Windows updates automatically every month to maintain system security and introduce new features. However, a new version may conflict with older programs or cause other issues. To avoid this, you can manage automatic Windows updates. If your computer encounters problems after a Windows update, uninstalling the update is recommended to revert to a previous version.
Uninstalling a Windows Update directly from the Control Panel is the simplest method.
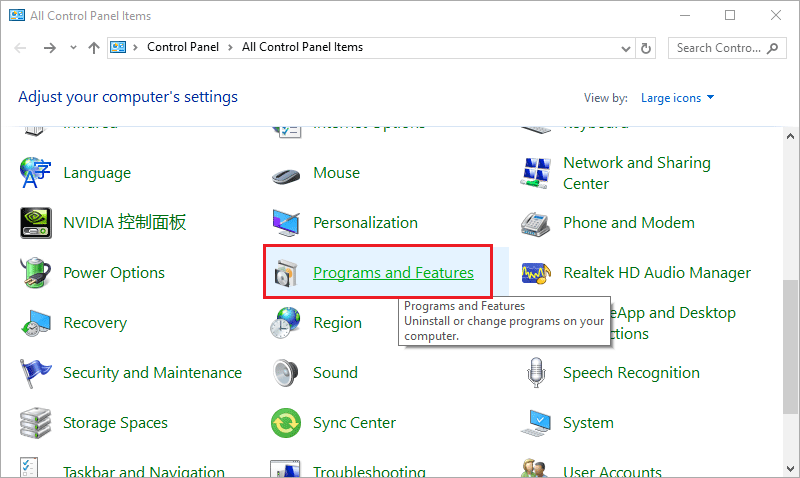
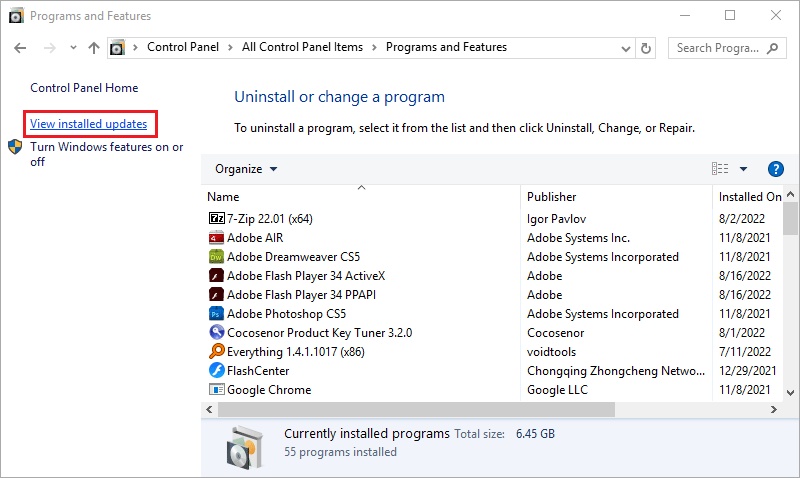
Step 1: Enter 'control panel' on the search bar and double-click Control Panel to open it.

Step 2: Find Programs and Features and double-click it to open.
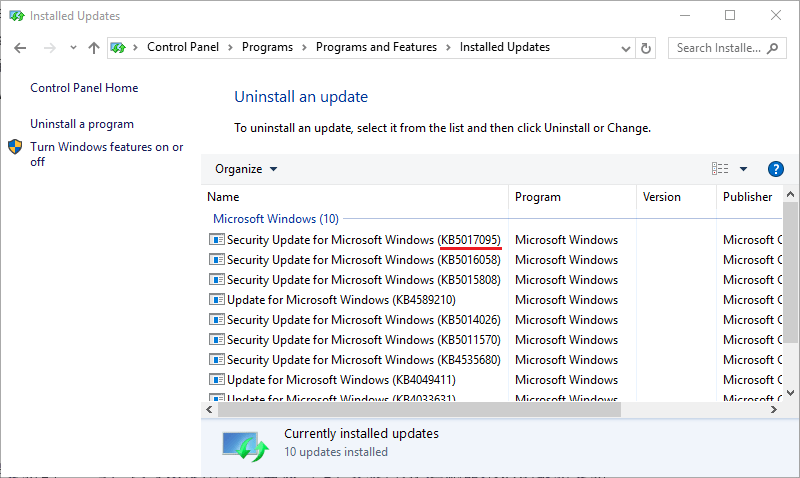
Step 3: Click View installed updates.
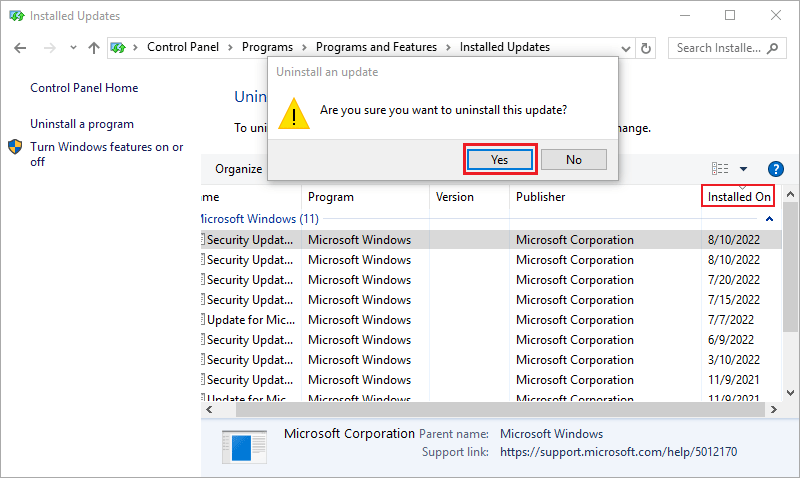
Step 4: Every Windows Update is displayed on this page. You can right-click a version you want to uninstall and click Yes to uninstall it.
Tips: If you're unsure which version to uninstall, click Installed On to identify them by installation date.
This method allows you to review the content of every Windows Update before uninstalling.
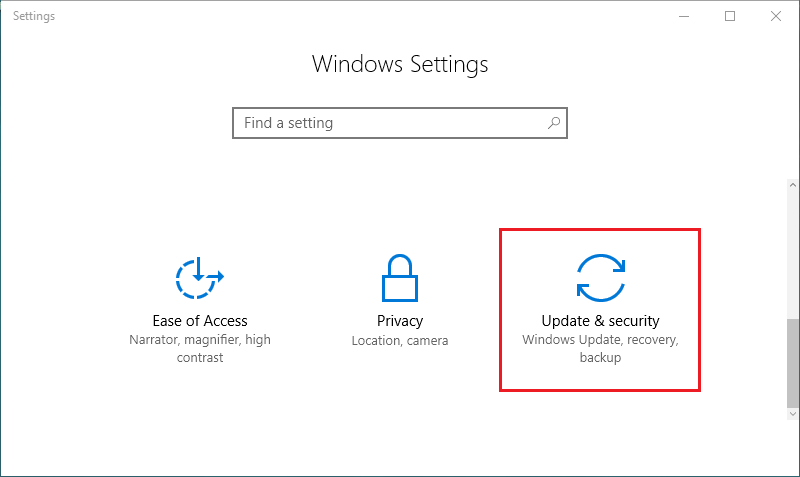
Step 1: Press the Win key or click the Windows icon and then click the Settings icon.

Step 2: Click Update & Security.
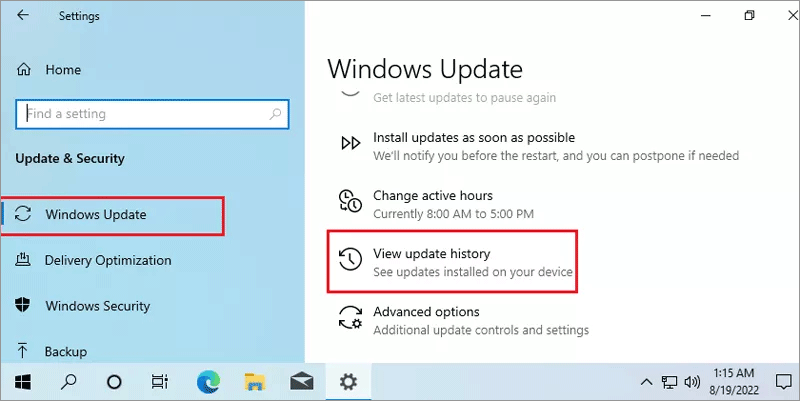
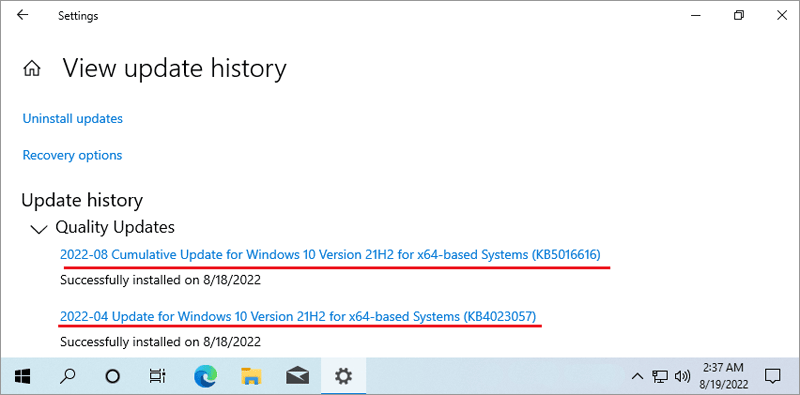
Step 3: In the Windows Update tab, click View update history.
Step 4: Before uninstalling, you can click on updates to see their features.
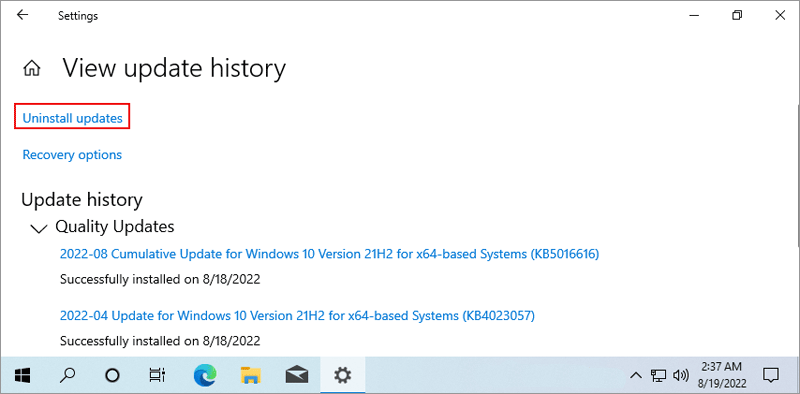
Step 5: Click Uninstall updates.
Step 6: Double-click a version you want to uninstall and click Yes to confirm.
This method is ideal for uninstalling the latest update.
Step 1: Press the Win key or click the Windows icon and then click the Settings icon.
Step 2: Click Update & Security.
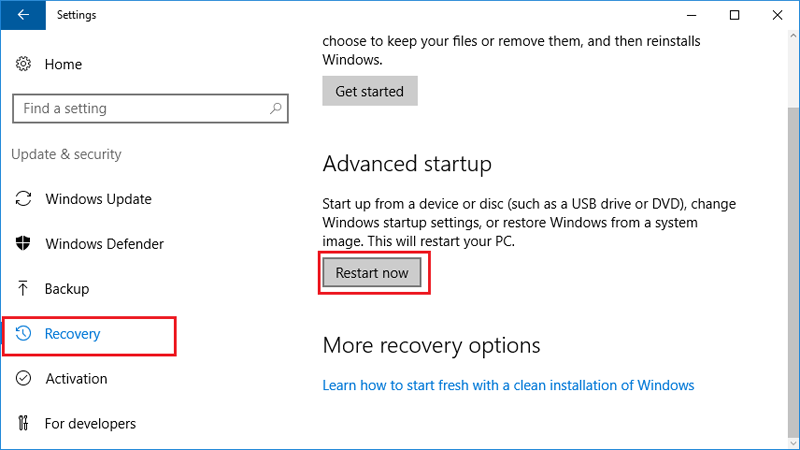
Step 3: Select the Recovery tab and click Restart now under Advanced startup.
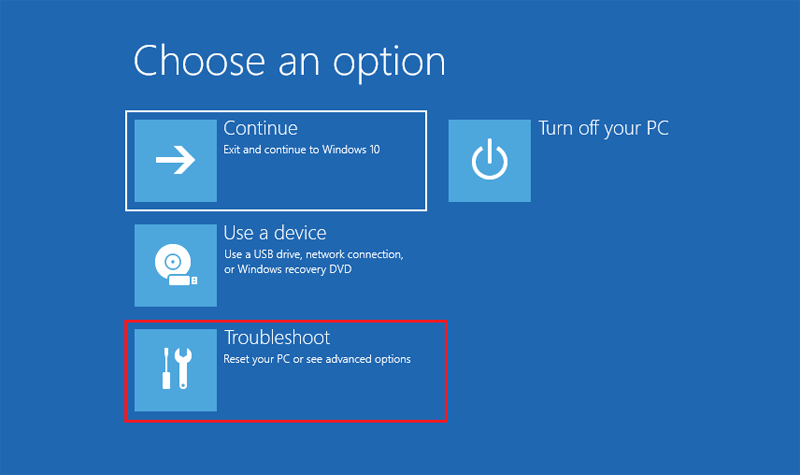
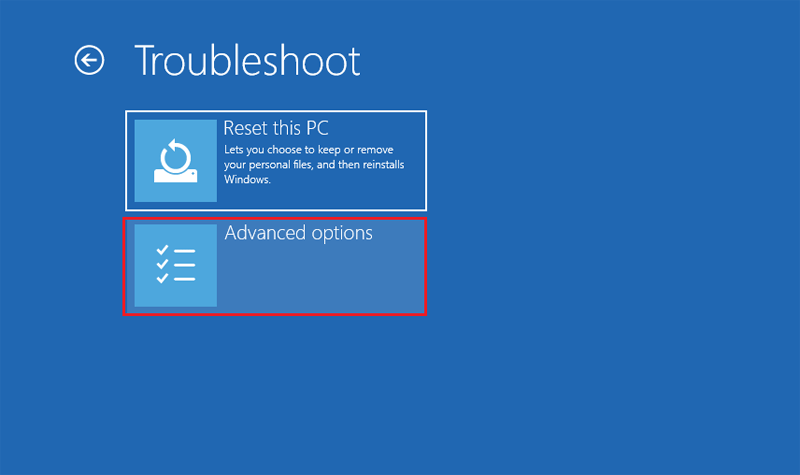
Step 4: After restart, click Troubleshoot.
Step 5: Click Advanced options.
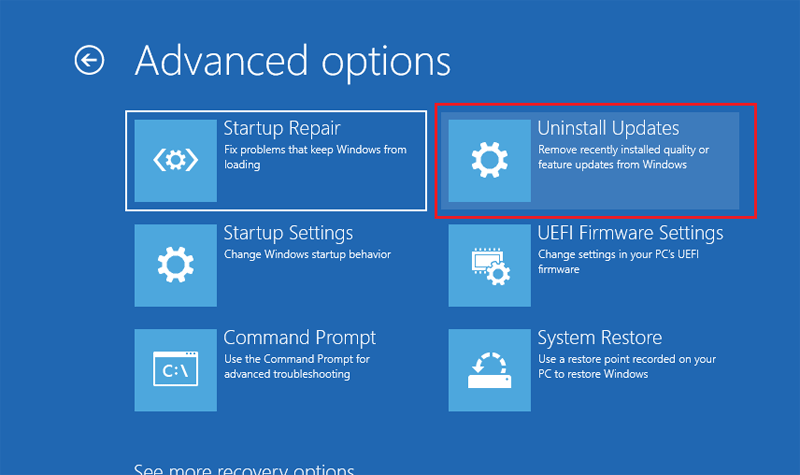
Step 6: Click Uninstall Updates.
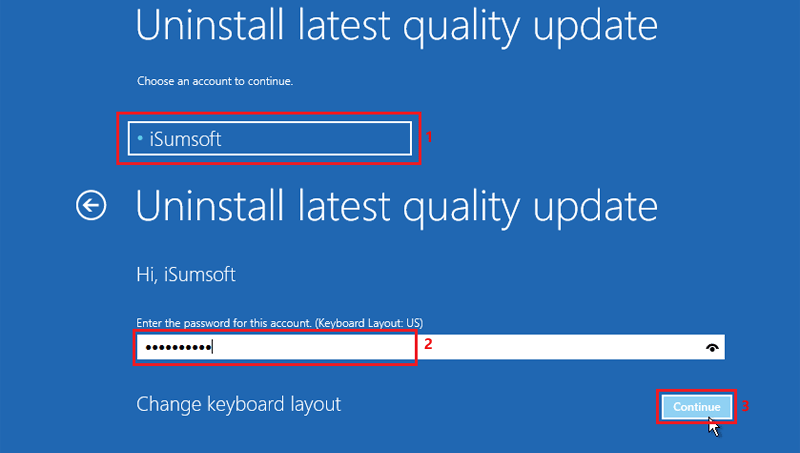
Step 7: Select a user and enter the password.
Step 8: Choose Uninstall latest quality update and follow the prompts.
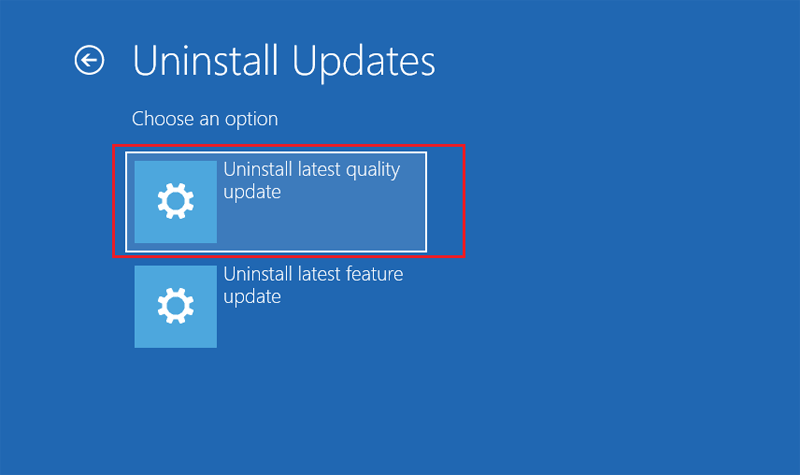
Tips: Quality Updates maintain system security monthly, while Feature Updates bring new functions twice a year. Quality Updates are more likely to cause issues.
For stubborn Windows Updates, use Command Prompt to uninstall.
Step 1: Find the KB id of the update you want to delete from the installed updates list.
Step 2: Open Command Prompt as administrator.

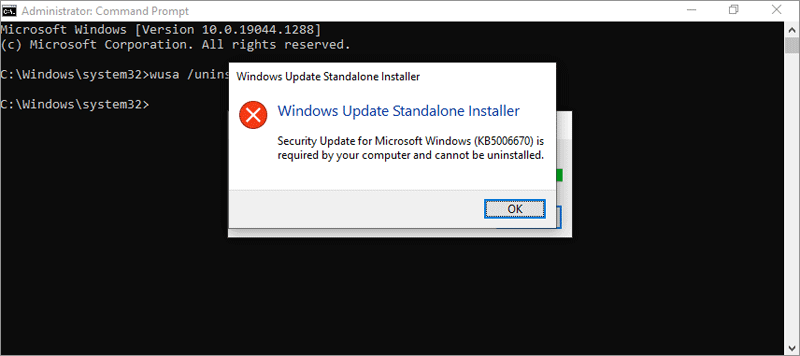
Step 3: Enter the command wusa /uninstall /kb:xxxxxxx and press Enter.
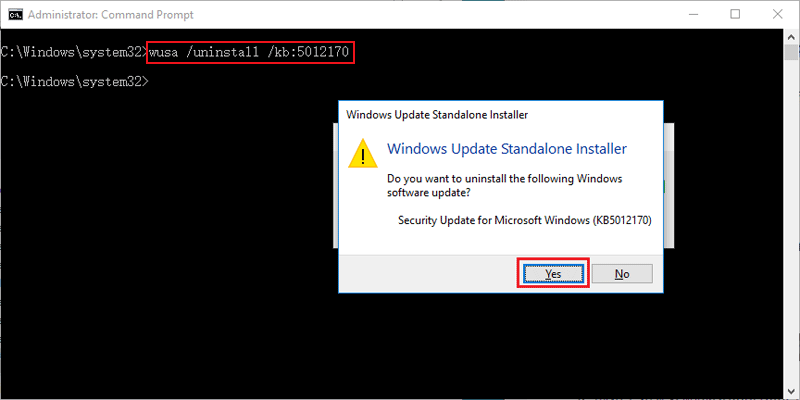
Tips: Replace xxxxxxx with the KB id.
If it can't be uninstalled, continue to the next steps.
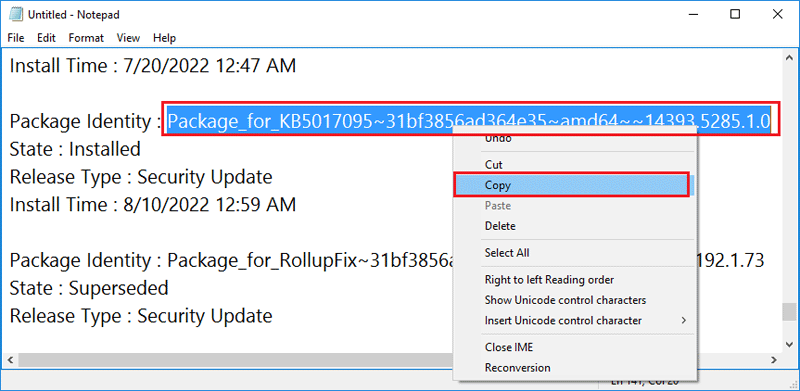
Step 4: Enter the command dism /online /get-packages | clip and press Enter.

Step 5: Paste the content into a Text Document.
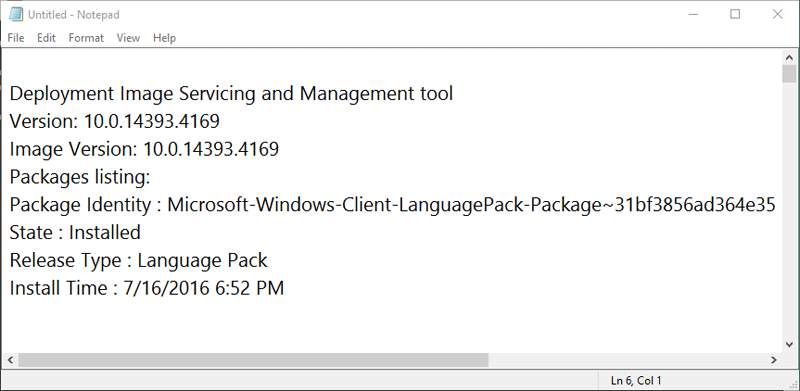
Step 6: Find the update and copy its Package Identity.
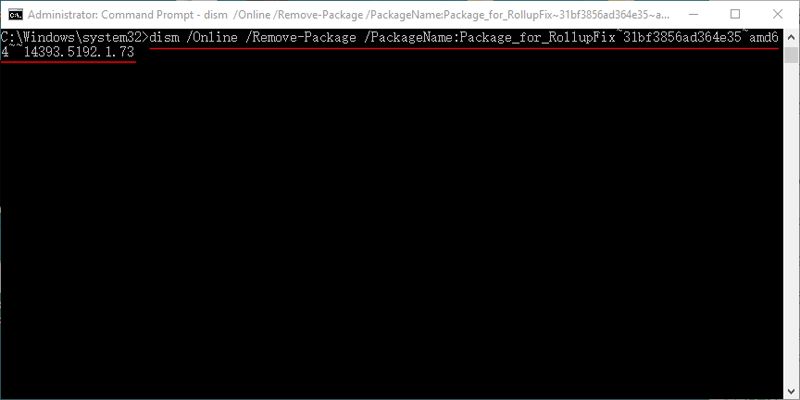
Step 7: Enter dism /Online /Remove-Package /PackageName:xxxxxxxx in Command Prompt.
Step 8: Restart your computer after uninstalling.