When installing Windows 10, you're prompted to create a Microsoft account or a local account. Sometimes, you may need to create a new administrator account in Windows 10 to gain administrative privileges, troubleshoot issues, or manage user accounts effectively. This guide will walk you through 3 ways to create an administrator account in Windows 10.
Tips:
Step 1 Open Command Prompt as Administrator in Windows 10.
Step 2 Run the command: net user user_name /add, replacing user_name with your desired local account name.
Step 3 Run: net localgroup Administrators user_name /add to add the new account to the Administrators group.
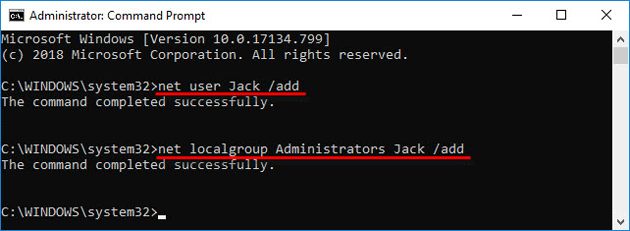
You've successfully created a new local administrator account using Command Prompt.
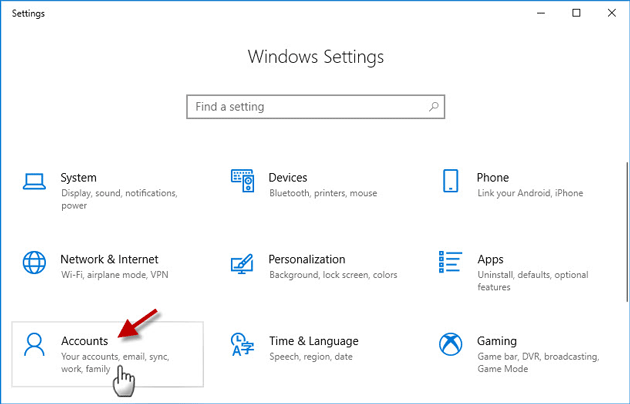
Step 1 Press Win + I to open the Settings app, then select Accounts.
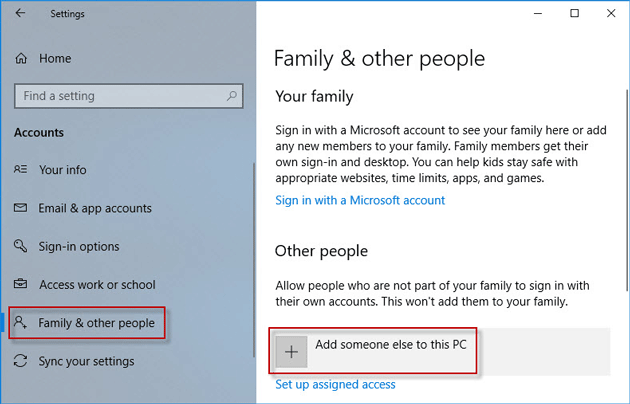
Step 2 Click Family & other users, then Add someone else to this PC.
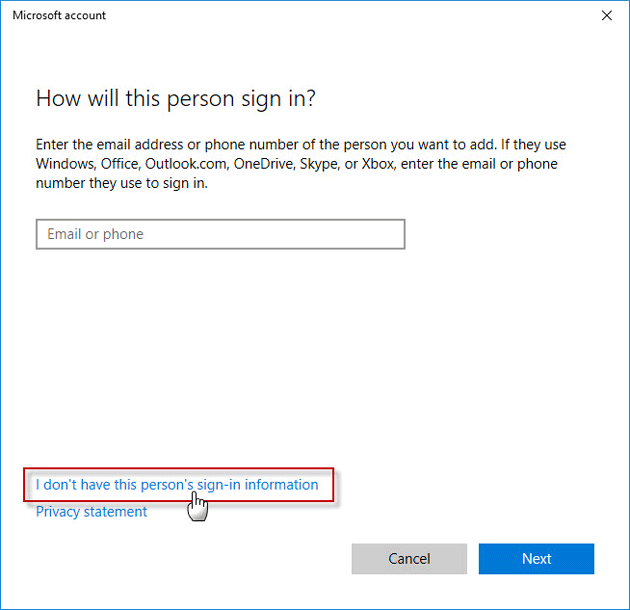
Step 3 In the Microsoft account window, click I don't have this person's sign-in information.
Tips:
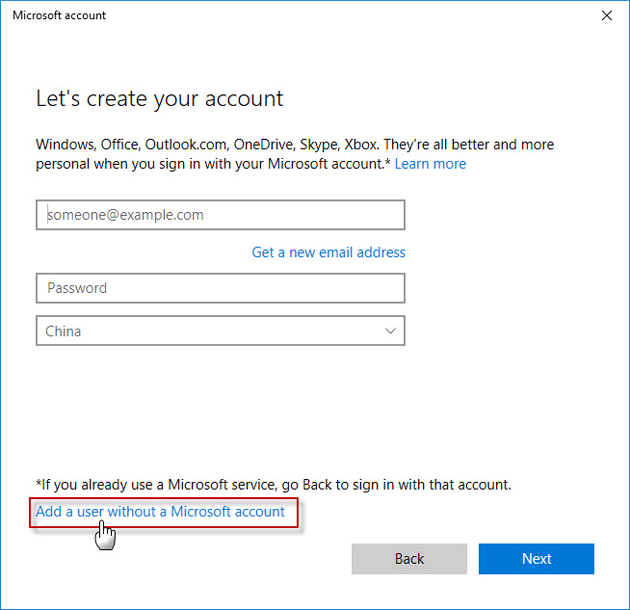
Step 4 Click Add a user without a Microsoft account.
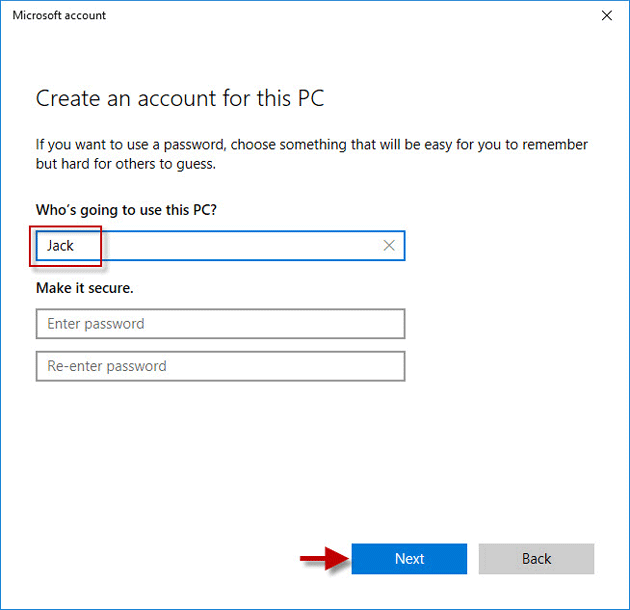
Step 5 Enter a username and click Next.
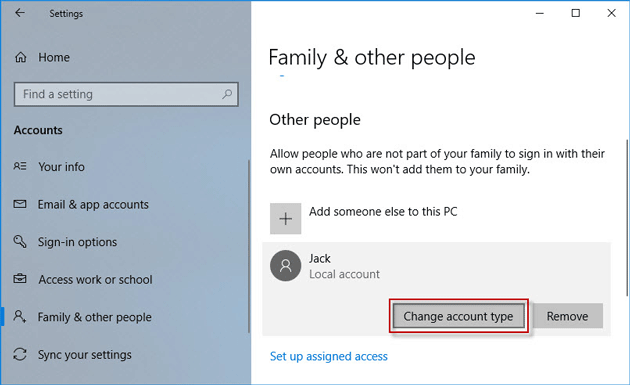
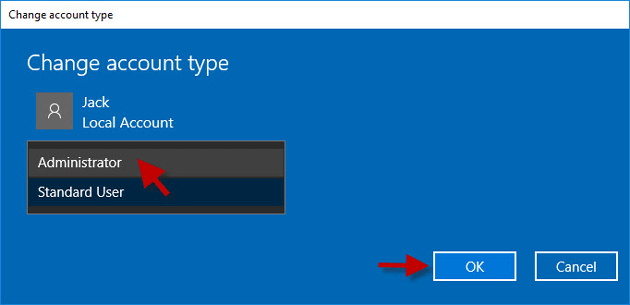
Step 6 On the Accounts screen, click the new account, then Change account type.
Step 7 Select Administrator under Account type, then click OK.
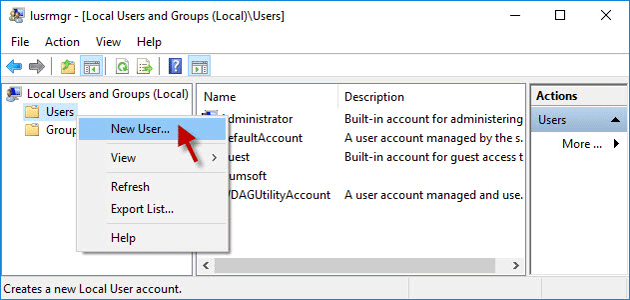
Step 1 Type lusrmgr.msc in the Start menu Search box and hit Enter to open Local Users and Groups.
Step 2 Right-click the Users folder and select New User.
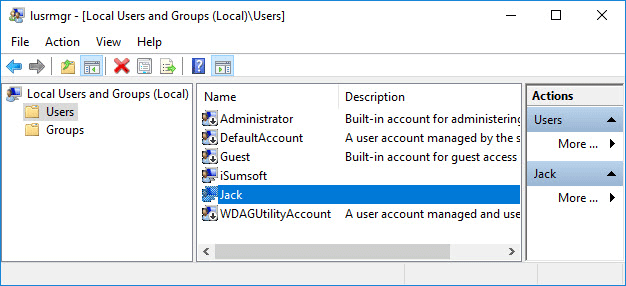
Step 3 Enter a username, uncheck "User must change password at next logon", check "Password never expires", and click Create followed by Close.

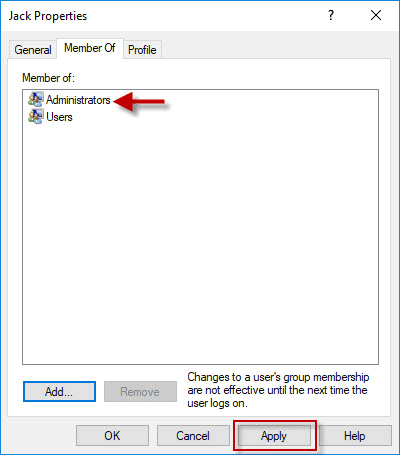
Step 4 Double-click the new user to change its properties and promote it to administrator.
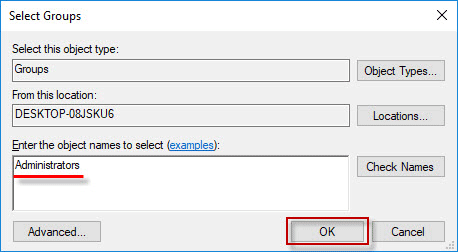
Step 5 In the Properties dialog, select the Member Of tab, then click Add.
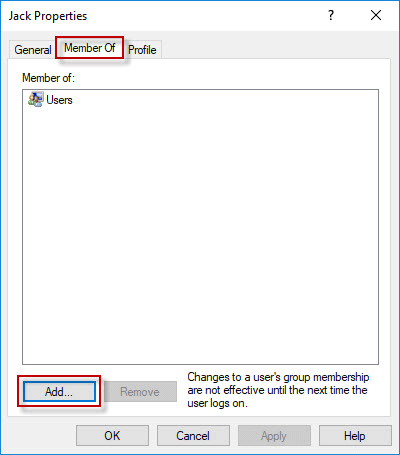
Step 6 Type Administrators in the object names box and click OK.
Step 7 Click Apply to successfully create a new local administrator account.