Windows Server machine users might often need to use Remote Desktop to perform some tasks. However, Remote Desktop service is disabled by default on all versions of Windows operating system. You need to manually enable Remote Desktop before you can use it to perform remote connections between computers. This post shows three different ways to enable/disable Remote Desktop in Windows Server 2008.
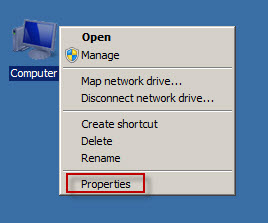
Step 1: Right-click on Computer and select Properties.
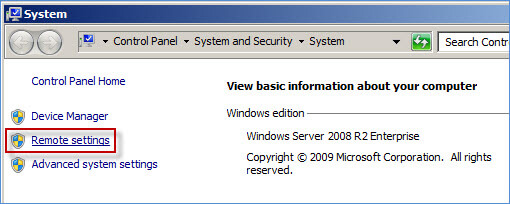
Step 2: After System window opens, click on the Remote settings link on the left side.
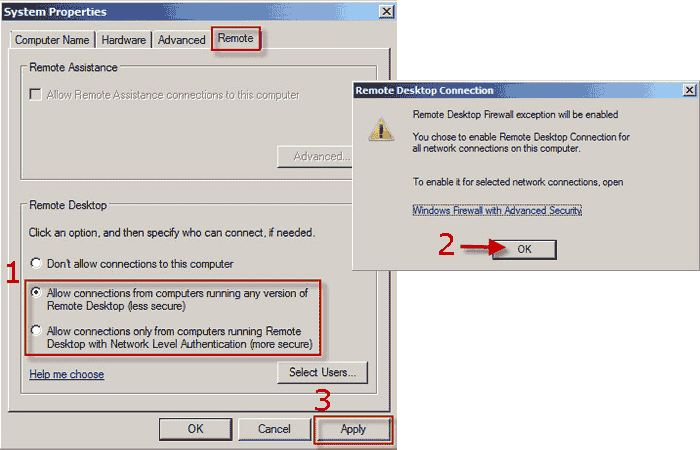
Step 3: After it opens the System Properties dialog with Remote tab selected, you can see Remote Desktop in the disabled state – "Don't allow connections to this computer". To enable it, select Allow Connections from computers running any version of Remote Desktop (less secure) or Allow connections only from computers running Remote Desktop with Network Level Authentication (more secure). Click OK if prompted with the security dialog box. Then click Apply to save the changes.
Step 4: After finished the above three steps, Remote Desktop has been enabled on the Windows Server 2008/R2 computer and any members of the Administrators group can connect to this computer. If you want to grand rights for more users to remotely access to this computer, click Select Users, and then add more users to the list.
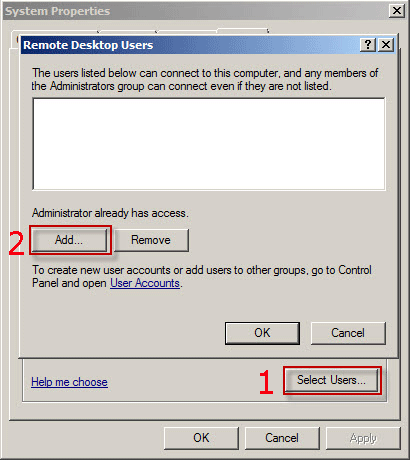
Tips: See How to Add Remote Desktop Users in Windows PC to learn more.
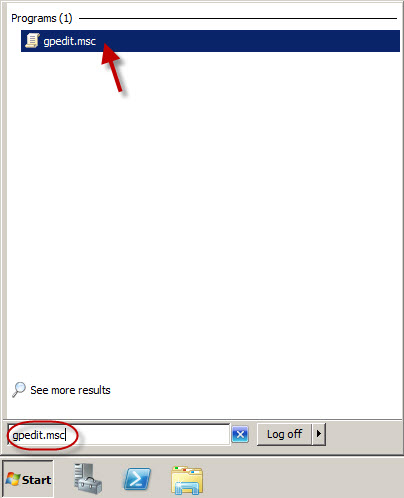
Step 1: Search gpedit.msc in the Start menu. Then in the program list, click gpedit.msc.
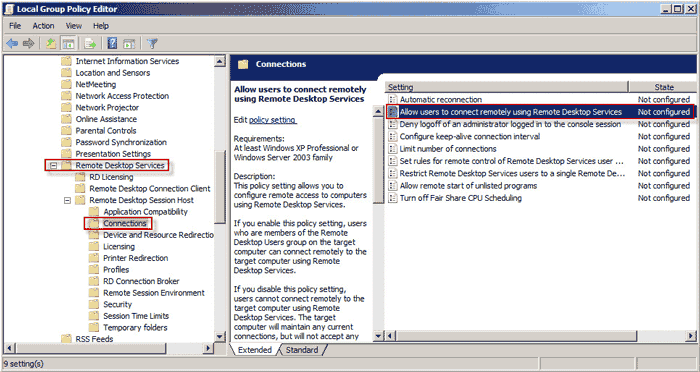
Step 2: After Local Group Policy Editor opens, expand Computer Configuration –> Administrative Templates –> Windows Components –> Remote Desktop Services –> Remote Desktop Session Host –> Connections. Then on the right-side pane, double-click on Allow users to connect remotely using Remote Desktop Services.
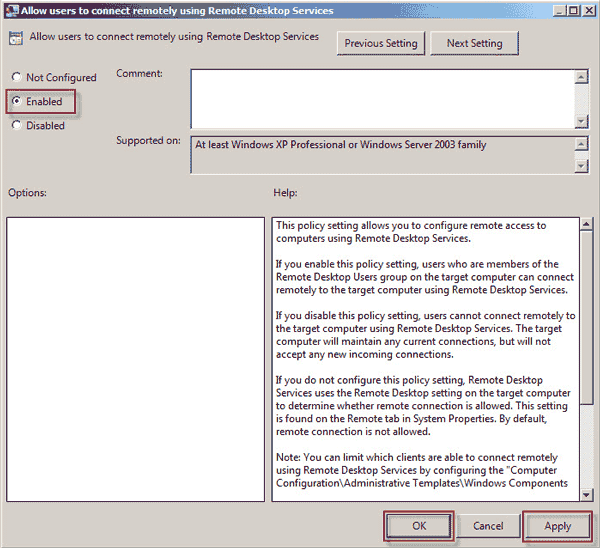
Step 3: Select Enabled and click Apply if you want to enable Remote Desktop. Select Disabled and click Apply if you need to disable it.
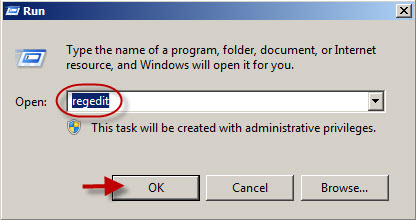
Step 1: Press Win + R key combination to open Run dialog box. Type regedit and click OK.
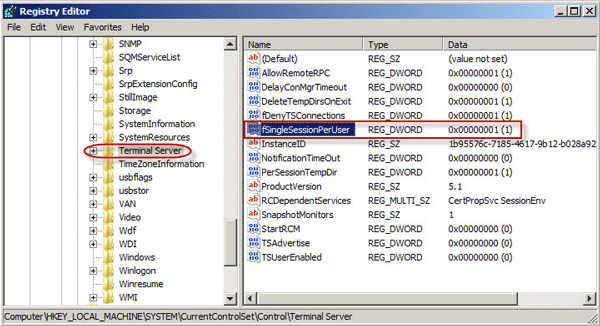
Step 2: After Registry Editor opens, navigate to HKEY_LOCAL_MACHINE\SYSTEM\CurrentControlSet\Control\Terminal Server. Then on the right-side pane, double-click on the fSingleSessionPerUser.
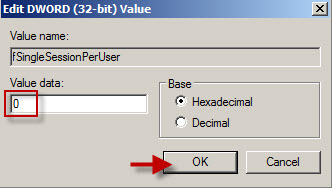
Step 3: Set the value data to 0 and click OK if you want to enable Remote Desktop. Set the value to 1 and click OK if you need to disable it.
Step 4: Restart computer to make the changes take effect.
The above are three common methods to enable or disable Remote Desktop in Windows Server 2008/R2. Actually, it is the fourth method via Command Prompt window. As the command line to be entered is a bit long, it will not be covered in this article.