For some reason, you intend to keep Windows 10 PC running for a certain period of time, and you don’t want the Windows 10 PC to be shut down accidentally by others because things might be out of control. In case you are looking for approaches to disable the shutdown option, go through the following guide about how to prevent Windows 10 from shutting down.
This way directly helps you to hide the shut down button.
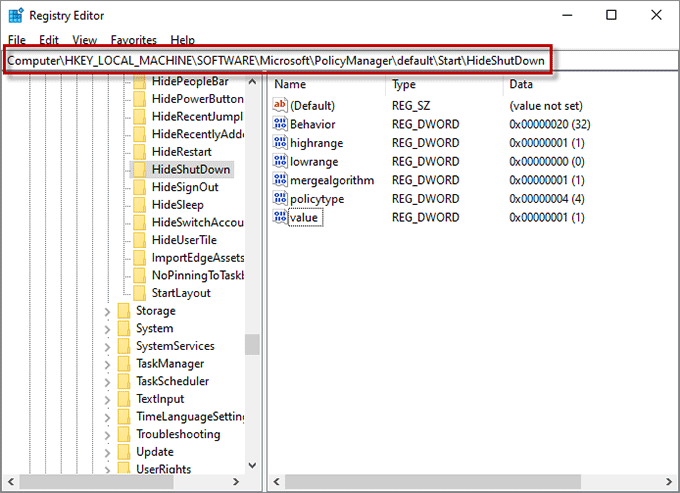
Step 1: Open the Windows Search box by pressing Win + S on the keyboard, and type regedit in the box. Click on Registry Editor when you see the best match.

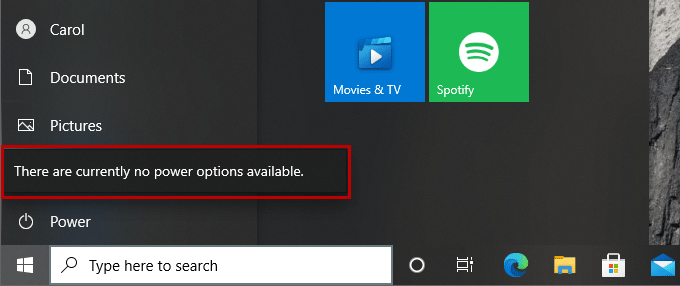
Step 2: In Registry Editor window, navigate to the path as follow: Computer\HKEY_LOCAL_MACHINE\SOFTWARE\Microsoft\PolicyManager\default\Start\HideShutDown.
Step 2: Double-click the key named value at the right pane, and reset the value data to 1.
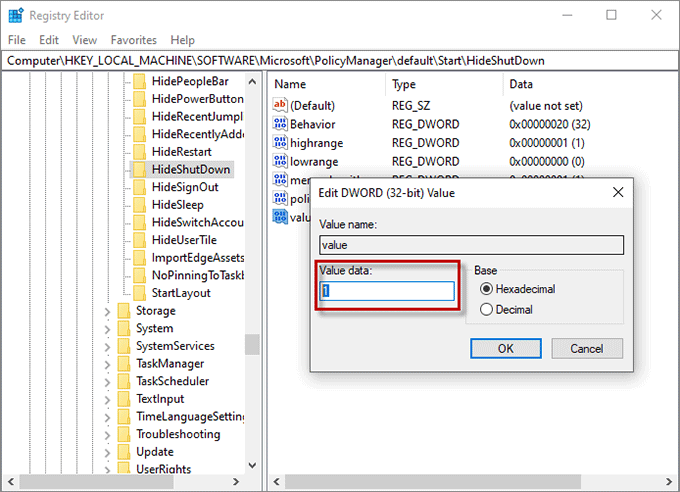
Then the Shutdown button will be removed from the Start menu. There will be only Sleep button and Restart button.
This solution will make the Power button inaccessible to the users. You can reach the goal through Group Policy Editor and Registry Editor.
Among all the Windows 10 editions, both Group Policy Editor and Registry Editor are available in Pro, Enterprise, and Education. But Windows 10 Home can only support Registry Editor. Therefore, if you are using Windows 10 Home, choose Option 2 below to disable the Power button.
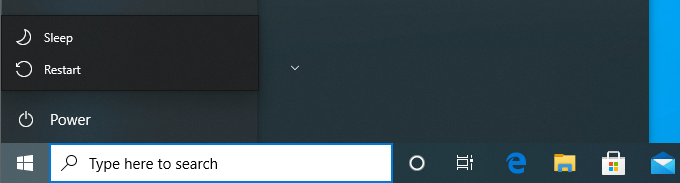
Step 1: Locate the "Type here to search" box.
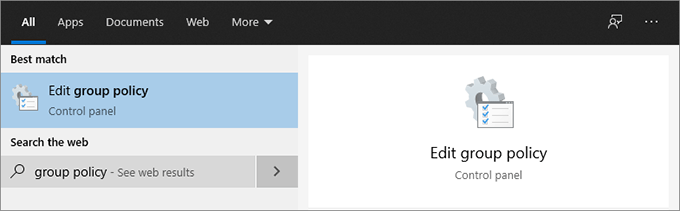
Step 2: Copy group policy into the search box, and click on the Best match Edit group policy.
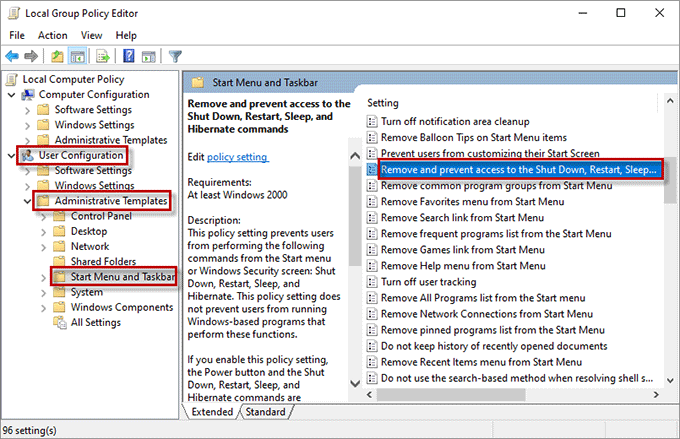
Step 3: When the Local Group Policy Editor pops up, go to the path: User Configuration > Administrative Templates > Start Menu and Taskbar. Locate and double-click the "Remove access to the Shutdown, Restart, Sleep, and Hibernate commands" option at the right-hand pane.
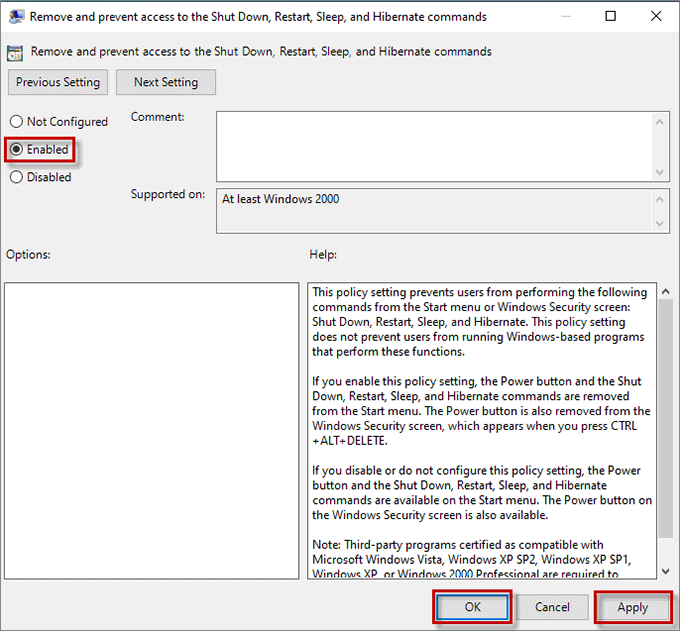
Step 4: In the following dialog, select the Enabled option to prevent Windows 10 from shutting down. Click on Apply and OK to confirm the settings.
Then, you will find the Power button is unavailable.
Step 1: Type regedit in the Windows Search box, and press Enter to open Registry Editor.
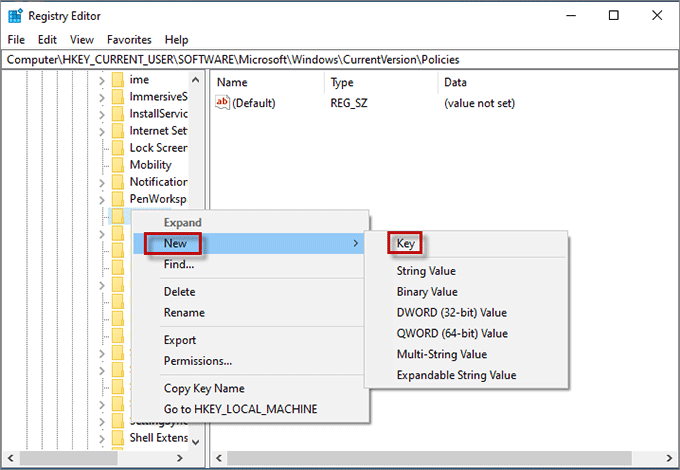
Step 2: After Registry Editor appears, follow the path: Computer\HKEY_CURRENT_USER\SOFTWARE\Microsoft\Windows\CurrentVersion\Policies.
Step 3: Right-click Policies and click on New > Key. The new key should be named after "Explorer".
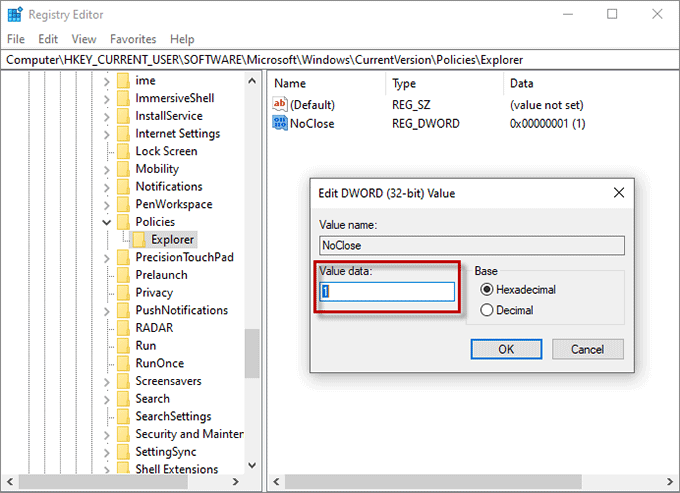
Step 4: Right-click the new key "Explorer" at the left-hand pane. Click on New and select DWORD (32-bit) Value from the next context menu. Name the value as "NoClose".

Step 5: Double-click the value "NoClose", set its value data to 1 in the pop-up dialog. Click OK to save the change.
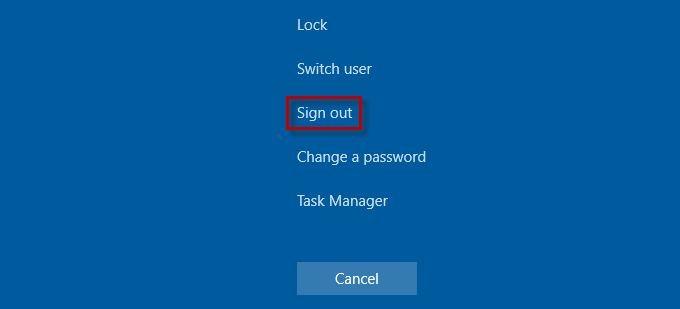
Step 6: Press Ctrl + Alt + Del to sign out Windows 10 PC. After signing in, you will find the Power button inaccessible. If the Power button is still available after the first trial, try a few more times to sign out and in through Ctrl + Alt + Del screen.
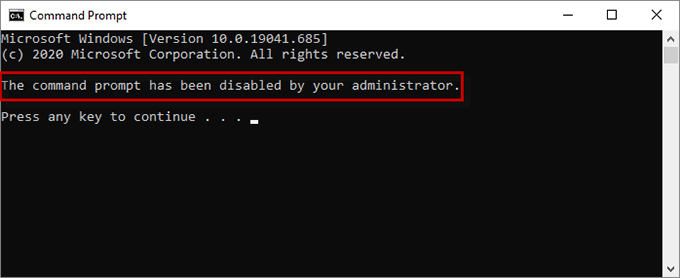
Apart from the Shutdown button, others can also shut your computer down with Command Prompt. Therefore, it is suggested to disable Command prompt to prevent Windows 10 from shutting down.
Others might make use of the third-party applications to shut down your PC. To prevent this from happening, you can restrict others from installing any software that is used for shutting down the Windows 10 PC.
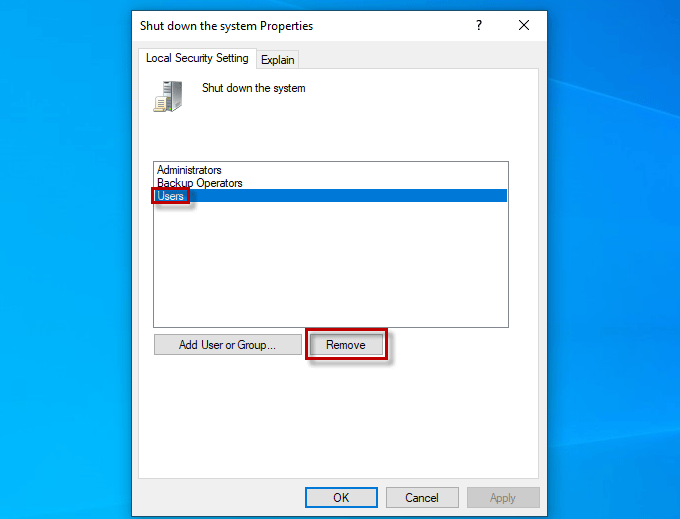
This way will prevent the users and groups from shutting down Windows 10 by removing their shutdown right.
Step 1: Open Local Group Policy Editor. Navigate to Computer Configuration > Windows Settings > Security Settings > Local Policies > User Rights Assignment. Locate and double-click Shut Down the System.
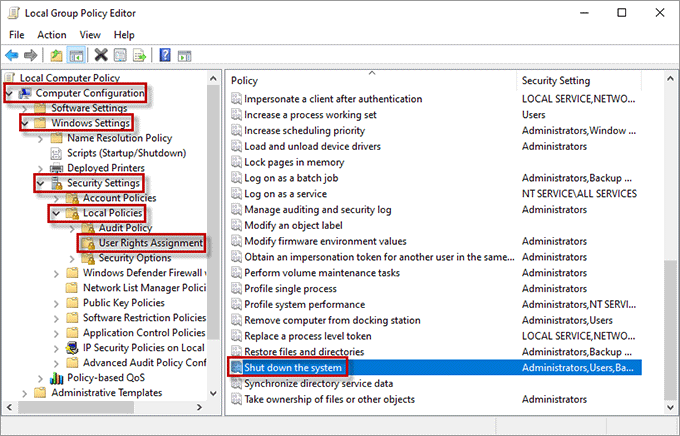
Step 2: Select the user or group who you want to prevent from shutting down Windows 10 PC, and click the Remove button. You should retain administrators to make sure you can shut down normally.