An ISO image contains a number of files and folders. Usually, it can be used to back up discs such as CD/DVD. You can not only unpack an ISO to view the contents of it but also pack up a bunch of files and folders and compress them into a single ISO file. Here this article will walk you through 3 ways on how to create ISO file from folder in Windows 10.

iSumsoft ShapeISO is a simply and free software for creating, burning and extracting ISO. If you want to create ISO file from files and folders, you can easily make it in a couple of clicks with iSumsoft ShapeISO. Here you can install iSumsoft ShapeISO and follow these steps.
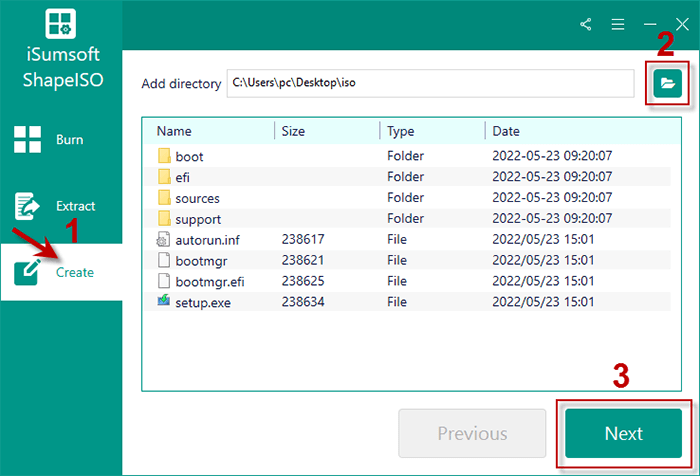
Step 1: Add the needed folder for ISO
Run iSumsoft ShapeISO and choose Create option. Then click file icon to browse and select the folder you want to make into ISO file. Finally click on Next at the bottom.
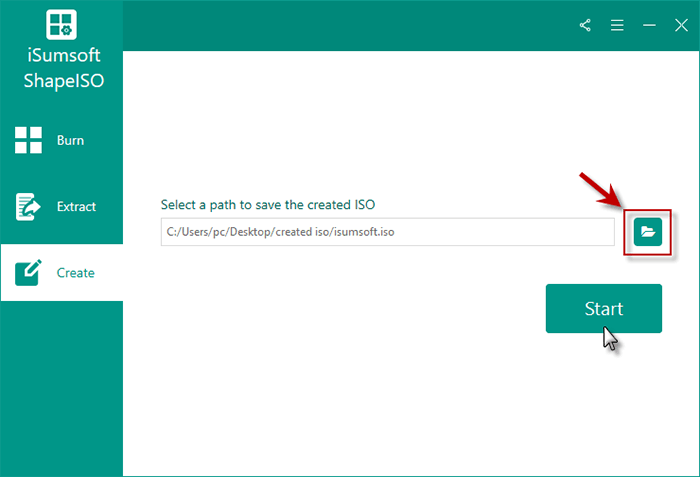
Step 2: Set ISO path
Click file icon to choose a location where you want to save the created ISO file and click on Start.
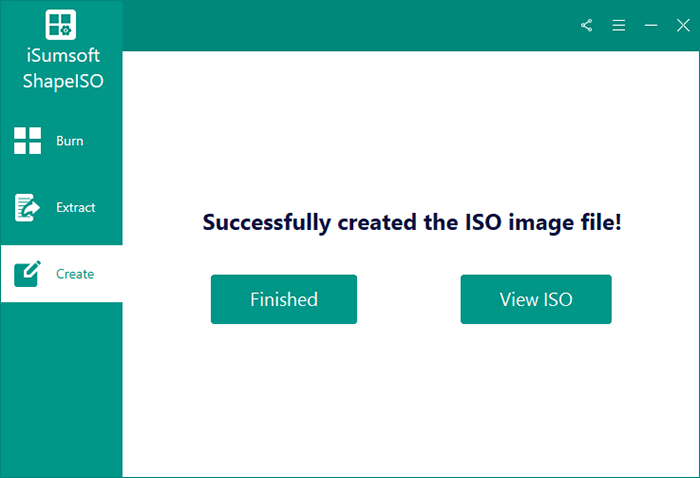
Step 3: View ISO directly
iSumsoft ShapeISO will create ISO file from the selected folder in minutes. When it is finished, you can choose View ISO to directly get the created ISO file in save location.
ImgBurn is also a free tool for burning various image files to disc. In addition, it also allows you create images file from disc or folder. Here you can follow the steps on how to create ISO file from folder in Windows 10 using ImgBurn.
Step 1: Install ImgBurn and launch it. Then choose Create Image file from files/folders.

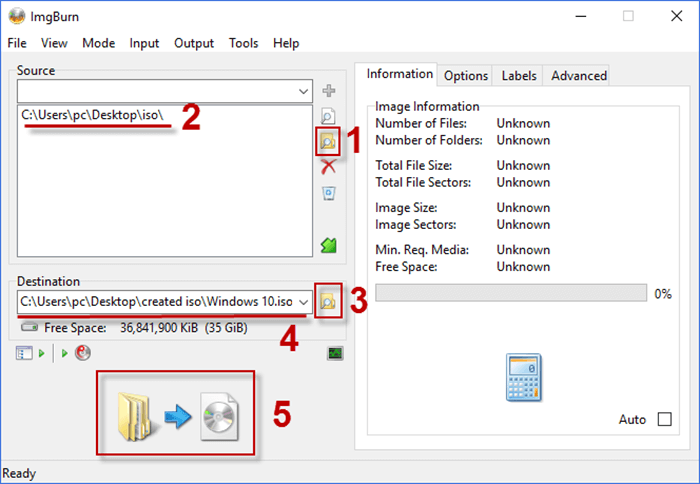
Step 2: Click folder icon next to "Source" field and add the folder you want to convent. Then click folder icon next to "Destination" field to set a desired path for created ISO. Finally click "Folder convent into ISO file" icon.
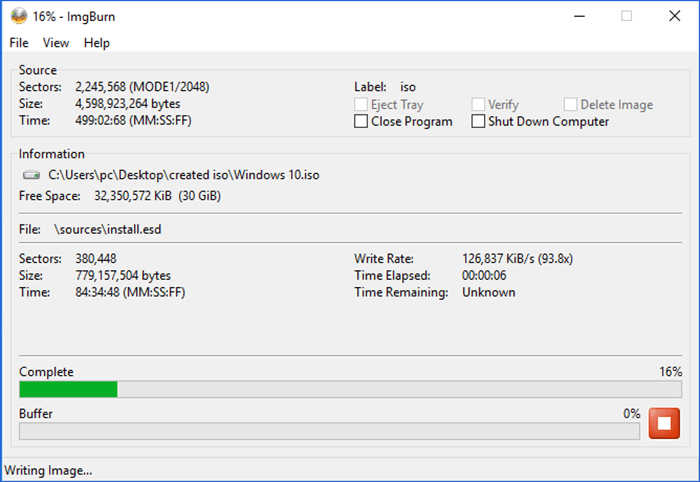
Step 3: ImgBurn begins creating ISO image from chosen folder. When it is complete, you can find newly created ISO file in destination folder.
PowerISO is a powerful and paid application for processing image file. It supports all CD / DVD / BD image files including ISO image file and has multiple functions such as creating, burning, extracting and mounting image file. You can follow the steps to know how to create ISO file from folder in Windows 10 via PowerISO.
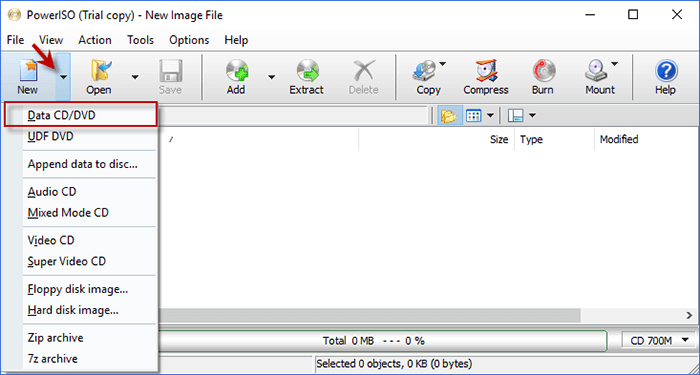
Step 1: Install PowerISO and open it. Then expand "New" option and choose Data CD/DVD.
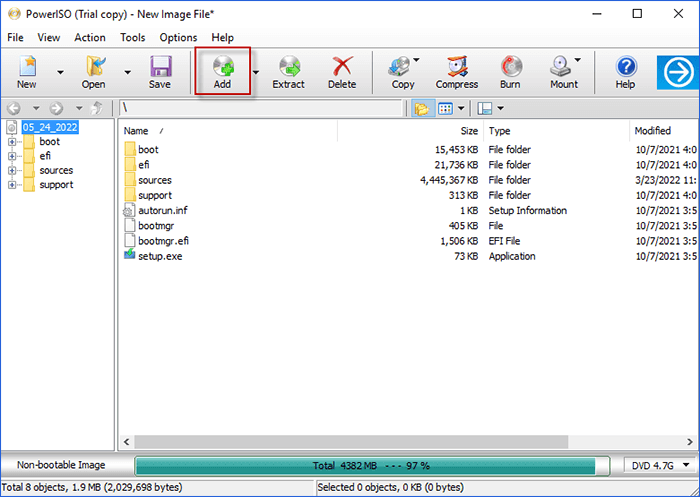
Step 2: Choose Add option to add the folder needed to create ISO.
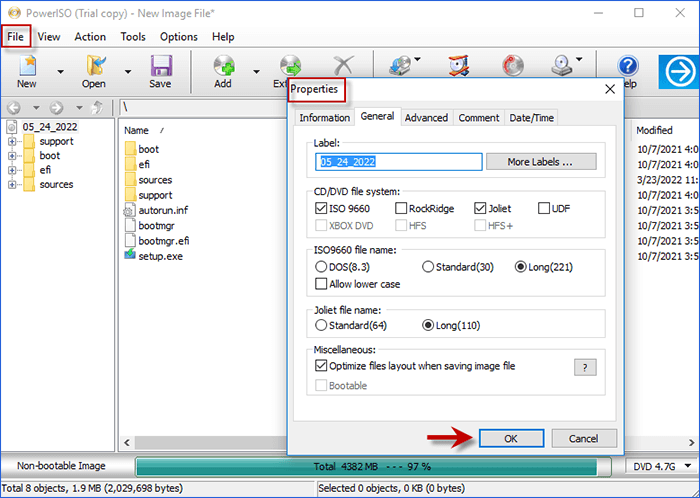
Step 3: Click File > Properties to modify ISO information according your needs and click OK to confirm the changes.
Step 4: Click Save and you can edit the file place and set the file style as Standard ISO Images. Then click Save at the bottom and wait for creating ISO file.

That’s all about how to create ISO file from folder in Windows 10. Hope this can help you make the creating process much easier and faster. If you have already created your ISO file, you may want to burn the ISO file to USB drive.