Windows 10 won't let you delete a file? This is likely because the file is being used by the system itself, another program or a hidden service, but you don't know. Sometimes it's hard to figure out why the file cannot be deleted. If you try to restart your computer but still can't delete the file, you may want to force delete the file. Now in this page, we will show you how to force delete a file that cannot be deleted in Windows 10.
Step 1: Make sure you have a file compression program installed on your Windows 10, such as WinRAR.
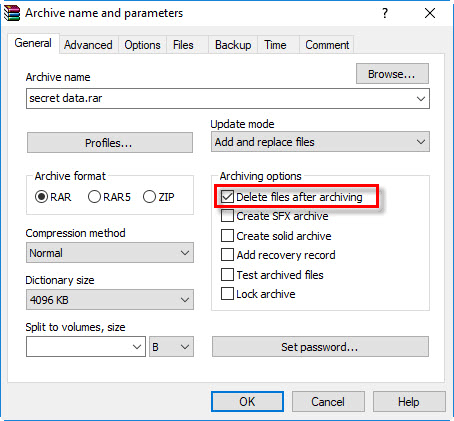
Step 2: Locate the file you cannot deleted, right click on it and select Add to archive from the context menu.

Step 3: When the archive program opens, tick the "Delete files after archiving" option and click OK. When the archiving is completed, the original file that cannot be deleted has now been successfully deleted.
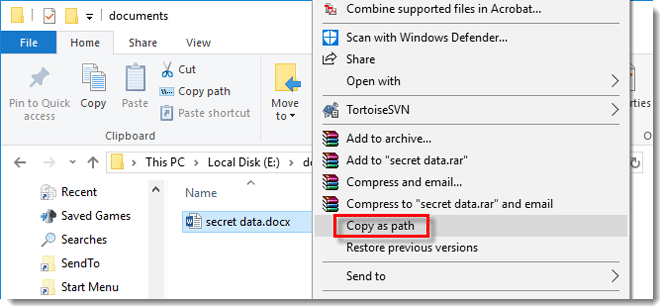
Step 1: Navigate to the directory where the file you cannot delete is located. Right click on the file while holding the Shift key on your keyboard and select Copy as path from the context menu. This will copy the full path of the file.
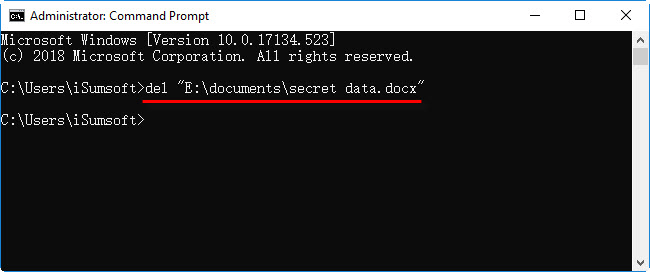
Step 2: Open Command Prompt as administrator. Type del, a space and then paste the file path you've just copied. For my case the command is as follows. Don't hit Enter key to run the command yet.
del "E:\documents\secret data.docx"
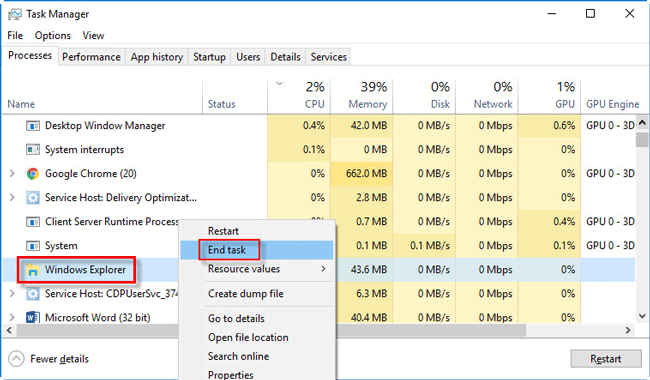
Step 3: In order to delete the file successfully, you need to end the Windows Explorer process temporarily. The specific steps are: open Task Manager, select the Processes tab, right click on the Windows Explorer and select End task.
Step 4: Return to the Command Prompt window and press Enter key to run the command that has been entered in Step 2. Once the command runs, the file is deleted successfully.
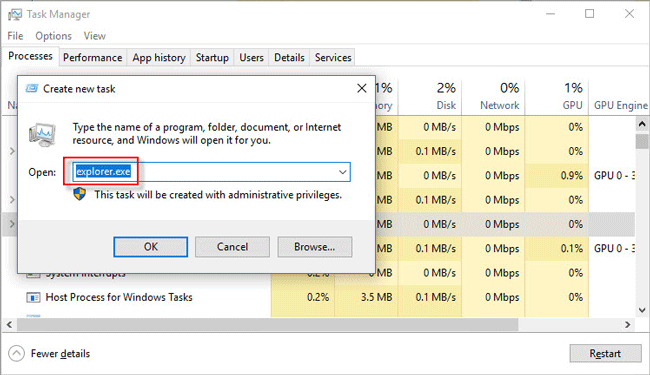
Step 5: Now you have to restart the Windows Explorer. The specific steps are: press Ctrl + Shift + Esc key combination to open the Task Manager, click File > Run new task, then type explorer.exe and click OK.
Safe Mode starts Windows using the minimum of required files and drivers. So, if the file that cannot be deleted is being used by a hidden service or the system itself or infected by malware, booting Windows 10 into safe mode will release of the lock of the file and allow you to delete the file successfully.
Step 1: Start Windows 10 into safe mode.
Step 2: Navigate to the directory where the file cannot be deleted is located, select the file and press Shift + Delete to delete it.
Step 3: Restart computer to exist safe mode.
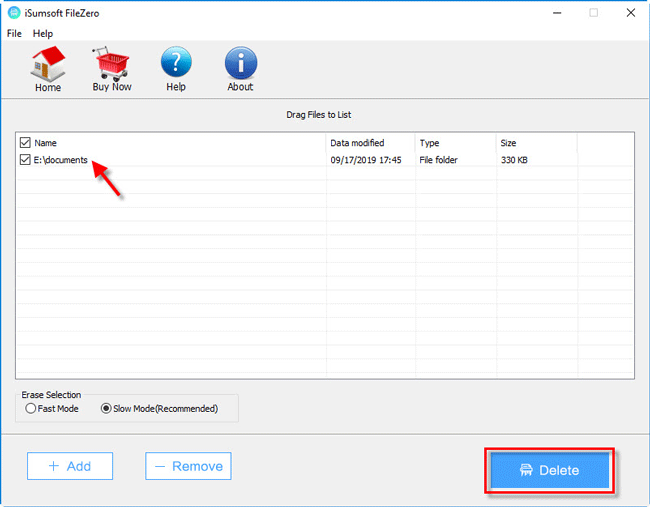
If you've tried all the above methods but still cannot delete the file, using a third-party file deleting tool should be a good choice. iSumsoft FileZero is simple but powerful tool that is used to permanently delete files from computer, including those files that cannot be deleted normally.
Step 1: Install and run iSumsoft FileZero on your Windows 10.
Step 2: Click the Add button in the lower left corner of this software. When the Open dialog pops up, choose the file that cannot be deleted and click OK. This will add the file to the software.
Step 3: Now make sure the file is selected and click on the Delete button in the lower right corner. When the Warning dialog pops up, click OK to confirm it. Then the file will be deleted immediately.