It's not always convenient to carry your computer with you when you're on a business trip or long-distance travel. Fortunately, you don't have to. You can create a Windows To Go workspace (or portable Windows) on a USB drive, then you can take your Windows with you wherever you go. iSumsoft SYSOnUSB helps you achieve this.
Free DownloadThis page will show you how to use iSumsoft SYSOnUSB to easily create a portable Windows or Windows To Go USB drive. The software provides two options to create portable Windows: PE and ISO. Follow these instructions.
This option uses Windows PE file to clone your current Windows installation from your PC to a portable USB drive. Then you can run your Windows from the USB drive on any computer. Please follow these steps.
Step 1: Connect a USB flash drive or external hard drive to one USB port of your computer.
Step 2: Open iSumsoft SYSOnUSB on your computer and select the connected USB drive from the drop-down menu in the upper right corner. Then, select the PE option in the upper left corner.
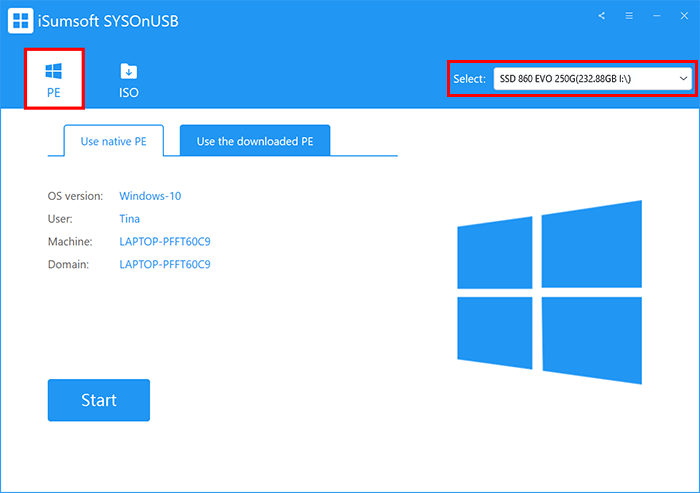
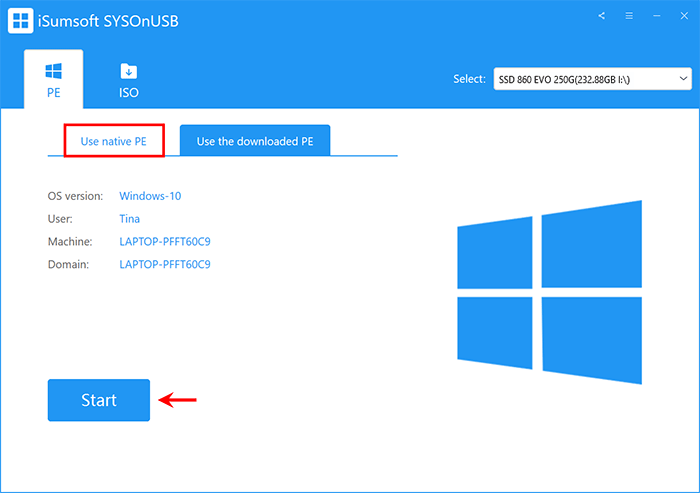
Step 3: Most installed Windows systems come with a PE file. Therefore, under the PE option, simply keep the "Use native PE" tab selected and click the Start button.
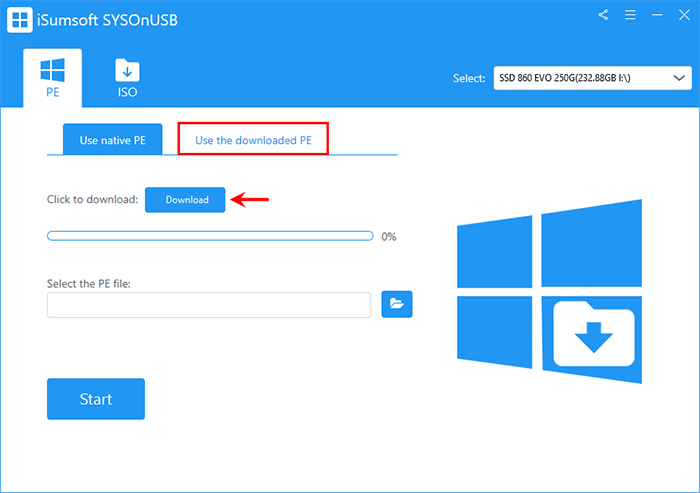
If the software says no available PE file is found, go to the "Use the downloaded PE" tab, and then click the Download button. The software will automatically start downloading a PE file from Microsoft. When the PE download is complete, click the Start button.
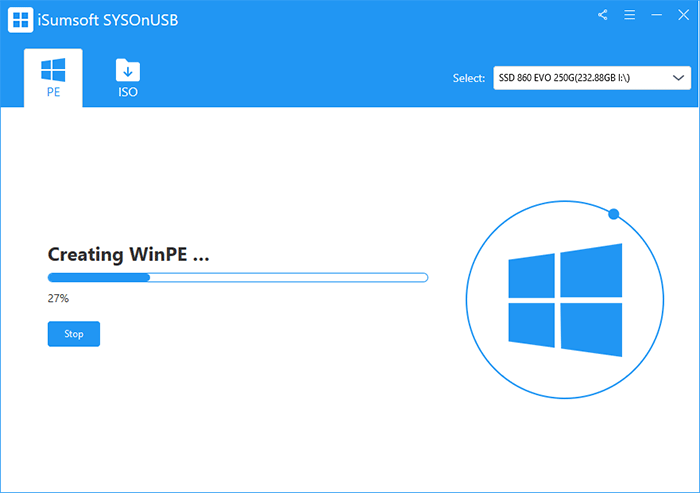
Step 4: The software immediately starts creating WinPE on the USB drive. Keep the USB drive connected and wait for the PE creation to complete.
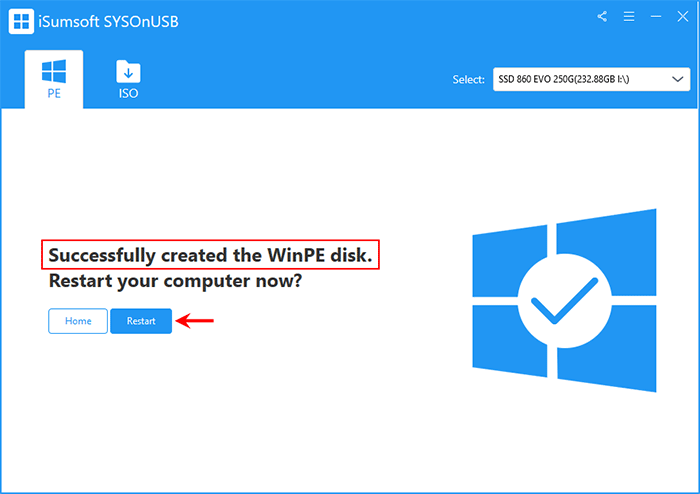
Step 5: Soon, the software says "Successfully created WinPE boot disk". Continue to keep the USB drive connected to the computer and click Restart to restart your computer.
Step 6: Once the computer restarts, immediately press and hold F12 or Del to enter the Boot Menu, and then select the USB drive as the boot device. The computer will boot from the USB drive.

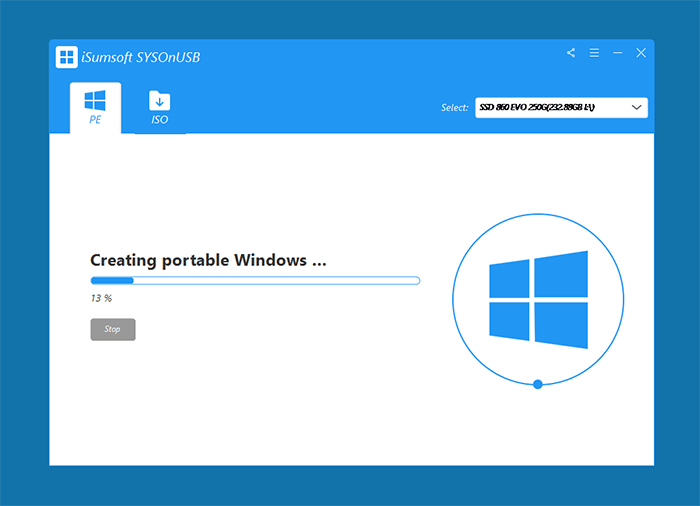
Step 7: After your computer boots from the USB drive, iSumsoft SYSOnUSB appears on your monitor and automatically starts creating a portable Windows on the USB drive.
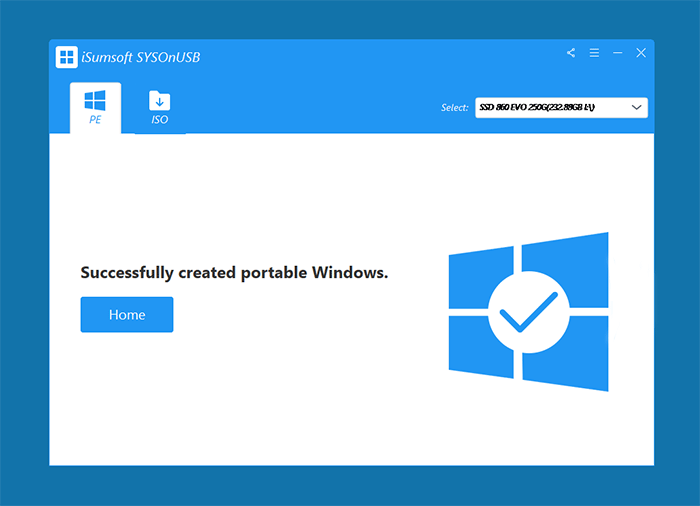
Step 8: After a few minutes, the screen shows "Successfully created portable Windows". This means you've successfully created a portable USB drive for your Windows.
That's it. Now you can keep the portable Windows USB drive in safe place or take it with you. Then plug it into any computer to run your Windows system when needed.
This option uses a Windows ISO file to install a clean Windows on a portable USB drive. Follow these steps.
Step 1: Download a Windows ISO file on your computer, and connect a USB drive to your computer.
Step 2: Open iSumsoft SYSOnUSB and select your connected USB drive from the drop-down menu in the upper right corner. Then, select the ISO option in the upper left corner.
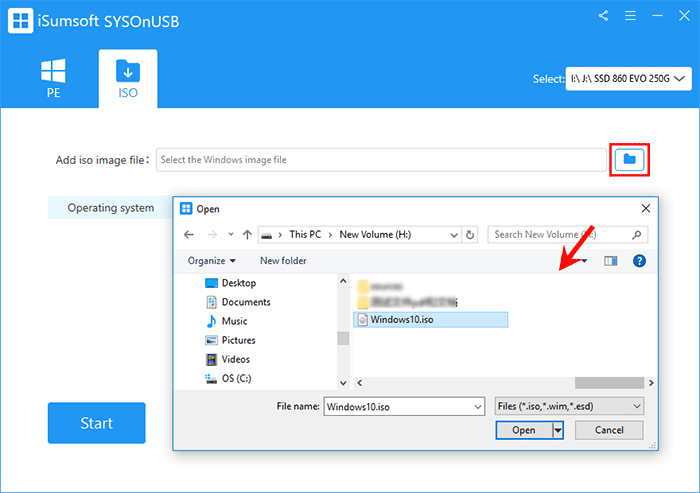
Step 3: Under the ISO option, click the file icon next to "Add iso image file" field. Then, navigate to the downloaded Windows ISO file and select it, and then click Open.
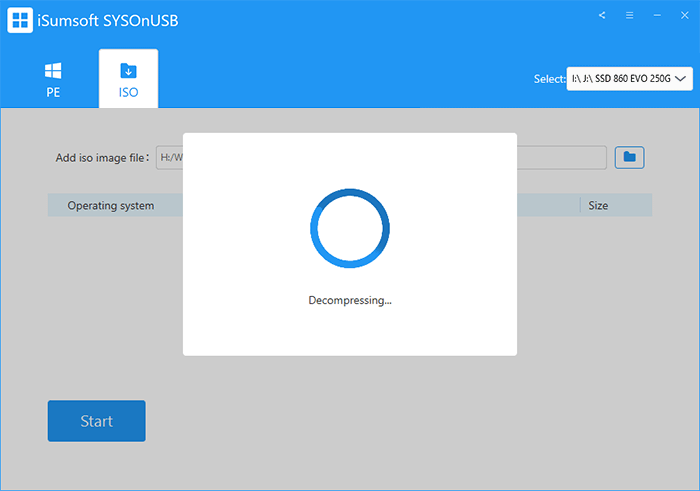
Step 4: The software will decompress Windows from the added ISO file. This may take a few minutes.
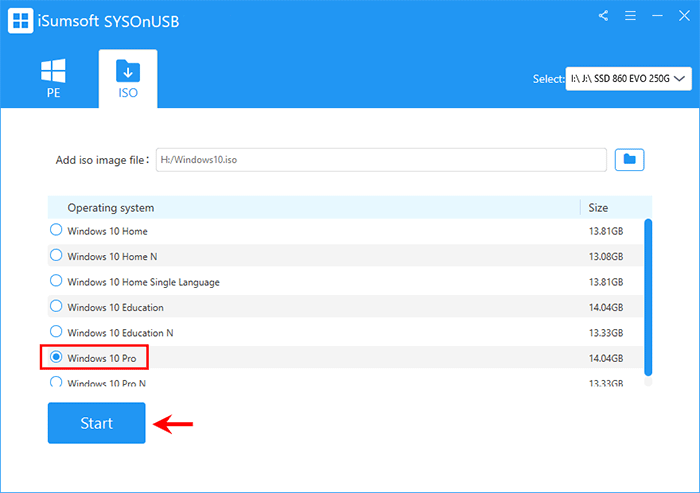
Step 5: When the decompression is complete, all Windows operating systems included in the ISO file are listed on the screen. Select the Windows edition you want to install on the portable USB drive, and then click Start.
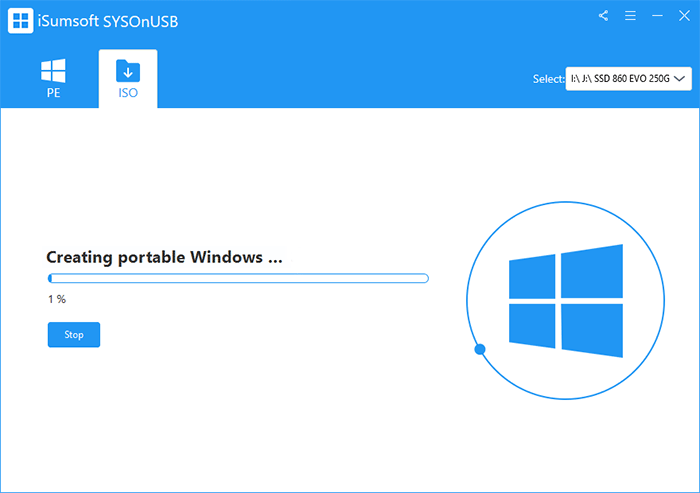
Step 6: The software immediately starts creating a portable Windows USB drive. The creation takes a few minutes. Keep the USB drive connected and wait for the creation to complete.
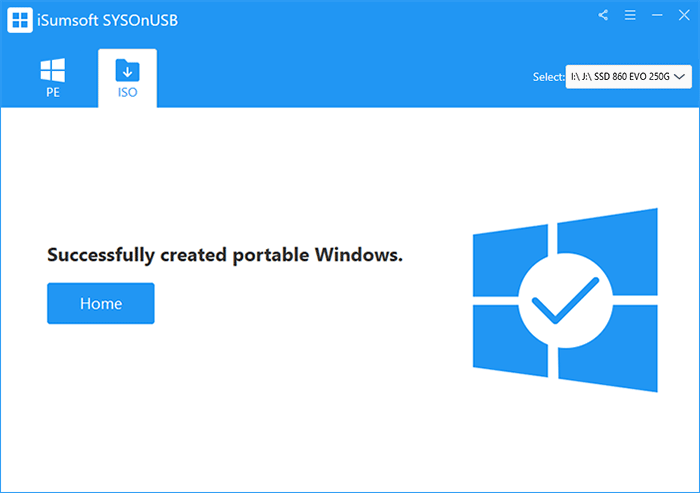
Step 7: When the software prompts "Successfully created portable Windows", you are finished.
Then, you can boot any computer from the USB drive and Windows will run on the USB drive directly without having to install it.