
"Cannot Verify Server Identity" on your iPhone is one of the common issues for most Apple users. It is all right. iSumsoft will show you 6 useful and effective methods to address this issue. Follow me.
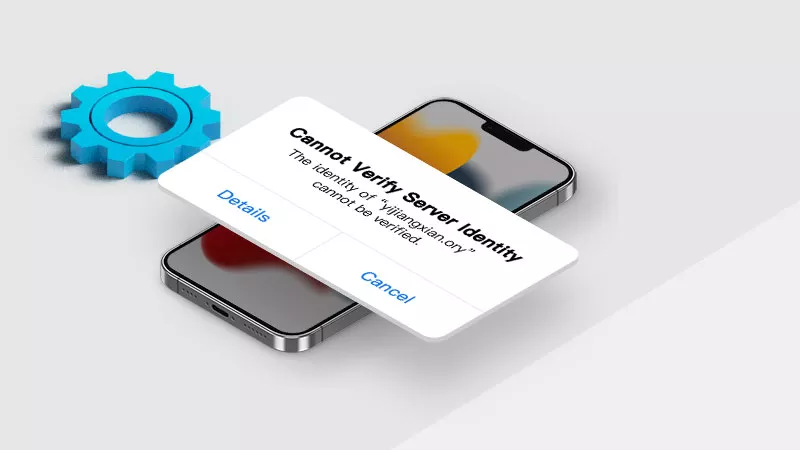
Let's start with the reasons behind this pop-up message. When your iPhone displays the message "Cannot Verify Server Identity," it typically means that the Mail app or another network-related app is having trouble verifying the security certificate of the server it's trying to connect to. The following are some common reasons for it:
Expired or Invalid Certificate: The server's SSL certificate may have expired or is not configured correctly.
Untrusted Certificate Authority: The certificate might be issued by an authority that your iPhone doesn't recognize as trusted.
Server Configuration Issues: There might be misconfigurations on the server side.
Network Issues: Sometimes, network-related issues can cause this error, such as problems with your internet connection or interference from a firewall.
Incorrect Date & Time: If your iPhone's date and time settings are incorrect, it can cause issues with verifying certificates.
Before carrying out further measures, force restarting your iPhone or iPad may be an effective and straightforward method to resolve this issue. This process can help to clear any temporary glitches or software anomalies that might cause the problem so that you can refresh the system and potentially fix the error without delving into more complex troubleshooting steps.
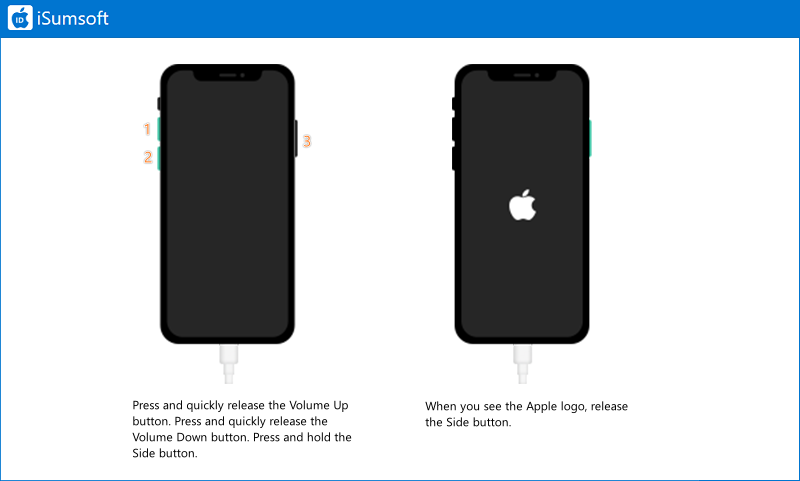
Here is how to force restart iPhone:
For iPhone 8 and later:
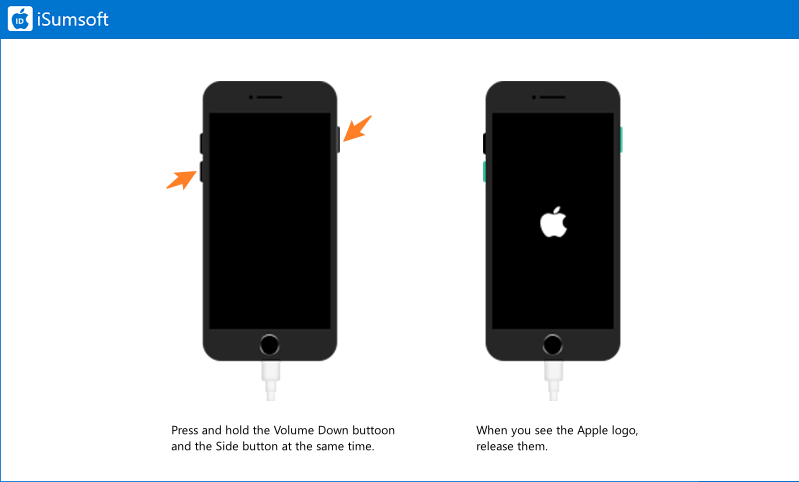
For iPhone 7 and iPhone 7 Plus:
Keep pressing the Volume Down button and the Side buttons simultaneously until the Apple logo appears.
For iPhone 6 and earlier:
Hold the Home button and the Top buttons until you see the Apple logo.

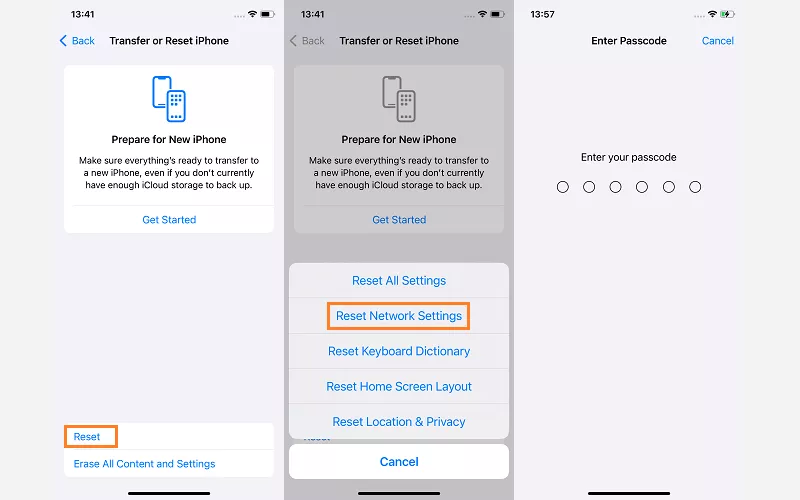
Given the wrong network settings may lead to "Cannot Verify Server Identity", you can try to set your network to its factory settings if Way 1 doesn't help. Follow these steps:
Step 1: Go to Settings > General > Transfer or Reset iPhone.
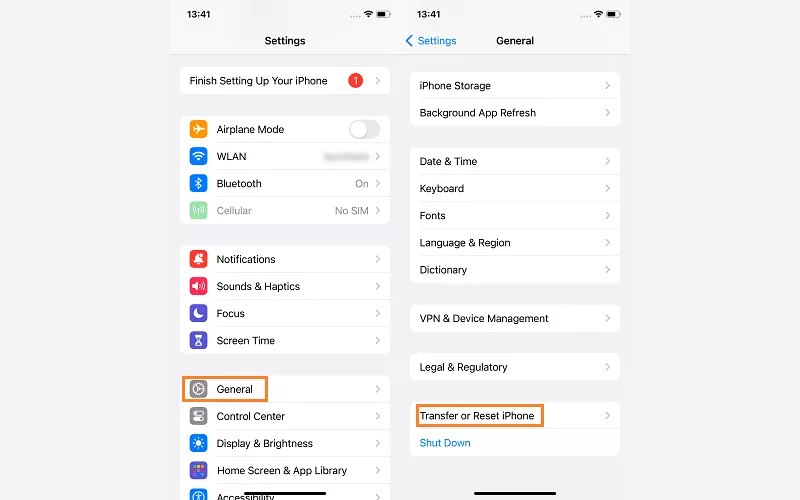
Step 2: Tap Reset > Reset Network Settings, then enter the Screen Lock passcode, and your iPhone will restart.
This method refreshes the account settings, ensuring that any outdated or corrupted configurations are corrected, retrieving and applying the latest server settings and security certificates, which might have changed or been updated by your email provider. Additionally, it enables the Mail app to generate new authentication tokens, clearing any expired or invalid ones that could be causing the problem. This process also eliminates any corrupted temporary data or cache associated with your email account.
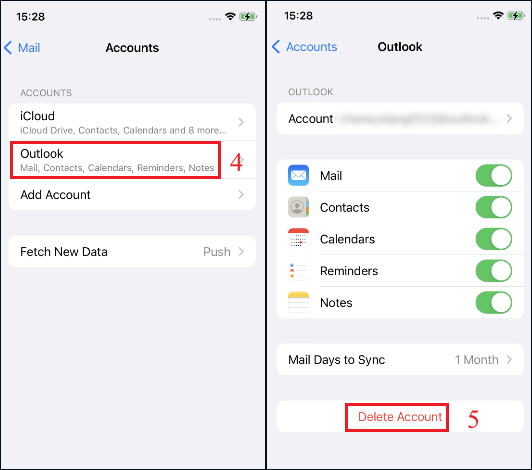
Step 1: Locate Settings > Mail > Accounts.
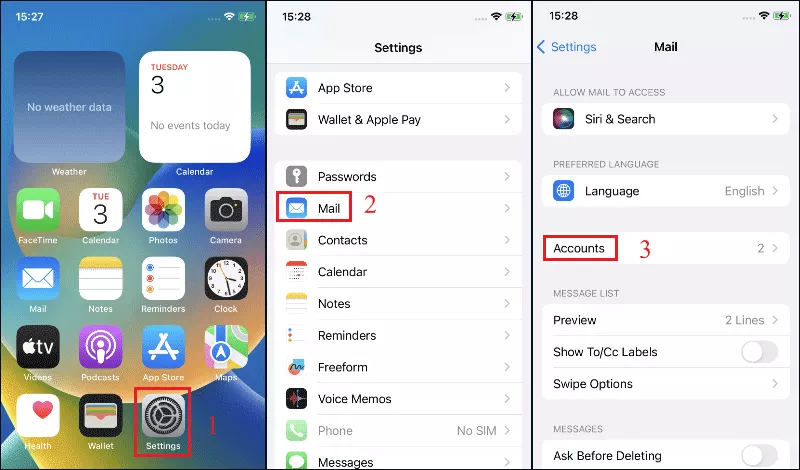
Step 2: Select your account and then tap Delete Account. Then re-add your account.
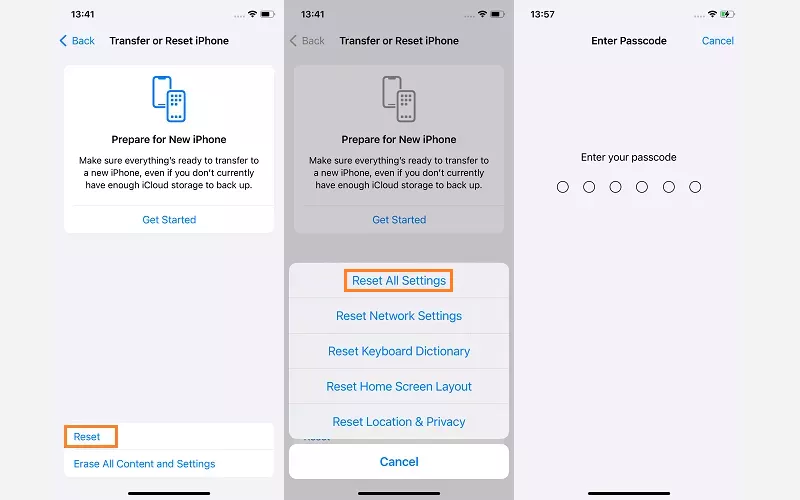
Resetting all settings on your iPhone or iPad can effectively resolve the "Cannot Verify Server Identity" issue. This process restores your device's settings to their default state without erasing your data, which can address underlying configuration problems that might cause the error. Follow these steps to reset all settings:
Step 1: Go to Settings > General > Transfer or Reset iPhone.
Step 2: Tap Reset > Reset All Settings, then enter the Screen Lock passcode to proceed.
Disabling SSL can temporarily fix the "Cannot Verify Server Identity" issue by bypassing certificate verification but it is generally not recommended because it compromises the security of your email communications. It should only be used as a last resort and for a short duration while permanent solutions, such as updating the server's SSL certificate or resolving misconfigurations, are implemented.
Step 1: Tap Settings > Mail > Accounts and select the email account you're having trouble with.

Step 2: Tap Account > Advanced. Here, toggle off Use SSL.

If you've tried all the above methods but the issue persists, you can consider using iSumsoft iOS Refixer, which is designed to repair many iOS issues, such as iOS 17 Update stuck on the Apple logo, iPhone stuck on Preparing Update, and the “Cannot Verify Server Identity” issue, both usual and unusual issues. With this software, you can solve issues within a few simple clicks.
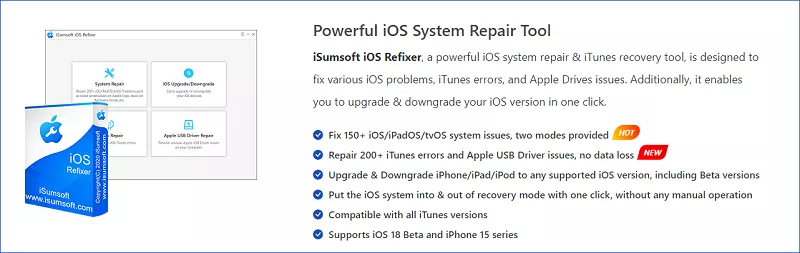
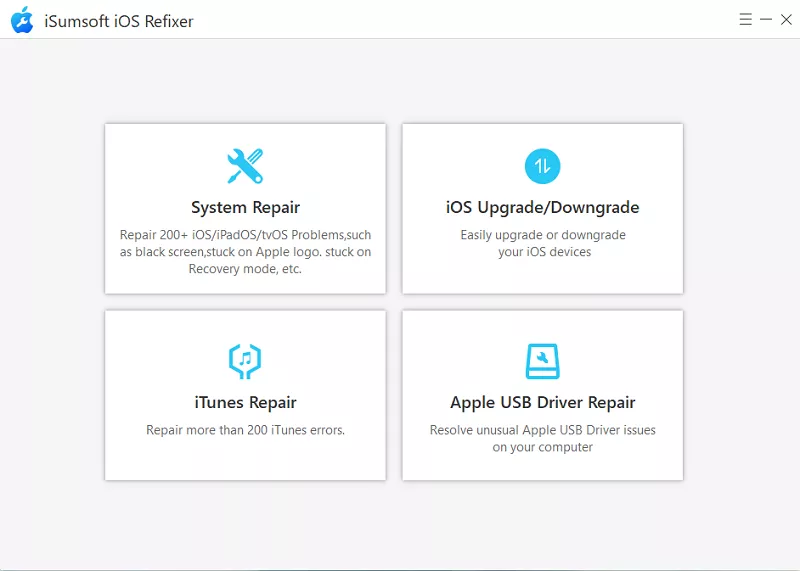
Learn how to use iSumsoft iOS Refixer:
Step 1: Free download the software and then install it on your computer. Then connect your device to the PC and launch the program.


Step 2: Select System Repair.
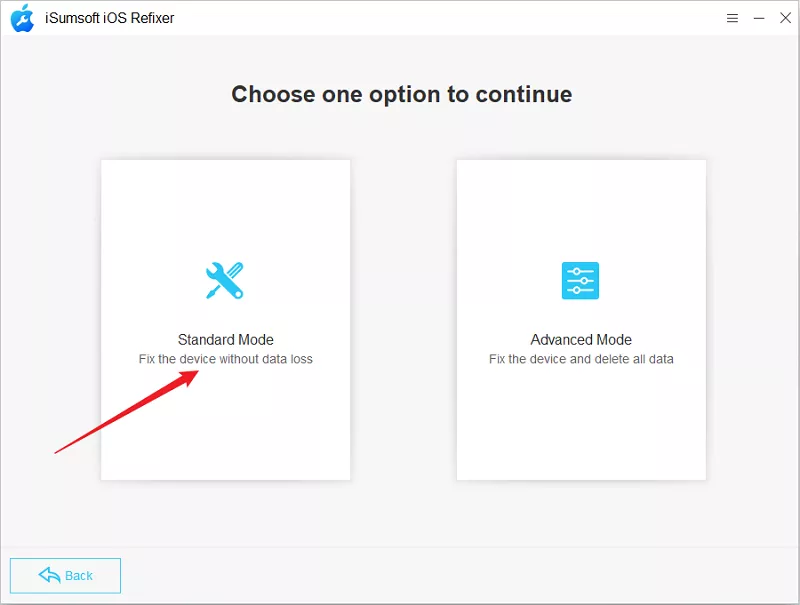
Step 3: You are provided with two repair modes, Standard Mode and Advanced Mode. If the former doesn't solve your issue, you can then try Advanced Mode. So, here, try Standard Mode first.
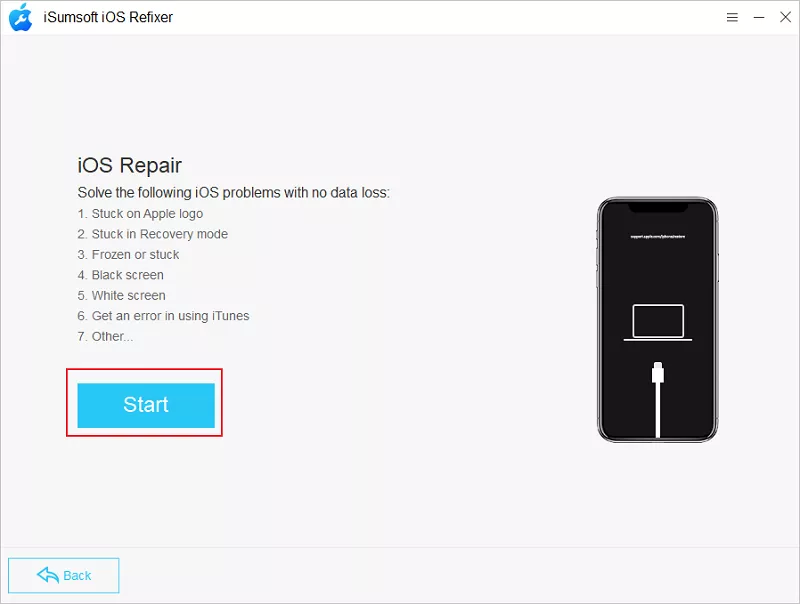
Step 4: Click Start.
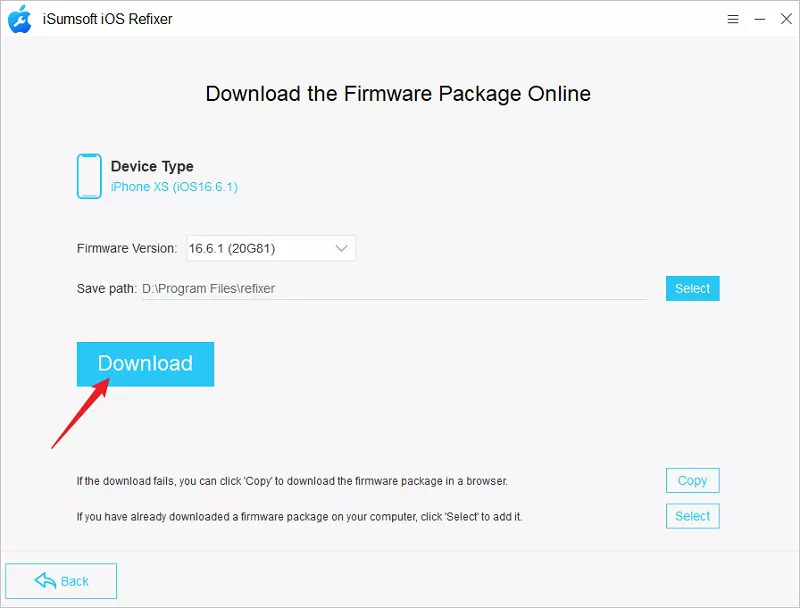
Step 5: Your device info is displayed on the screen, and you need to click Download to get a firmware package for further steps.
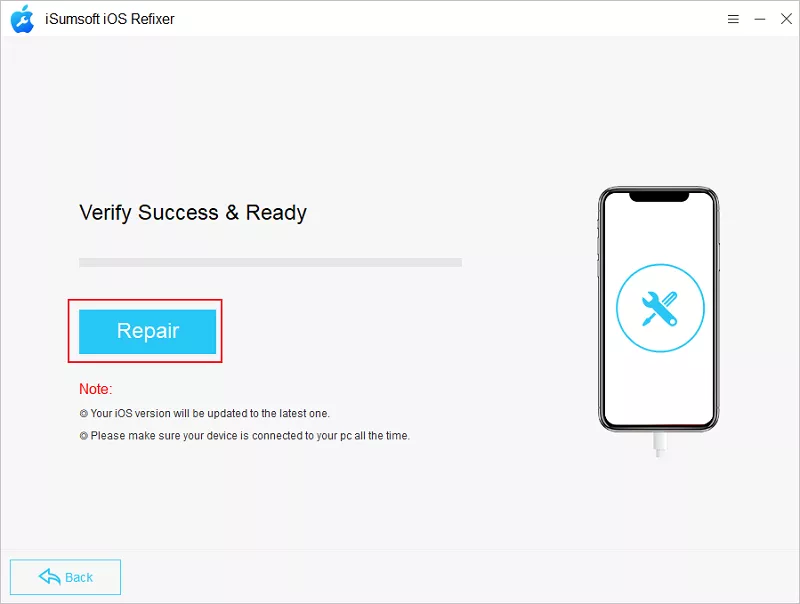
Step 6: After the download, click Repair to proceed.
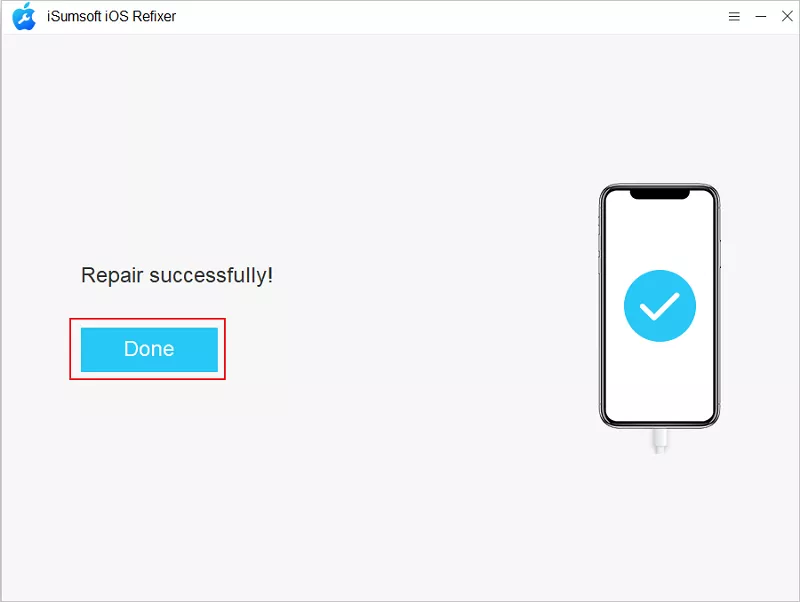
Step 7: When you see "Repair successfully" on the interface, the issue has been fixed and your device will restart automatically.
When encountering common iOS issues, you can first try to force restart your device as this simple step will solve the problem. However, for more complex issues that cannot be solved by force rebooting, such as persistent software bugs, system crashes, or problems that occur after an iOS update, you may need to seek additional help. In this case, iSumsoft iOS Refixer is a very useful tool.
 10 Simple
Ways to Fix Share Location Unavailable
10 Simple
Ways to Fix Share Location Unavailable Find My iPhone
Not Updating Location? Check This Article!
Find My iPhone
Not Updating Location? Check This Article! How to Fix
Gmail Not Working After iPhone Update?
How to Fix
Gmail Not Working After iPhone Update? Fixed:
The iPhone Software Update Server Could Not Be Contacted
Fixed:
The iPhone Software Update Server Could Not Be Contacted Top 10 Ways to
Fix the Error Connecting to Apple ID Server
Top 10 Ways to
Fix the Error Connecting to Apple ID Server There Was
an Error Connecting to the Apple ID Server? How to Fix?
There Was
an Error Connecting to the Apple ID Server? How to Fix?