iSumsoft iLock Refixer helps you bypass iCloud activation lock, turn off Find My [device], and remove iCloud account on iPhone/iPad/iTouch without Apple ID and password. This tool is useful if you lost access to your Apple ID or got a second-hand iPhone linked to the previous owner's Apple ID. Now, this article will show you in detail how to use iSumsoft iLock Refixer.
iSumsoft iLock Refixer is a software program for Windows, so please download and install it on your Windows computer first, and then follow the steps below.
Free DownloadThis method works on devices running iOS 12.0 to iOS 14.8, including iPhone 5s to iPhone X, iPad 4-7 and iPod touch 6 & 7.
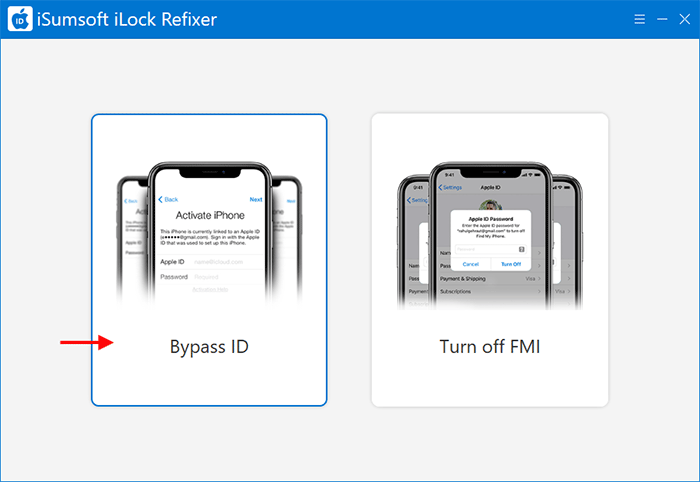
Step 1: Connect the Apple device and USB driver to the computer, then launch the software and select Bypass ID.
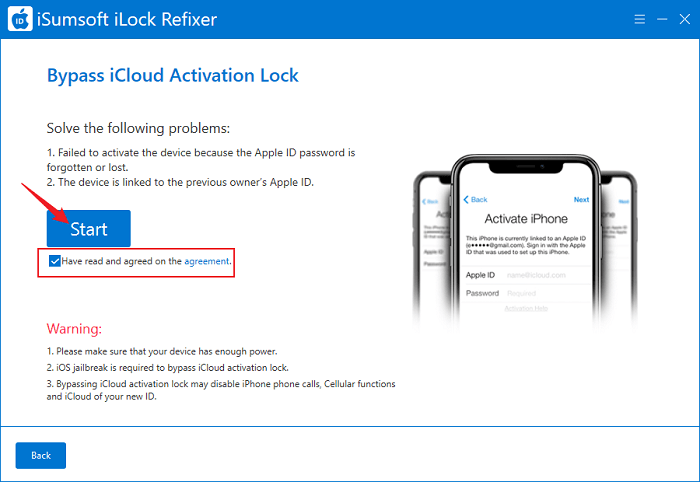
Step 2: Check Have read and agreed on the agreement (It has been checked by
default), then click on Start.
It is noted that this operation will disable iPhone phone calls, Cellular functions and iCloud of your
new Apple ID.
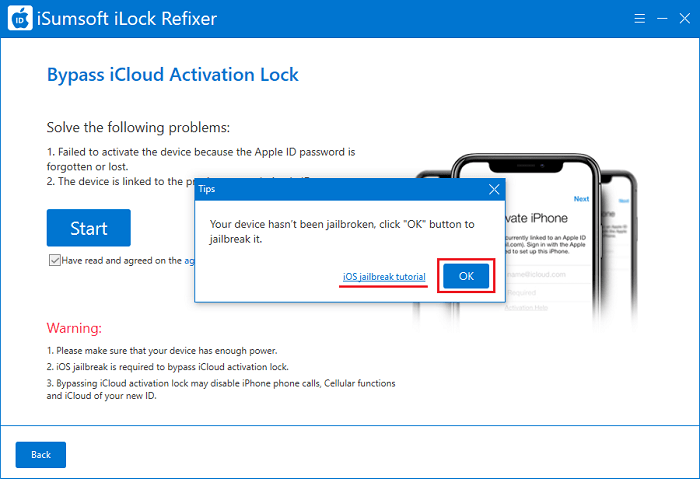
Step 3: You will be prompted to jailbreak your device. Click OK to start jailbreaking, or you can select the iOS jailbreak tutorial to view the complete tutorial.
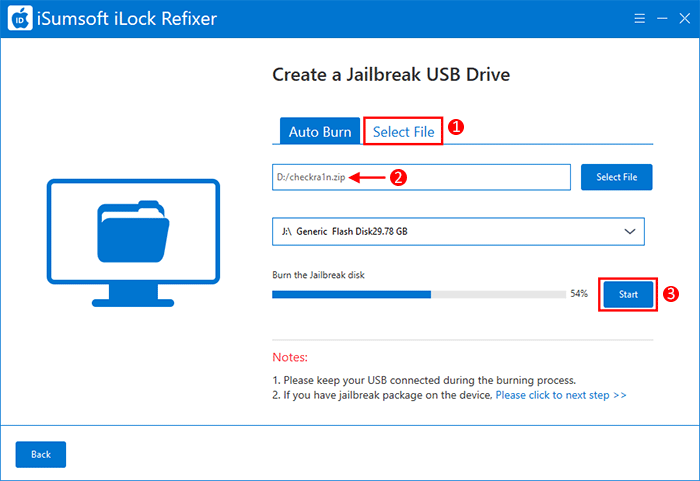
Step 4: You are required to create a Jailbreak USB drive. You can select Auto Burn to burn a disk, or you can click Select File to choose a download file to start burning.
Auto Burn:

Select File:
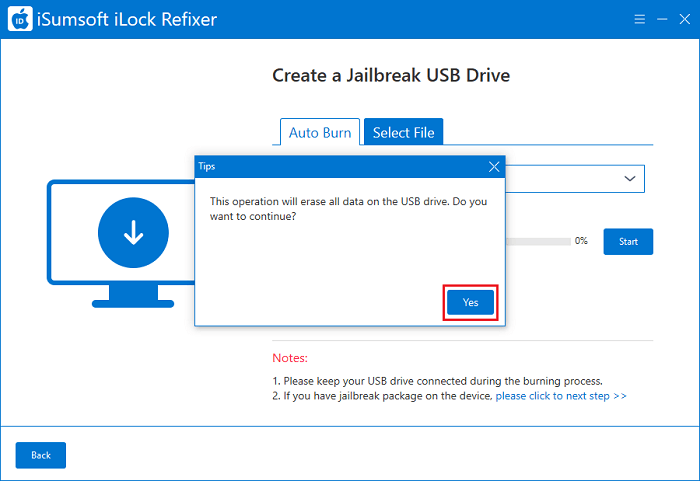
Step 5: A pop-up window will warn you that this operation will erase all the data on the USB drive, you need to click Yes to continue.
Step 6: Hang on while burning the disk. If "Burn Success" appears, then click OK.

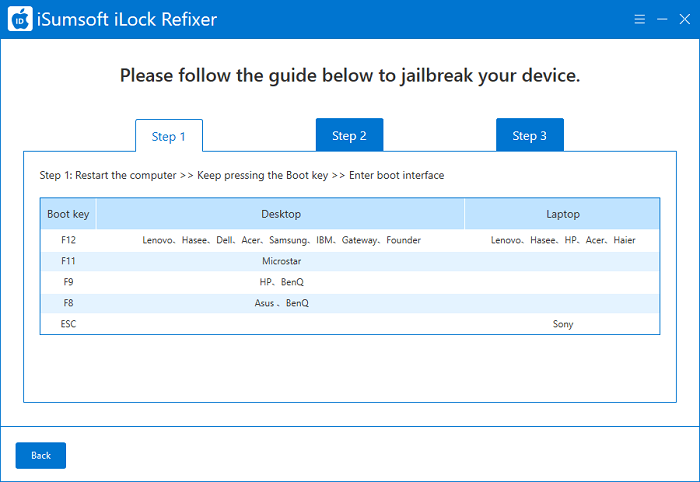
Step 7: Follow the onscreen instructions to jailbreak your device. Learn the complete tutorial to jailbreak device.
Step 8: After the successful jailbreak, your device will restart automatically. Open iSumsoft iLock Refixer and select Bypass ID > Start again, which will immediately start removing the activation lock.
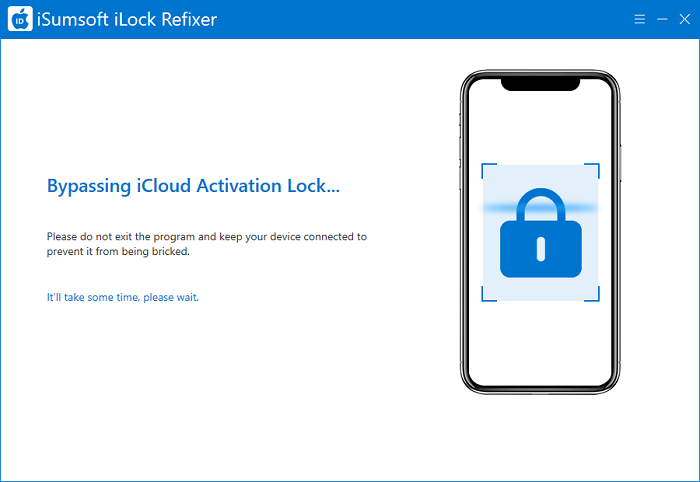
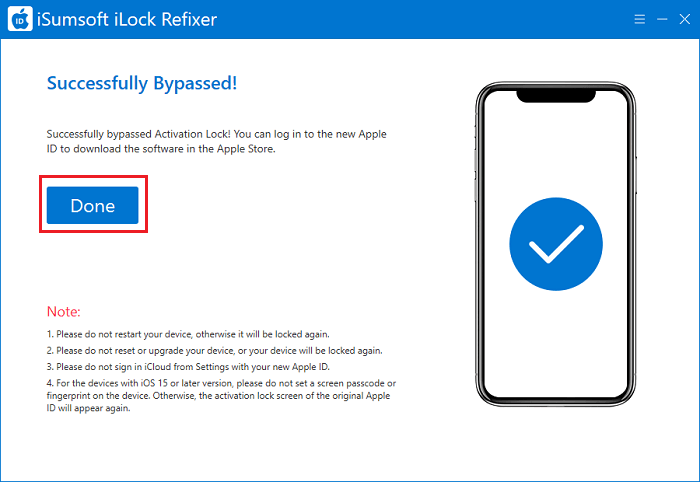
Step 9: When "Successfully Bypassed" appears, your device will restart automatically and you can
click Done to exit the program. You can now reset your device.
Note that you cannot set a Screen Passcode, Fingerprint and Face ID for the device running iOS 15
and later during setup, or you will be locked out of the Activation Lock again.
If this happens, you will need to perform the steps above again.
This method works on devices running iOS 15 - iOS 16.7, including iPhone 5s to iPhone X, iPad 4-7 and iPod touch 6 & 7.
Step 1: Connect your Apple device to the computer and then launch the software. Then select Bypass ID.
Step 2: Click on Start. You must note that the option Have read and agreed on the agreement has been selected by default and you cannot uncheck it.
Step 3: Follow the onscreen instructions to put your device into DFU mode.
Note: If the iPhone has never been jailbroken or it was previously jailbroken but has undergone a factory reset, check the box. If the iPhone has bypassed the Activation Lock but restarts for some reason (the Activation Lock will appear again), uncheck the box.

Step 4: Once the device enters DFU mode, it will start the first jailbreak automatically.

Step 5: You are required to access DFU mode again.

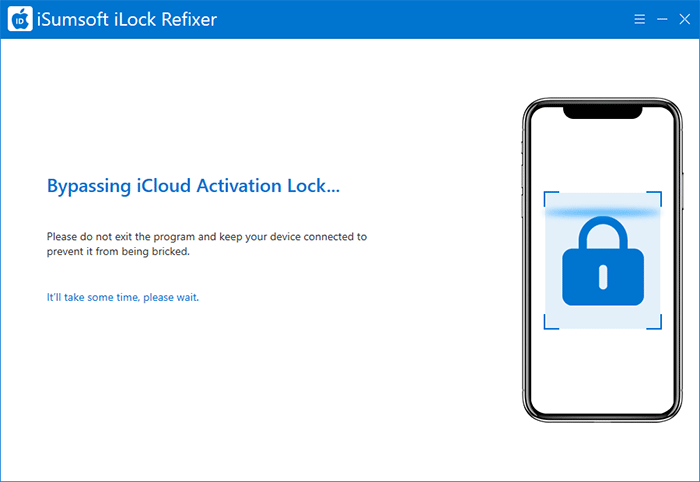
Step 6: The software will proform a second jailbreak and then begin bypassing the iCloud Activation Lock.
Step 7: Click Done when "Successfully Bypassed" appears, and your device will begin
restarting automatically. Then you can set up your device.
Note: You cannot set a Screen Passcode, Fingerprint and Face ID for the device running iOS 15 and
later during setup, or you will be locked out of the Activation Lock again.
If this happens, you will need to perform the steps above again.
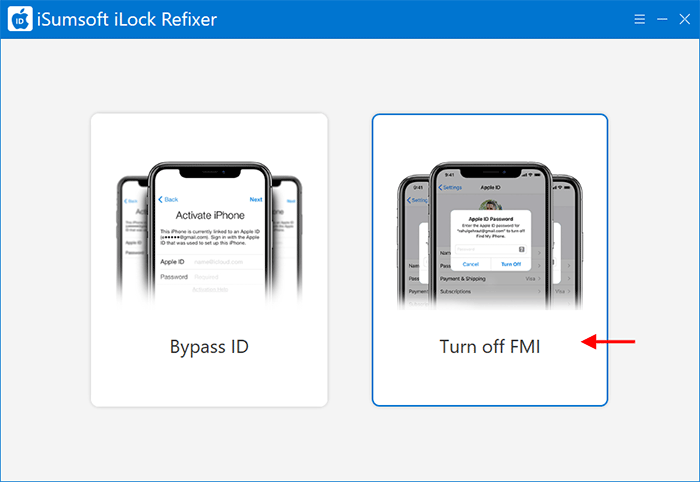
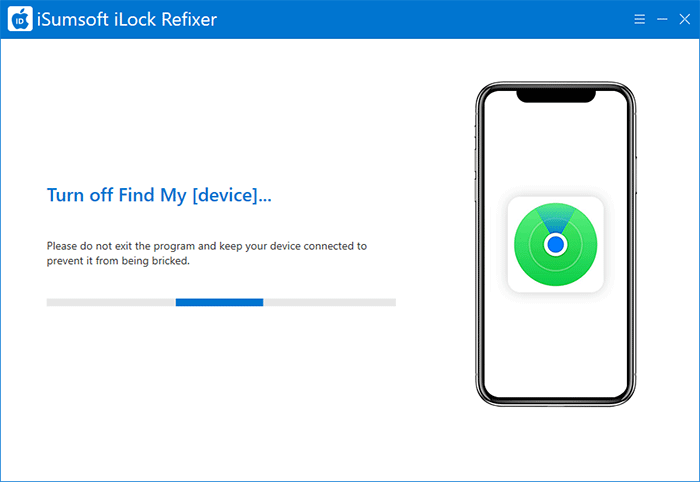
Launch iSumsoft iLock Refixer and choose the Turn off FMI option on the main interface.
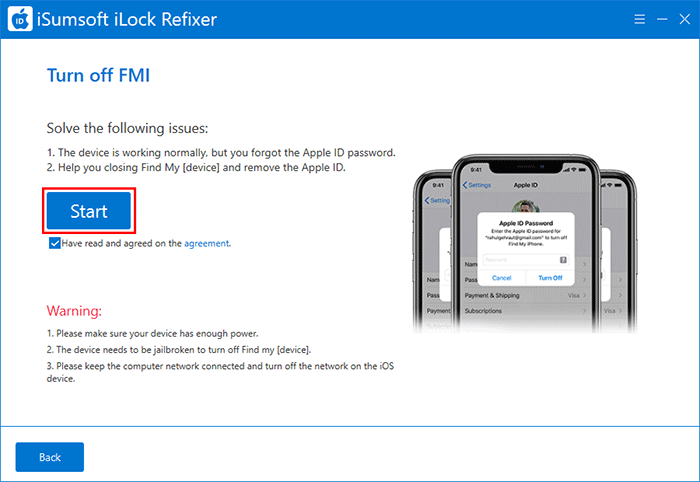
When you get to the next page, make sure your computer is connected to the Internet and turn off the network on your iOS device, and then click Start to proceed.
The software will recognize your iOS device and start turning off Find My [device]. Please always keep the device connected.
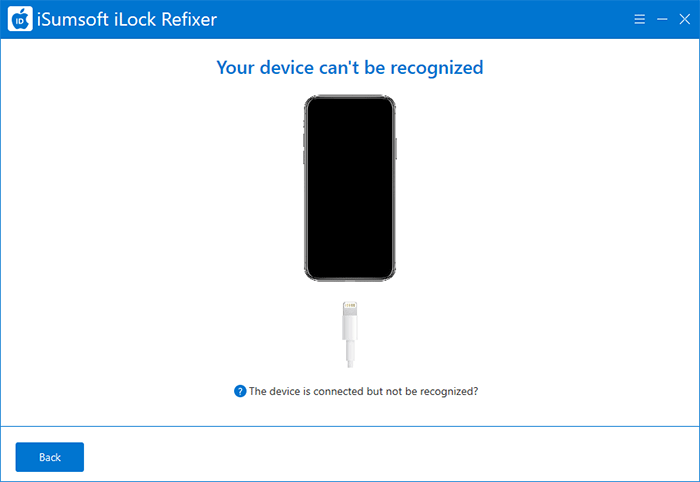
Tips: If your device is plugged in but the software does not recognize it, just unplug the iPhone and reconnect it, or use another Apple USB cable.
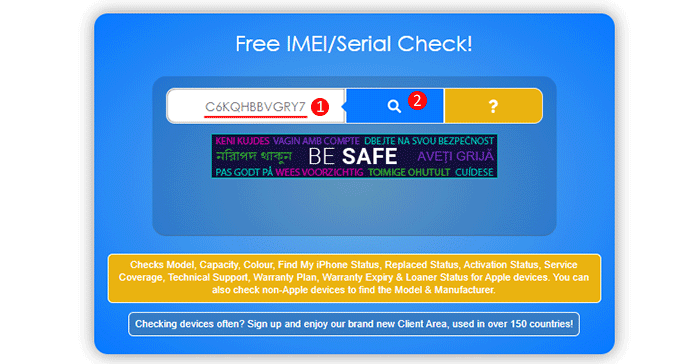
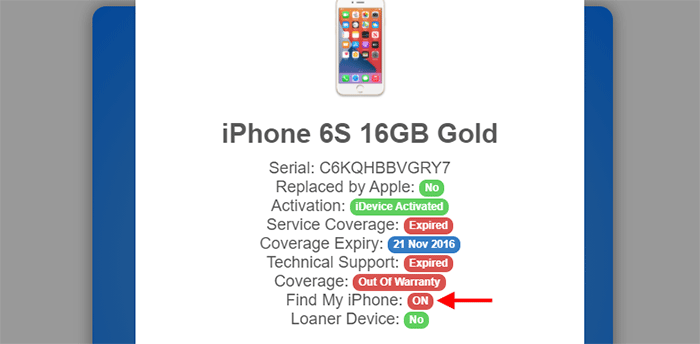
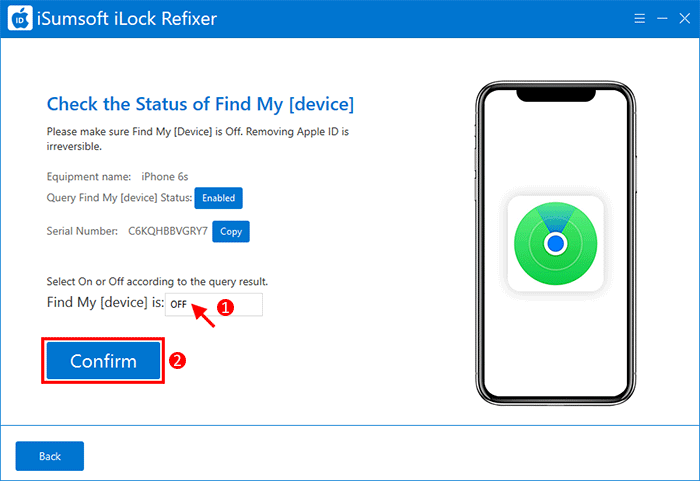
Now, you need to check if Find My [device] is really turned off. The result viewed from your iOS device is often inaccurate. The best practice is to open this page, copy the serial number of your iOS device into the box, and then click the Query button to query the status of Find My [device].
If the query result shows that Find My [device] is OFF, then you can start removing the Apple ID from your device.
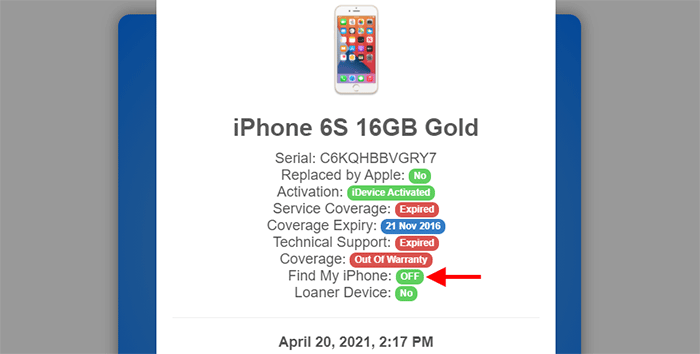
Tips: If the query result shows that Find My [device] is still ON, then it may be that your computer's network delay caused the turning off failure. Don't worry, just return the software to the Turn off FMI interface and click the Start button to try to turn off Find My [device] again. If necessary, you can try turning off Find My [device] several times until the query results show that it is OFF.
Note: Attempting to remove Apple ID or reset iOS device with Find My [device] turned on will cause the Activation Lock screen. If you don't have the original Apple ID and password, you will eventually have to use Option 1 above to bypass the Activation lock to access the device. If you don't want to get into such trouble, make sure that the Find My [device] is OFF before removing the Apple ID.
After making sure Find My [device] is OFF, select OFF from the drop-down menu next to Find My [device] is, and then click Confirm. You will be prompted that removing the Apple ID will delete all data on the device. Click Yes to continue.
The software will start removing the Apple ID from your device. This takes only a few seconds. Your iPhone data will be erased.
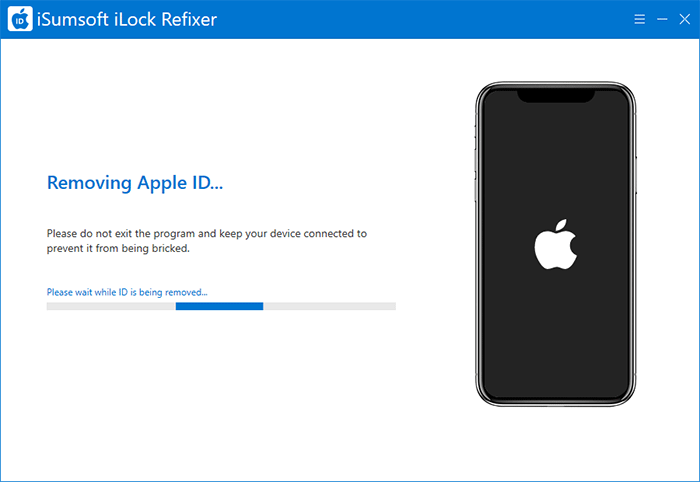
The Apple ID has been removed successfully from your iOS device. Now you can use a different Apple ID to set up your iPhone.
![Find My [device] has been turned off](../images/guide/ilock-refixer/find-my-device-turned-off.png)