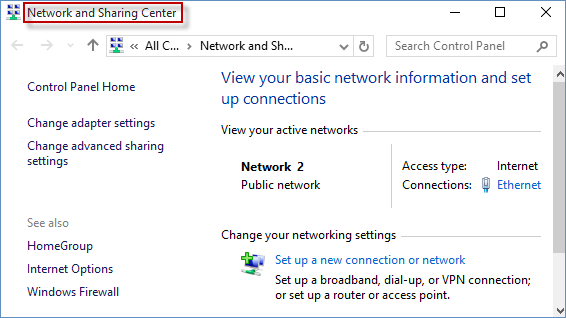
If you want to check whether the network location has changed in Windows 7/10, you must first open the Network and Sharing Center ( See the picture below ). In the Network and Sharing Center, you can see the actual location of each network connection, just under its name. Hence, in this article, we will introduce how to launch Network and Sharing Center in Windows 7/10.
1. For Windows 7:
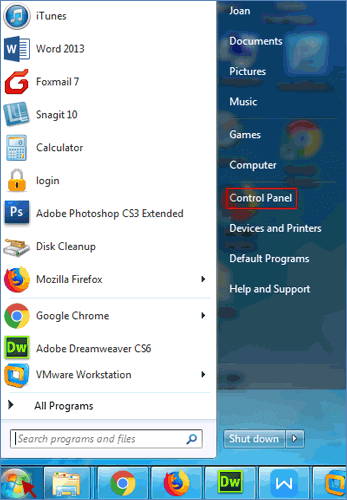
Step 1: Click Start icon to choose Control Panel.
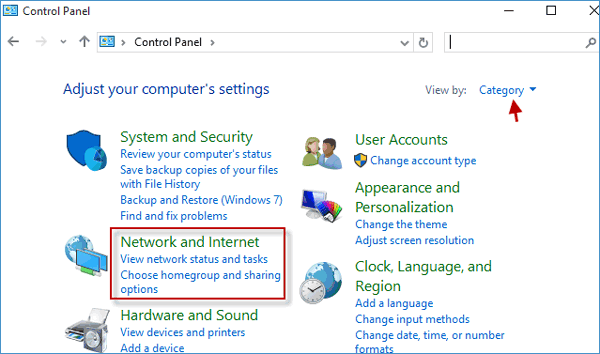
Step 2: In Control Panel, if your View by is set to Category, click Network and Internet link.
Step 3: And then click Network and Sharing Center link.
Note: If your View by is set to either Large icons or Small icons, directly click Network and Sharing Center link.
2. For Windows 10:
Step 1: launch Control Panel.
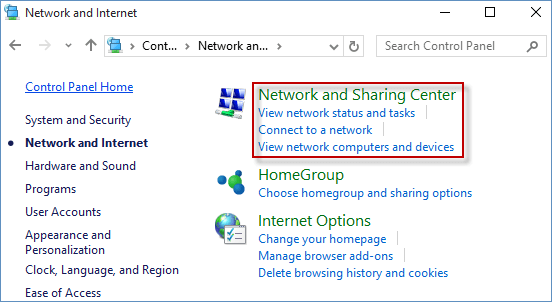
Step 2: In Control Panel, if your View by is set to Category, click Network and Internet link, and then click Network and Sharing Center link. If your View by is set to either Large icons or Small icons, directly click Network and Sharing Center link. ( See the following screenshot )
![]()
![]()
1. For Windows 7, click Start menu > All Programs > Accessories, and then click Command Prompt. Input control.exe /name Microsoft.NetworkAndSharingCenter in the Command Prompt and press enter to open Network and Sharing Center.
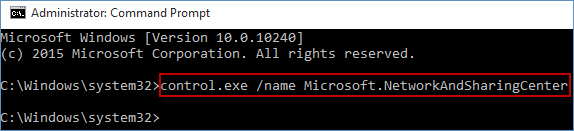
2. For Windows 10, launch Command Prompt as administrator. Input control.exe /name Microsoft.NetworkAndSharingCenter in the Command Prompt and press enter to open Network and Sharing Center.
1. For Windows 7, just click Start menu > All Programs > Accessories, find and choose Windows PowerShell. Write control.exe /name Microsoft.NetworkAndSharingCenter in the Windows PowerShell and press enter to start Network and Sharing Center.
2. For Windows 10, click Start icon > All apps, expand and find Windows PowerShell. Write control.exe /name Microsoft.NetworkAndSharingCenter in the Windows PowerShell and press enter to open Network and Sharing Center.

For Windows 7/10, follow the procedures below:
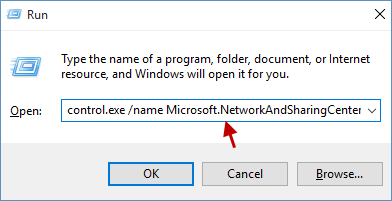
Step 1: Open Run dialog box by pressing Win+R keys simultaneously.
Step 2: Type control.exe /name Microsoft.NetworkAndSharingCenter and click OK button to start Network and Sharing Center.
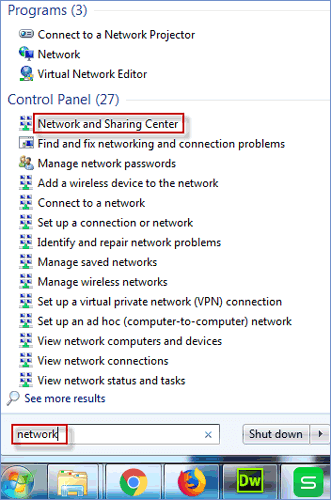
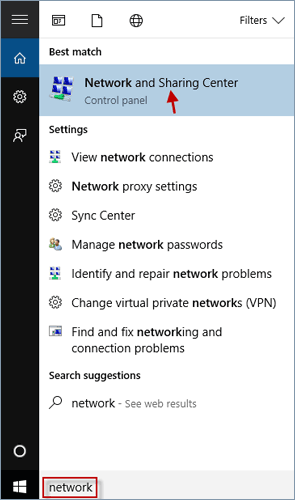
For Windows 7/10, click Start menu and type network in the blank field, choose Network and Sharing Center, and then bring up Network and Sharing Center instantly.
Right-click the Internet icon, select Open Network and Sharing Center option.
![]()
Definitely, if you would like to delete network icon from Windows 10 login screen, please refer to this article.