
Are you currently facing a frustrating situation where your Apple ID is greyed out on iPhone Settings, preventing you from accessing further Apple ID features? Are you wondering why is my Apple ID greyed out and seeking solutions? Focus on this article and it will discuss the reasons behind this issue and provide you with several effective solutions to restore your Apple ID.

According to Apple support, a grey Apple ID often indicates that restrictions or parental controls, a part of Screen Time, might have been enabled on your device, which is designed to prevent children from making changes to their parent's account. Apart from that, there are several potential reasons:
Account Security - Your Apple ID is disabled for security reasons such as unauthorized access and suspicious activity on your account.
Software Glitches - It is not uncommon for newly released iOS versions to have underlying bugs and glitches, resulting in various unpredictable issues occurring intermittently, especially after you update the iOS version.
Password Change - You change your Apple ID password and your device is not properly authenticated with iCloud, leading to credential verification.
Network Connectivity - Your Apple ID settings may also be affected by poor network connectivity or server issues on Apple's end.
Payment Issues - Apple may disable certain features, including iCloud, the App Store, iTunes, and more if there is an unpaid balance or a problem with the payment method associated with your Apple ID.
As enabling restrictions is the most likely cause of the issue, you can try this method as a priority.
Step 1: From Settings, tap Screen Time > Content & Privacy Restrictions.
Step 2: Scroll down and navigate to Allow Changes section, then tap Account Changes and set it to Allow.
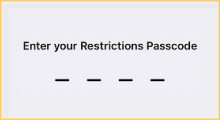
Step 3: If asked, enter your Screen Time passcode to complete.
Forgot your Screen Time passcode? Find it here.

Checking for Apple System Status is not a fix for grey Apple ID while it provides real-time information about the status of various Apple services and platforms, covering updates on service availability, performance issues, and scheduled maintenance for services such as iCloud, Apple ID, App Store, Apple Pay, and more.
On this page, you'll find a list of Apple services along with a color-coded indicator next to each service. The indicators represent the current status of the service:

A grey Apple ID disables you from clicking on it and prevents you from further operations. Serving as a powerful tool, iSumsoft iPhone Passcode Refixer allows you to remove the grey Apple ID with a few simple clicks.

Step 1: Complete installation on the computer and connect the iPhone to the computer.
Step 2: From the interface, select Remove Apple ID. The software will automatically detect your device information and warn you that all data will be deleted from your iPhone. Once you have acknowledged the warnings, click Start to begin removing Apple ID.

Step 4: The following steps are categorized into three distinct scenarios:
Once you click Start, the Apple ID will be removed automatically shortly.

you must follow the onscreen instructions to reset the iPhone. After that, the software will start removing the Apple ID.

You must ensure that Two-Factor Authentication and Screen Password are activated, and enter "0000" separately to confirm.

Then you need to download a specific package by clicking Download. After the successful download, click Remove to completely remove Apple ID.

To some extent, restarting is almost a panacea for most device issues such as when the Apple ID is greyed out on iPhone. Try rebooting your iPhone.
For iPhone X, 11, or later
1: Press and hold Volume up or down button and the Side button until the power-off slider appears.
2: Swipe the slider, then wait for your device to turn off. To turn your device back on, press and hold the Side button until you see the Apple logo.

For iPhone 6, 7, 8, or SE (2nd or 3rd generation)
1: Press and hold the Side button until the power-off slider appears.
2: Drag the slider until your device powers off. To turn your device back on, press and hold the Side button until the Apple logo appears.

For iPhone 5 or SE 1st generation, or earlier
1: Press and hold the Top button until the power-off slider appears.
2: Drag the slider to turn off your device. To turn your device back on, press and hold the top button until you see the Apple logo.

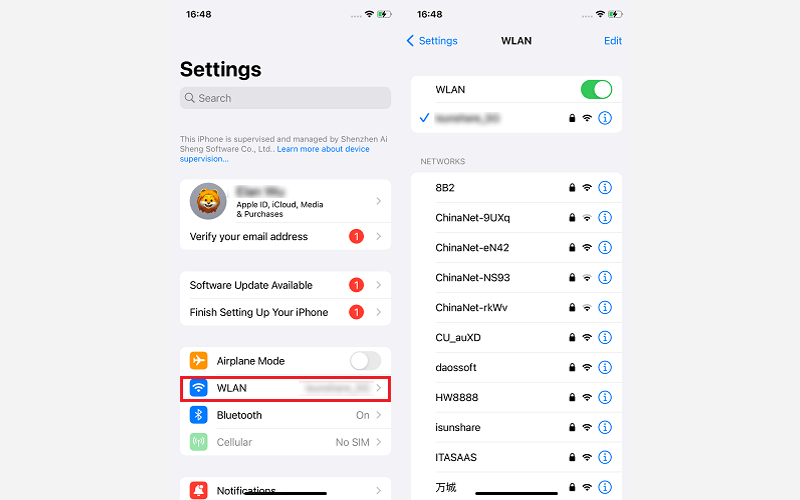
A stable and reliable network connection is of utmost importance when it comes to accessing and utilizing Apple ID services. If your Apple ID is greyed out, check your iPhone's network status by locating Settings > WLAN.
If you're experiencing the greyed-out Apple ID problem, it's generally recommended that you try updating your iOS to the latest version as one of the potential troubleshooting methods. Go to Settings > General > Software Update. The device will check for the update and follow the instructions to install the new version.

 How to Enable or Disable
Restrictions on iPhone/iPad
How to Enable or Disable
Restrictions on iPhone/iPad Fixed: Apple
ID Sign Out is Not Available Due to Restrictions
Fixed: Apple
ID Sign Out is Not Available Due to Restrictions![Apple ID Locked for Security Reasons [SOLVED]](../images/apple/apple-id-locked-for-security-reasons/apple-id-locked-for-security-reasons.png) Apple ID Locked for Security
Reasons [SOLVED]
Apple ID Locked for Security
Reasons [SOLVED] Why are iOS 16
Duplicate Photos not Showing up 2023
Why are iOS 16
Duplicate Photos not Showing up 2023 iPhone Wi-Fi Network
Connection Problem
iPhone Wi-Fi Network
Connection Problem![[Fixed] No Option for Forgot Screen Time Passcode iOS 16/15/12](../images/apple/no-option-for-forgot-screen-time-passcode/no-option-for-forgot-screen-time-passcode-s.png) [Fixed] No Option for
Forgot Screen Time Passcode iOS 16/15/12
[Fixed] No Option for
Forgot Screen Time Passcode iOS 16/15/12