If you've ever upgraded from an old-school spinning Hard Disk Drive (HDD) to a Solid State Drive (SSD), you know the feeling. It's like trading in a bicycle for a rocket ship. Everything is instant. Windows boots before you can sip your coffee. Apps open in a blink.
But there's a catch. A tiny, invisible feature called Trim that makes SSDs fast also makes them a nightmare for data recovery. It's like a hyperactive cleaning lady who doesn't just throw your trash in the bin—she incinerates it immediately.
In this article, we'll demystify the Trim command, explain why it's both a blessing and a curse, and show you how to recover your data even when Trim is working against you.
To understand Trim, you have to understand how drives work. Imagine your hard drive is a library.
On an old HDD (Hard Disk Drive): When you "delete" a book (file), the librarian doesn't actually remove the book. She just erases the card in the catalog. The book sits there on the shelf until a new book needs that space. This is why data recovery is easy on HDDs—the data is still there, just "hidden."
On an SSD (Solid State Drive): SSDs work differently. They can't just write new data over old data easily. They have to scrub the shelf clean first. This scrubbing takes time. If the SSD waited until you wanted to save a file to scrub the space, your computer would freeze up. Not cool.
Enter Trim. When you delete a file, Windows sends a "Trim" command to the SSD, saying, "Hey, these pages are invalid. Wipe them now so they're ready for new data." The SSD dutifully scrubs those sectors clean in the background.
In short: Trim keeps your SSD fast by proactively cleaning up garbage data.

(Diagram: On the left, HDD marks file as 'deleted' but keeps data. On the right, SSD with Trim wipes the data block completely.)
Here's the scary part. Because Trim physically wipes the data blocks to prepare them for new use, once Trim runs, your data is gone. Forever.
On a traditional hard drive, you could delete a file, wait a week, and likely still recover it if you hadn't written much new data. On an SSD with Trim enabled, you might delete a file, and seconds later, it's physically erased. It's the digital equivalent of shredding a document instead of just throwing it in the wastebasket.
This is why many data recovery tools fail on modern laptops. They look for the "ghost" of the file, but Trim has already busted the ghost.
If you've just accidentally deleted a massive folder of photos, stop everything! Your best bet is to disable Trim immediately to prevent it from sweeping up your lost files before you can save them.
1. Press Win + X and select Command Prompt (Admin) or Windows PowerShell (Admin).
2. Type the following command and hit Enter:
fsutil behavior query DisableDeleteNotify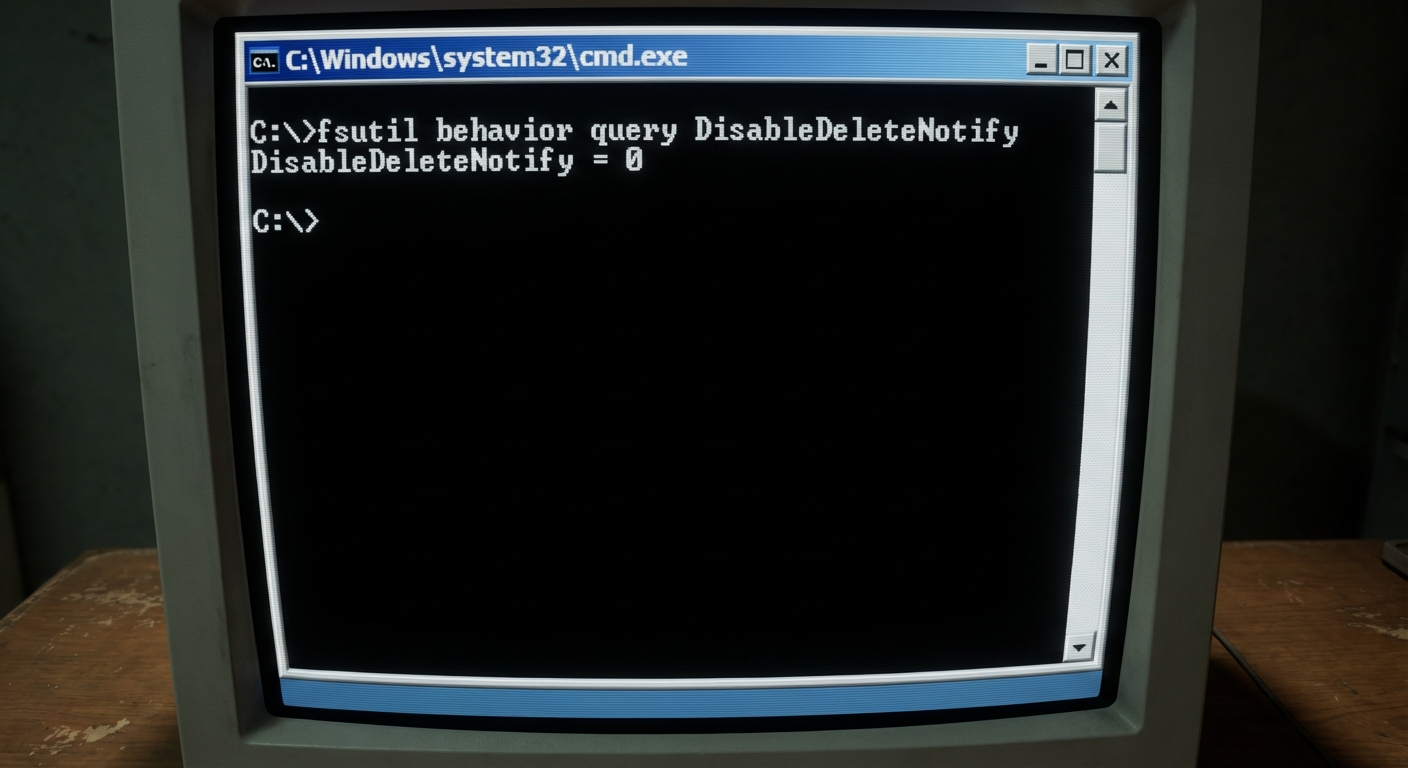
The Results:
To stop the "cleaning lady" while you try to recover your files, run this command:
fsutil behavior set DisableDeleteNotify 1Notice:
So, is all hope lost? Not necessarily. Trim doesn't always run instantly. It might run during idle time, or on a schedule. If you act fast, or if your drive is external (Trim often doesn't work on USB drives), you can still save your files.
This is where iSumsoft Data Refixer shines. It's designed to dig deep into the drive's sectors, bypassing the file system to find raw data fragments that haven't been scrubbed yet.
Step 1: Download and install iSumsoft Data Refixer. (Ideally, install it on a different drive to avoid overwriting the data you're trying to save!)
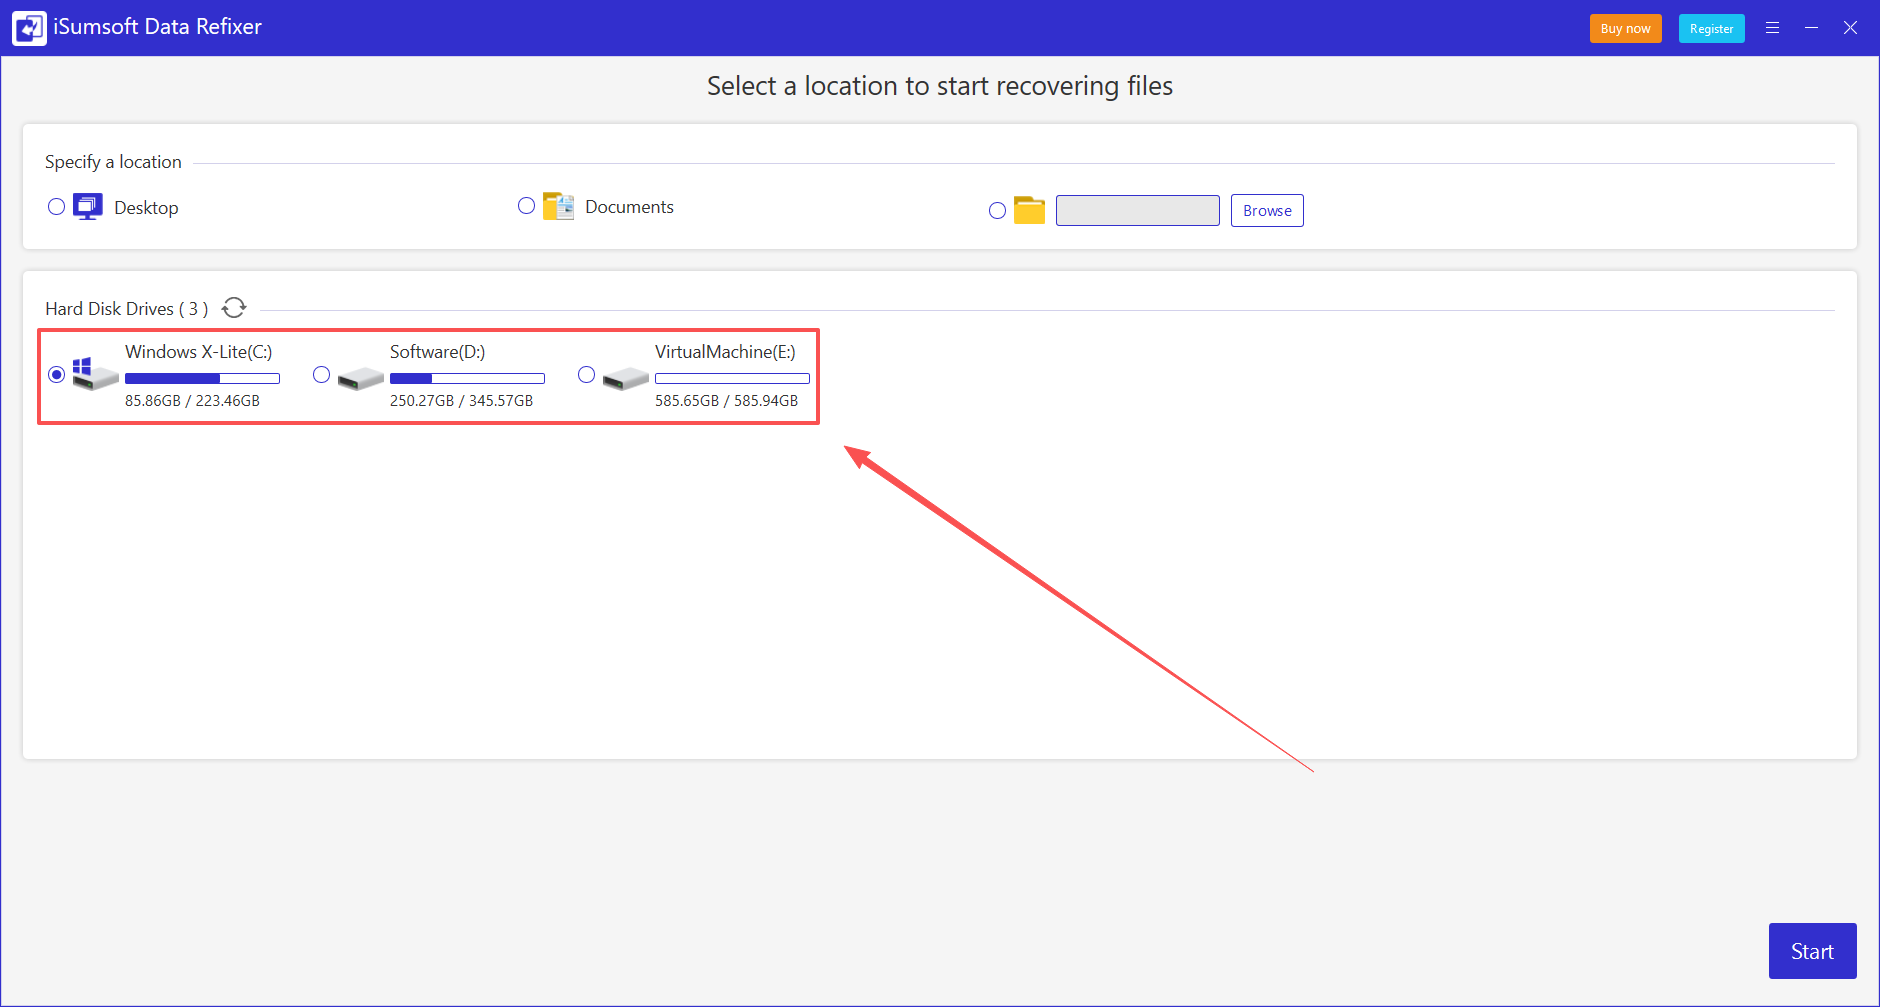
Step 2: Launch the software and select the drive where you lost your files.
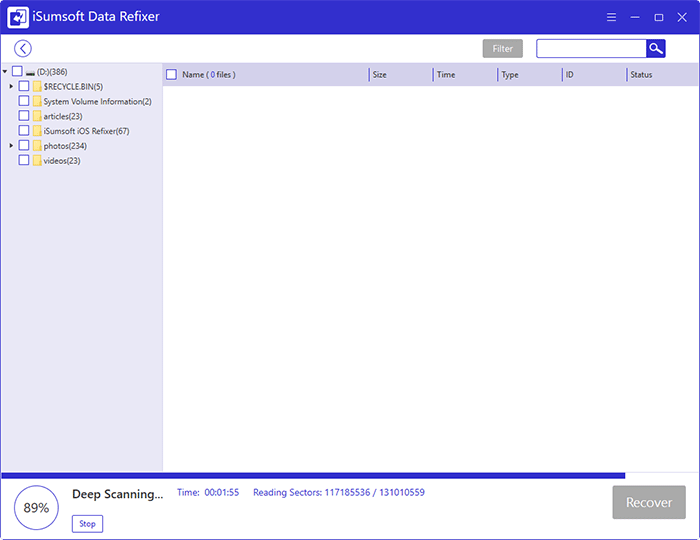
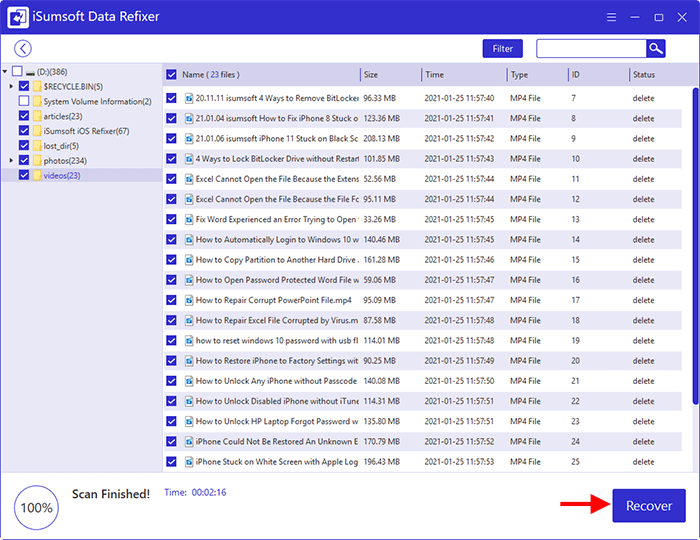
Step 3: Click Start. The software will perform a "Deep Scan." Unlike a quick scan that just checks the file table, this reads every sector. Even if Trim has started, it might not have finished, and Data Refixer can pull out whatever remains.
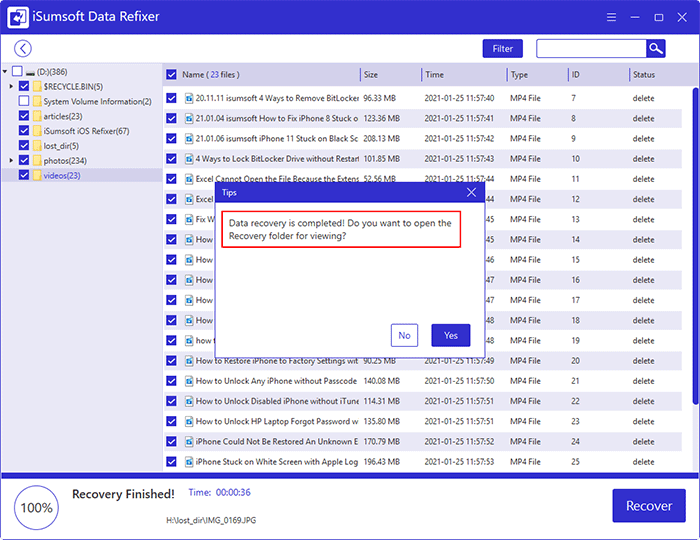
Step 4: Preview and Recover. Once the scan is done, you can see a list of recoverable files. If the file preview works, congratulations! You beat the Trim command.
The Trim command is a necessary evil. It keeps our computers fast and responsive, but it raises the stakes for data loss. The best defense is a good backup (seriously, back up your stuff). But when disaster strikes, knowing how to disable Trim and having a powerful tool like Data Refixer in your arsenal can be the difference between a minor hiccup and a digital tragedy.
Now, go check your Trim status, and maybe give your hard drive a pat on the back for working so hard.