The Recycle Bin serves as temporary storage for deleted files, allowing users to restore or permanently remove them. To free up disk space, emptying the Recycle Bin is essential. This guide outlines five distinct methods to empty the Recycle Bin in Windows 10.
Related: Recover Deleted Files from Empty Recycle Bin
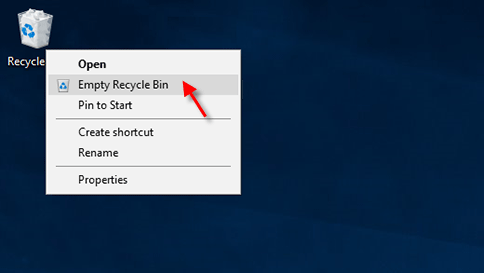
If the Recycle Bin icon is visible on your desktop, follow these steps:
Step 1: Locate the Recycle Bin icon on your desktop.
Step 2: Right-click (or press and hold) and select Empty Recycle Bin.
Tip: Adding the Desktop toolbar to Taskbar allows easy access to empty the Recycle Bin.
To remove Recycle Bin files via Settings:
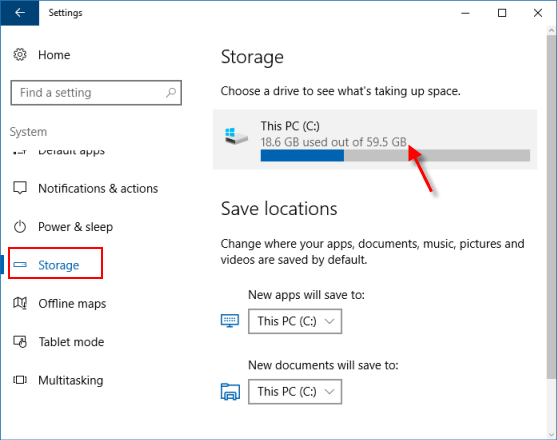
Step 1: Open the Settings app, navigate to System > Storage.
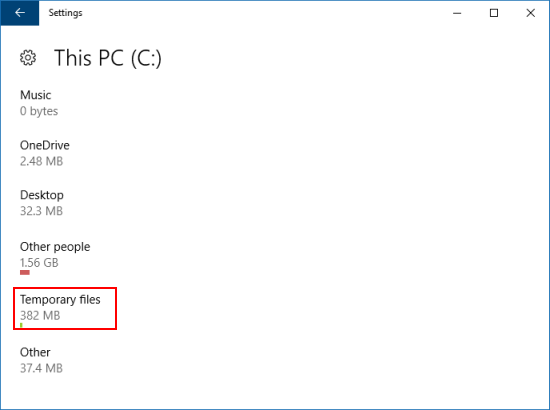
Step 2: Click on This PC, scroll down, and select Temporary files.
Step 3: Click on Temporary files.
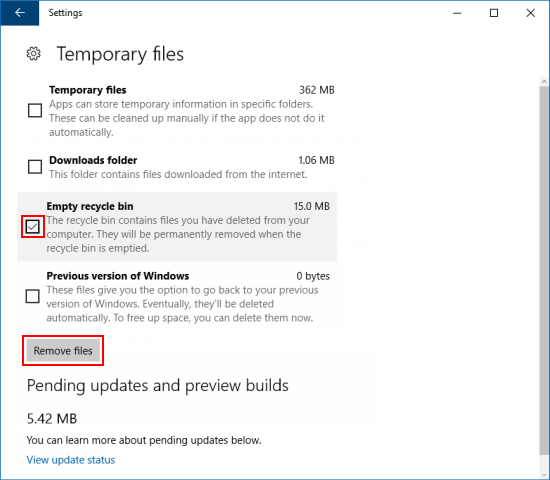
Step 4: Under Remove temporary files, check the Empty recycle bin box and click Remove files.
The Windows.old folder contains previous Windows installations, occupying significant storage. Using Disk Cleanup Tool's Remove previous Windows installations option can free up several GBs.
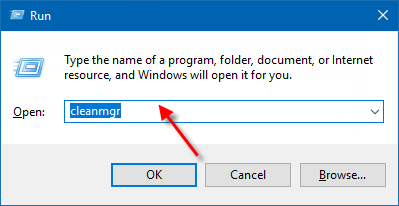
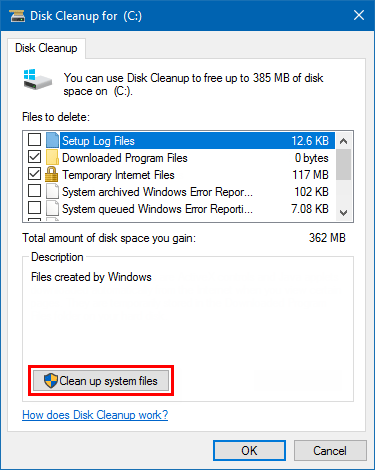
Step 1: Open Disk Cleanup via Run.
Press Win+R, type cleanmgr, and hit Enter.
Wait for the system to calculate used space.
Step 2: Click Clean up system files.
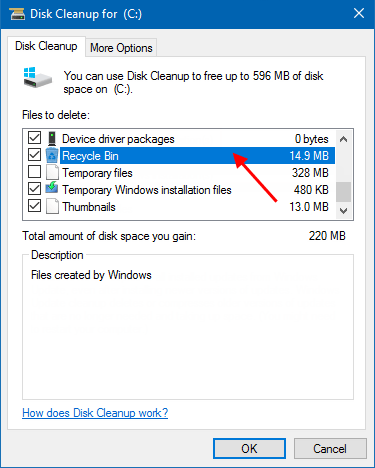
Step 3: Scroll down, check Recycle Bin, and click OK.
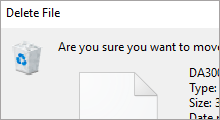
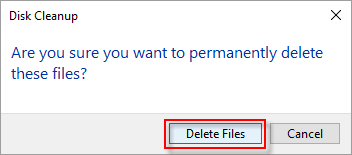
Step 4: Click Delete Files to confirm.
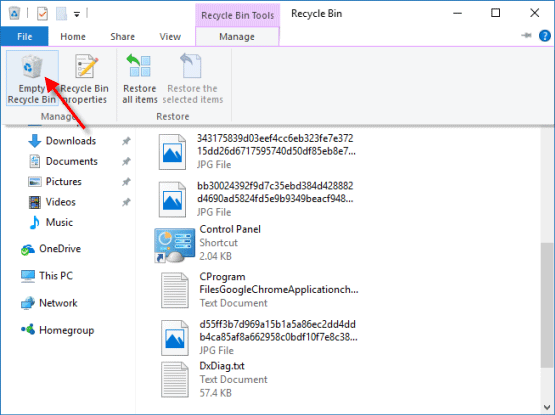
Step 1: Open Recycle Bin.
Step 2: Click the Recycle Bin Tools Manage tab, then click Empty Recycle Bin in the ribbon.
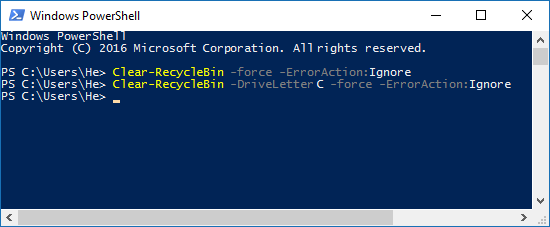
Step 1: Open Windows PowerShell via Run.
Press Win+R, type powershell, and click OK.

Step 2: Execute the desired command in PowerShell and press Enter.
To empty Recycle Bin for all drives: Clear-RecycleBin -force -ErrorAction:Ignore
To empty Recycle Bin for a specific drive: Clear-RecycleBin -DriveLetter <drive letter> -force -ErrorAction:Ignore