This is an iSumsoft ShapeISO user guide. We will show you how to use iSumsoft ShapeISO to burn, extract and create an ISO image file. First, download and install iSumsoft ShapeISO on your Windows computer, and then follow the instructions below.
Free DownloadThis section will guide you to burn an ISO file to a USB drive. This helps create a bootable USB drive for installing the operating system, repairing PC issues, etc. Please follow these steps.
1. On iSumsoft ShapeISO, select the Burn option on the left.
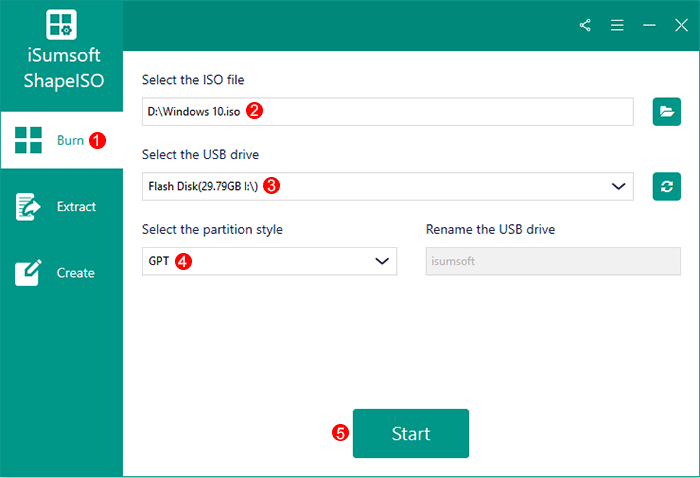
2. Under "Select the ISO file", click the file icon to import the target ISO file to the software.
3. Under "Select the USB drive", click the Refresh button to detect the USB drive connected to the computer, and then select the USB drive from the drop-down menu.
4. Choose GPT (for UEFI boot settings) or MBR (for Legacy BIOS settings), depending on what computers you want to boot the USB drive on.
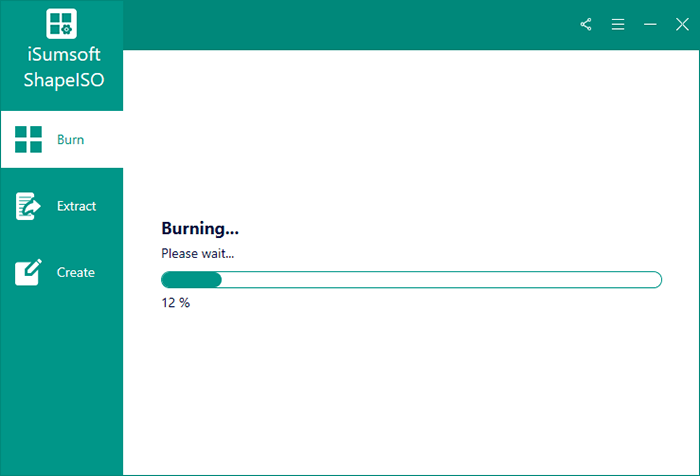
5. Click Start and the software will immediately start burning the ISO file to the USB drive.
6. Keep the USB drive connected and wait until the burning is complete.
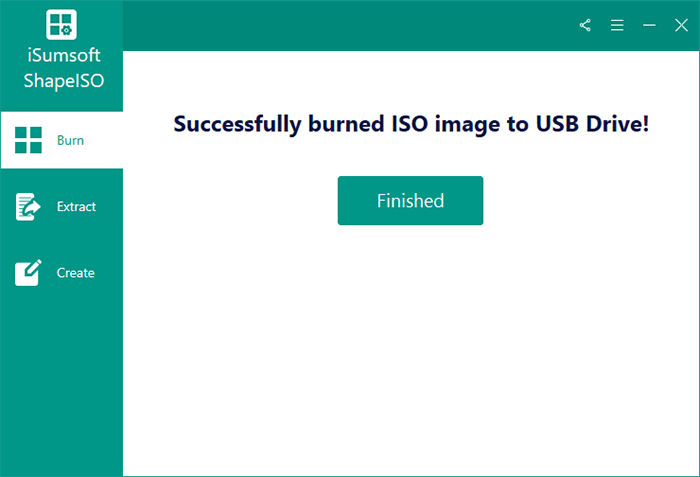
7. When "Successfully burned ISO image to USB drive" appears on the software page, you're finished..
This option will show you how to decompress an ISO file to a custom folder. Please follow these simple steps.
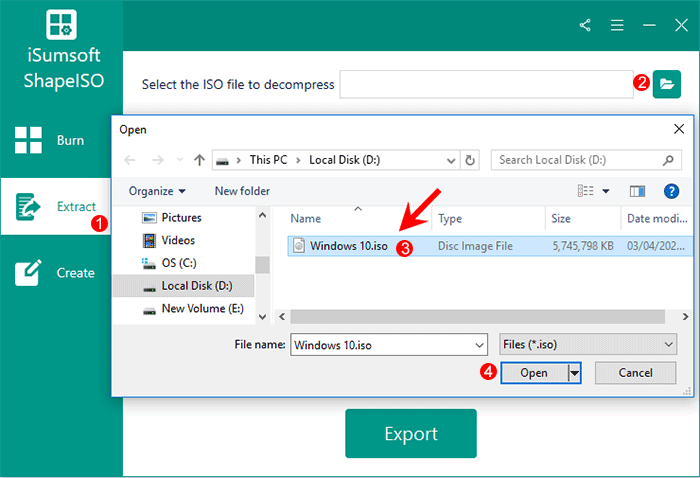
1. On iSumsoft ShapeISO, select the Extract option on the left, and then click the file icon on the right to import the ISO file you want to extract and open.
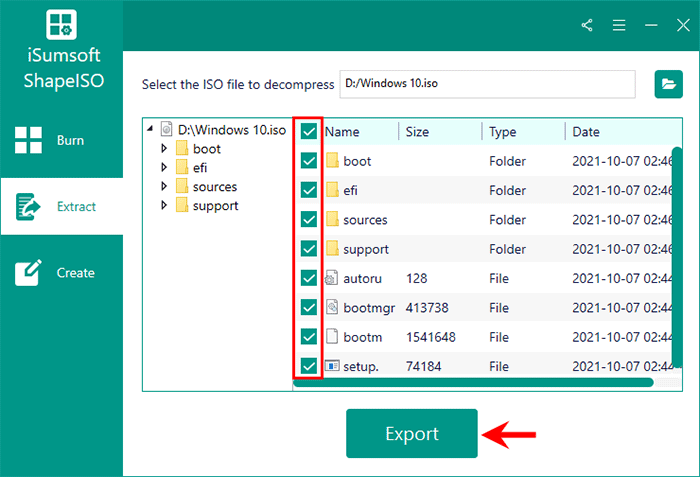
2. Once the ISO file is imported, all files and folders contained in it are extracted and displayed on the software page. Check all files and folders and then click the Export button.
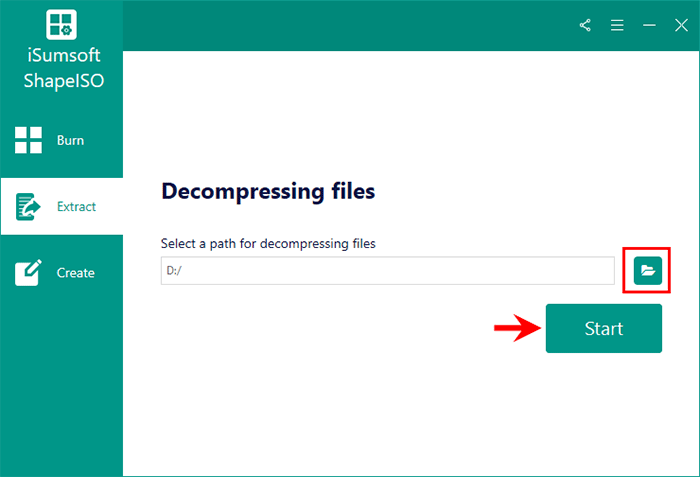
3. On the next page, click on the file icon to choose a path to save the files and click on Start.
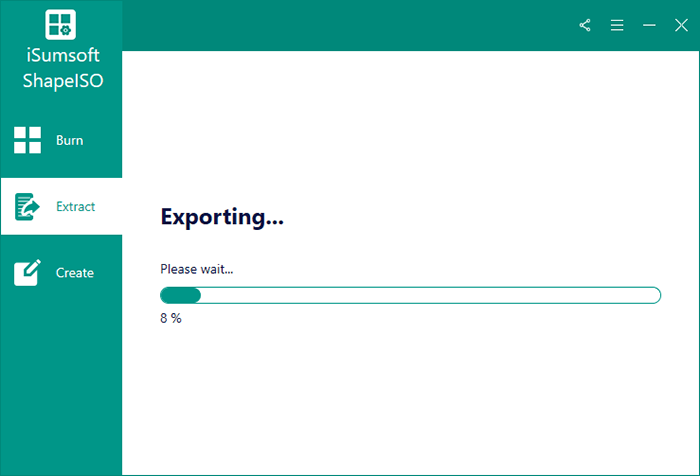
4. The software will start exporting all files and folders extracted from the ISO image to the destination path. This takes only a few minutes.
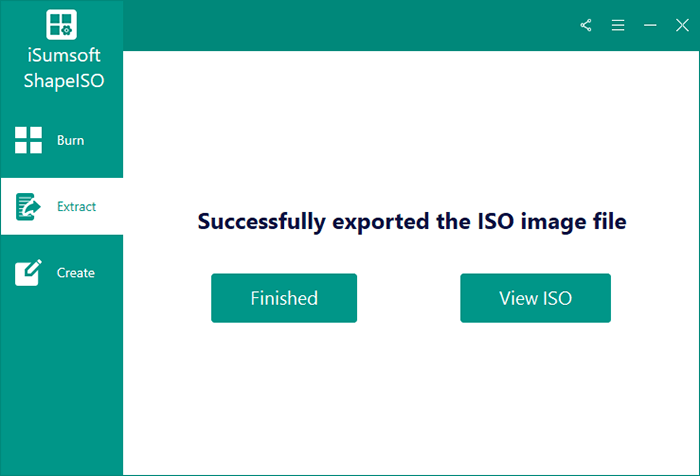
5. When the export is successful, you can go to the target location to view the contents of the ISO image.
This option will help you create ISO image file from files or folders on PC. Here come the steps.
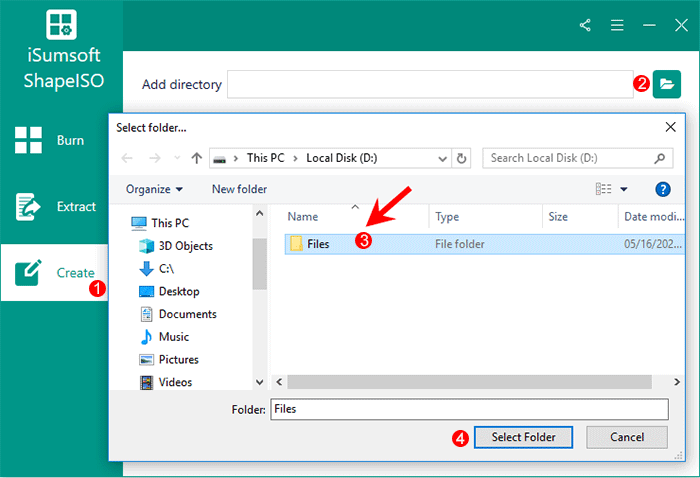
1. On iSumsoft ShapeISO, select the Create option on the left, and then click the file icon on the right to add the folder you want to convert into an ISO image file.
2. Once the folder is added, all files in it are listed on the software page. Make sure that the files and folders you need are included, and then click Next.

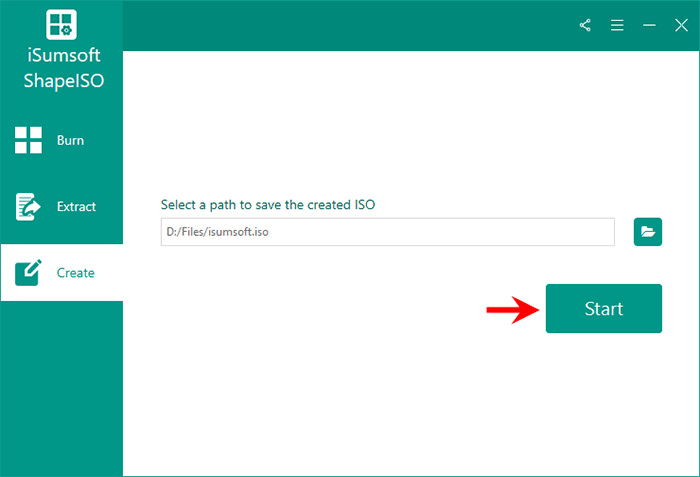
3. On the next page, click the file icon to select a path to save the created ISO, and then click Start.
4. The software will start creating an ISO image file from your selected folder at once.

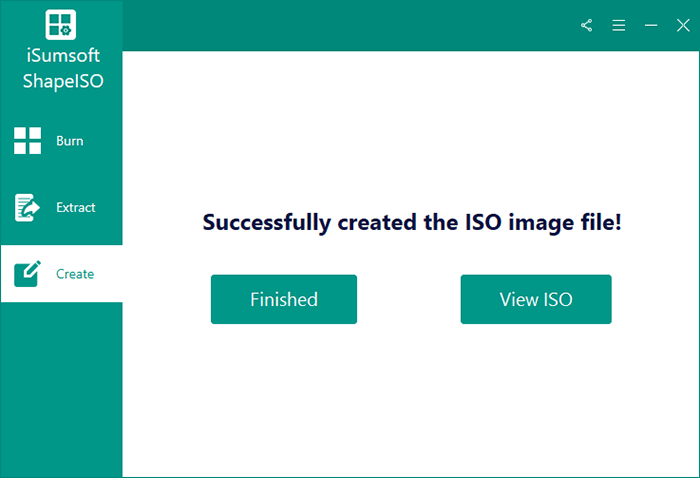
5. When creating the ISO image file is successful, you can click View ISO to check the created ISO file in the chosen folder. Then you can burn the created ISO to a DVD, CD or USB drive whenever you need.