Forgot your passcode and can't get into your iPhone/iPad? Got a second-hand device but don't know the passcode to unlock it? Want to remove an Apple ID from an iPhone/iPad but don't know the Apple ID password? Want a useful tool to manage all passwords on iOS devices? Forgot your iPhone/iPad Screen Time Passcode? Device is stuck on Remote Management screen or being supervised by the organization? Cannot turn off iTunes backup encryption as you forgot passwords? iPhone Passcode Refixer can help you solve all these problems. Now this tutorial will show you how to use iSumsoft iPhone Passcode Refixer in six parts.
Step 1: Launch iPhone Passcode Refixer on your computer and choose the option "Unlock Lock Screen".

Step 2: Click Start on the next page.

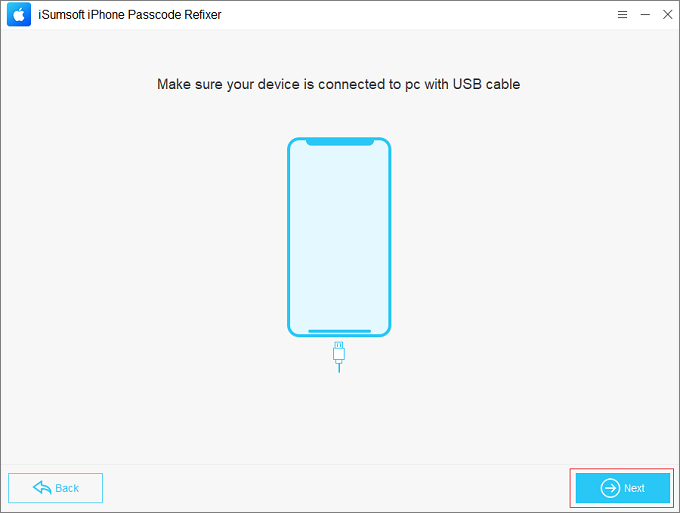
Step 3: On the next page, make sure your iPhone is connected to the computer and click on Next in the lower right corner. The software will automatically recognize your iPhone and load the device information.
Step 4: Now you're asked to download the firmware package needed to unlock the iPhone. Click on Download and the software will automatically start downloading the firmware package. If you already have a firmware package on your computer, click Select to add it. After downloading or adding the firmware package, the software will start verifying the firmware.

Step 5: Once the firmware verification is successful, click Unlock to start unlocking your iPhone. Your iPhone will immediately enter the recovery mode, then restart and update the iOS to the latest version.

Step 6: Wait for the unlocking process to complete. This takes a few minutes. When the "Unlock Screen successfully" appears on the software screen, click Done. Your iPhone will restart and be unlocked. Do not disconnect the iPhone from the computer until your iPhone is turned on and the Hello screen appears.

Someone has signed in his Apple ID on your iPhone and you can't remove the Apple ID without the password? Don't worry. iPhone Passcode Refixer allows you to quickly remove the Apple ID from the iPhone even without the Apple ID password.
Step 1: While the iPhone is connected to the computer, unlock the iPhone and tap Trust to allow the computer to access the iPhone.
Step 2: Launch iPhone Passcode Refixer on the computer and choose the Remove Apple ID option.

Step 3: On the next page, click on Start.

Case 1: If Find My iPhone is turned off on your iPhone, the software will immediately start removing the Apple ID from the iPhone. Your iPhone will restart and then restore the settings. The restore will be completed in one or two minutes. All settings on the iPhone, including the signed-in Apple ID, will be removed successfully. Then you can use a new Apple ID to set up the iPhone.

Case 2: If Find My iPhone is enabled on your iPhone and your device's iOS version is lower than 11.4, you first need to manually reset all settings on your iPhone before the software can remove your Apple ID. Go to Settings > General > Reset > Reset All Settings on your iPhone and then type your passcode to confirm the action. Once the reset is done, the software will start removing your Apple ID.

Case 3: If Find My iPhone is enabled and your device runs on iOS 11.4 or later, you must
ensure that:
1) Two-Factor Authentication is activated. To check the state of
Two-Factor Authentication, go to Settings > Apple ID > Password & Security.
2) Screen Password is on. You can set a password through Settings > Touch ID & Passcode.
Step 1: Input "0000" to confirm you have set up the screen password, and then click on Next.

Step 2: Similarly, enter "0000" to ensure that Two-Factor Authentication is enabled, then choose Next to proceed.

Step 3: Click the Download button to obtain the firmware package.
Tips: You could click the Select button
next to the "Save path" field to choose a different storage location. If you have
already downloaded a firmware package to your computer, click the "Select" option (located at the
bottom-right corner) to choose it, and the program will then begin the verification process
automatically.

Step 4: Wait for the download and verification to complete, then select Remove.

Step 5: Apple ID is being removed and it will take about 5 - 10 minutes.

Step 6: When prompted "Removed Apple ID Successfully", click Next.

Step 7: After completing the previous step, you need to activate your device by following the iPhone setup guidance before signing in with a new Apple ID, during which you must tap on Unlock with Passcode? and Use Device Passcode.

Step 1: While the iPhone is connected to the computer, unlock the iPhone and go to Settings > iCloud > Find My iPhone to turn off Find My iPhone.
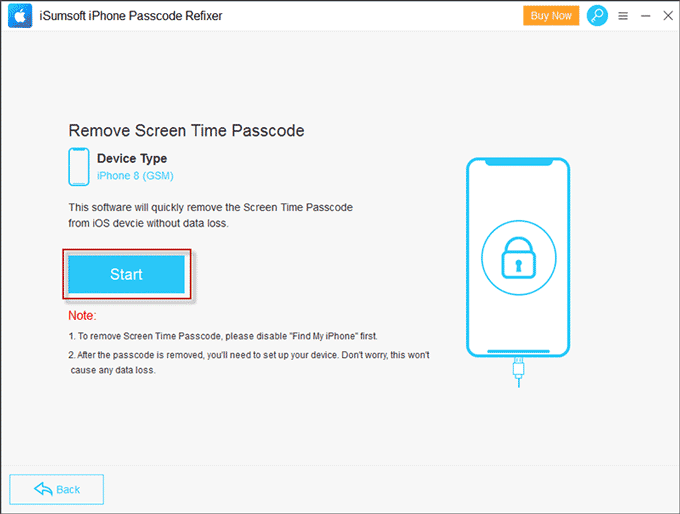
Step 2: Launch iPhone Passcode Refixer on the computer and choose the Remove Screen Time Passcode option.

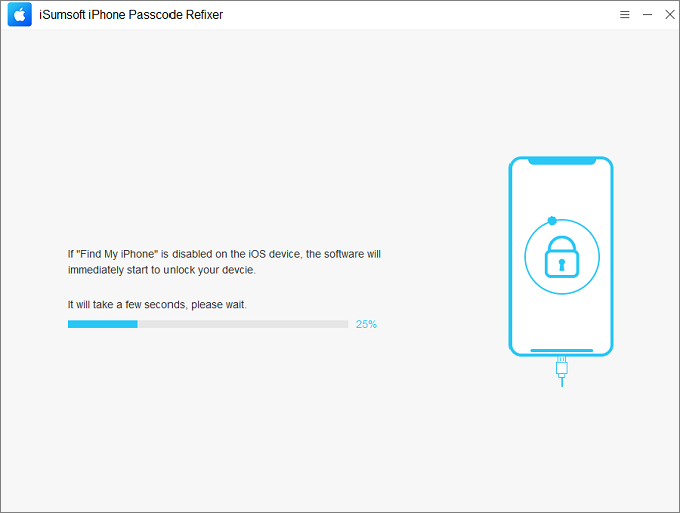
Step 3: On the next page, click Start. The software will start removing the screen time passcode.
Step 4: After a few seconds, the screen time passcode is removed successfully from the iPhone. The whole process won't cause any data loss.
Step 1: Connect your iPhone to your computer with a suitable USB cable. Your phone will be asked whether to trust this device, tap Trust.
Step 2: Launch iPhone Passcode Refixer on your computer and choose the option "iOS Password Manager".

Step 3: Click Start Scan to detect all your passwords.

Step 4: Before scanning, you need to enter the backup password to begin scanning.

If you don't know your backup password, try the following steps:
1) Tap Forgot Password? option.

2) You will come with a Remove iTunes Backup Encryption interface. Read the note and click Start to remove backup encryption.

3) Once removed, the program will set a backup password "aaa" for your device.

Step 5: When the scanning process is finished, you can view passwords on your device (including WiFi Account, Website&App, Email Account, Apple ID, ScreenTime Password).

Step 6: Click Export. You can select which passwords to export or select all passwords to export.

Step 1: Connect your iPhone to the computer. If asked to "Trust This Computer", tap Trust and enter your device passcode. Please note that you must disable "Find My iPhone" before proceeding. To do so, go to Settings > Apple ID > Find My. From there, turn off Find My iPhone.
Step 2: Launch iSumsoft iPhone Password Refixer on your computer, and select Remove or Bypass MDM.

Step 3: Click on Start to begin bypassing or removing MDM.

Step 4: MDM removal is in progress and may take several minutes to complete.
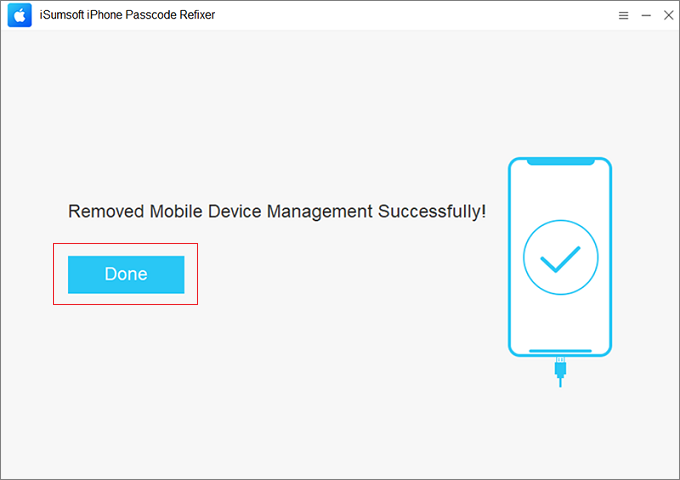
Step 5: Enter Done when prompted with "Removed Mobile Device Management Successfully!". Locate iPhone Settings and you will see that MDM has been successfully removed.
Step 1: Select Remove iTuns Backup Encryption.

Step 2: Read the onscreen notes, then click on Start to remove iTunes backup password.

Step 3: iTunes Backup Encryption is being removing.

Step 4: When "Remove iTunes Backup Encryption Successfully" appears on the interface, you have succeeded in bypassing the backup password.