You have tapped Trust on your iPhone, but the "Trust This Computer" alert still keeps popping up? Why does iPhone keep asking if you trust this computer, and how to stop it? This article will address this problem.

Normally, when you connect your iPhone to a computer for the first time, an alert pops up on your iPhone asking whether you trust the computer.
If you tap Trust, the computer can access the data and settings on your iPhone, and you can transfer photos and videos back and forth between them. Then, you will not see the Trust alert every time you connect your iPhone to this computer. Because your iPhone has remembered the computer you've chosen to trust, and will no longer pop up the Trust alert every time it is connected to this computer. The computer remains trusted until you change the Trust settings or erase your iPhone.
If you tap Don't Trust, the computer has no access to the content on your iPhone, and you iPhone is only charging on that computer. Then, the Trust alert will appear again the next time you connect your iPhone to that computer.
However, in some special cases, even if you have tapped Trust, the iPhone still keeps popping up the Trust This Computer alert. This can happen when iPhone is connected to a Mac or Windows 10 computer. The problem may lie in the cable, computer, or iPhone. When restarting the device and changing the cable do not help, try the following methods. At least one or more of these methods will help fix this problem.
An old version or improperly installed iTunes on your computer sometimes may cause issues related the iPhone connection, including the Trust alert that keeps popping up. Updating or reinstalling iTunes on the computer may solve the problem.
1. Open iTunes on the computer, then click Help > Check for Updates. If you are prompted that a new version of iTunes is available, download and install it on your computer.
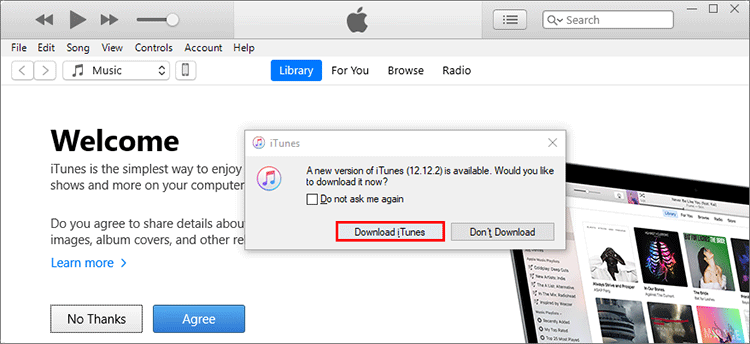
2. If you are already using the latest version of iTunes, you can uninstall it, then redownload and reinstall it on your computer.
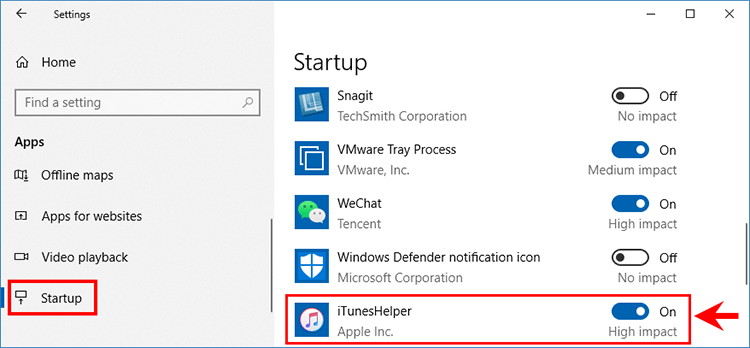
3. Also, make sure that the iTunes Helper app on your Windows 10 computer runs automatically at startup. To do so, go to your Windows 10's Settings > Apps > Startup, and then turn the iTunesHelper on.
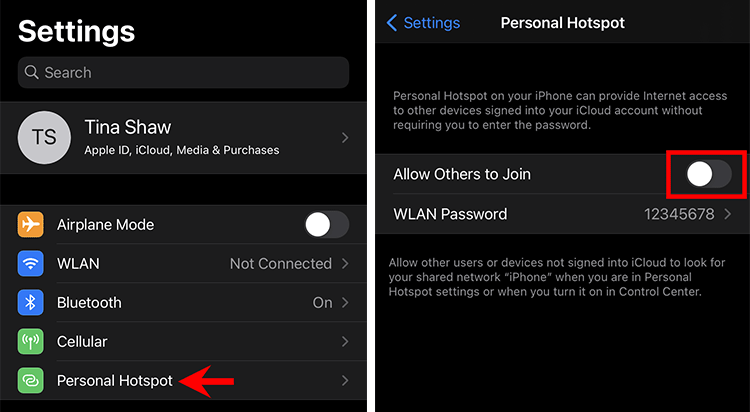
Some users reported that when they turned off the Personal Hotspot, the iPhone stopped popping up the Trust This Computer alert. So, please try this trick.
Open the iPhone's Settings app and tap Personal Hotspot to check if it is turned on. If it is on, toggle "Allow Others to Join" Off to disable Personal Hotspot.
If the previous steps do not help, it's time to reset the Trust settings on your iPhone. In many cases, this will help solve iPhone stuck on the Trust This Computer message loop, and it won't delete any of your personal files on your iPhone.
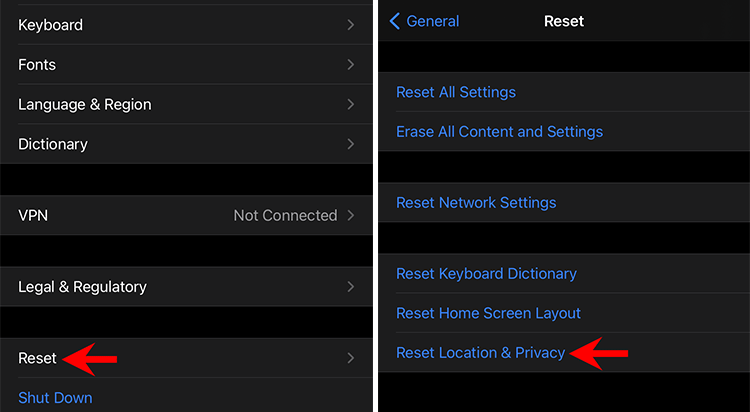
1. Go to Settings > General > Reset > Reset Location & Privacy to reset all of the location and privacy settings, including Trust settings, to the factory default.
2. Reconnect the iPhone to your computer and tap Trust when prompted. This time, your iPhone should remember this computer and no longer pop up the Trust alert every time it is connected.
3. In case resetting location and privacy settings doesn't help, go to Settings > General > Reset > Reset Network Settings.
If you've tried all the methods listed above, but your iPhone still keeps asking to trust your Windows 10 computer, the problem may lie in iOS glitch. In order to avoid unnecessary trouble and save time, we strongly recommend that you use the iSumsoft iOS Refixer tool to help solve the problem quickly.
iSumsoft iOS Refixer is a safe and powerful iOS repair tool for PC that helps fix various iOS software problems, including the Trust This Computer issue, without causing any data loss. You just need to download and install iSumsoft iOS Refixer to your Windows 10 computer, then follow the steps below to repair your iPhone and stop it from always asking to trust the same computer.

iSumsoft iOS Refixer
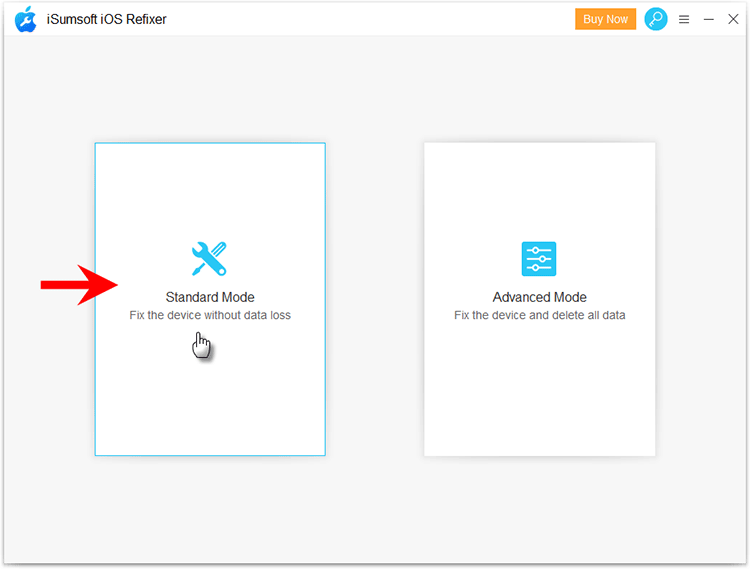
Step 1: Open iSumsoft iOS Refixer on your computer, and then select Standard Mode.
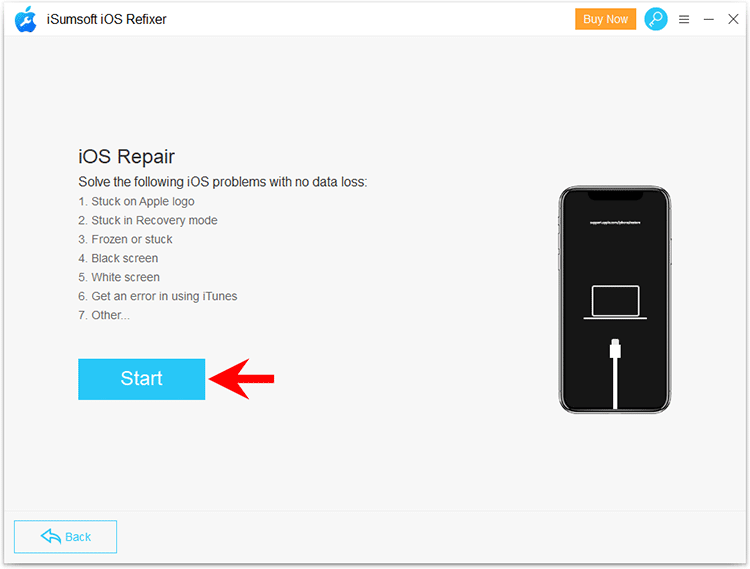
Step 2: The most common problems that the software can solve are listed on the screen. You just need to click Start to proceed.
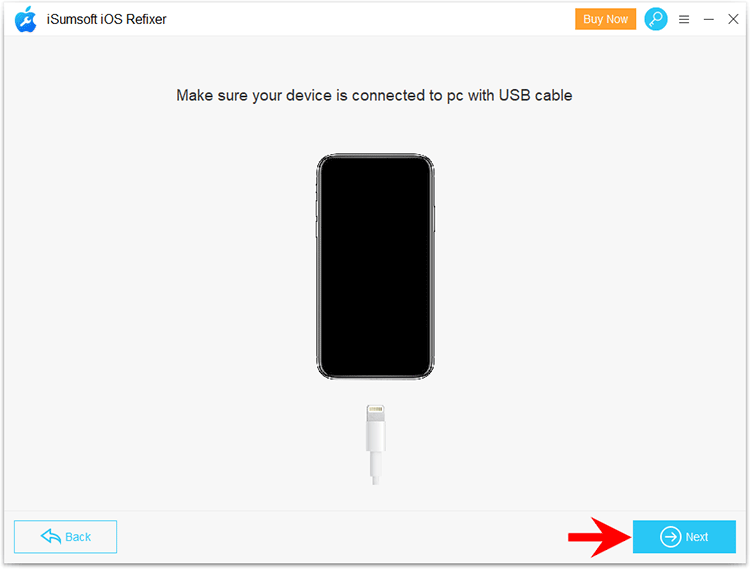
Step 3: Connect your iPhone to your computer using a USB cable, and tap Trust when prompted. Then, click Next on the iSumsoft iOS Refixer window. The tool will recognize your iPhone and load its information.
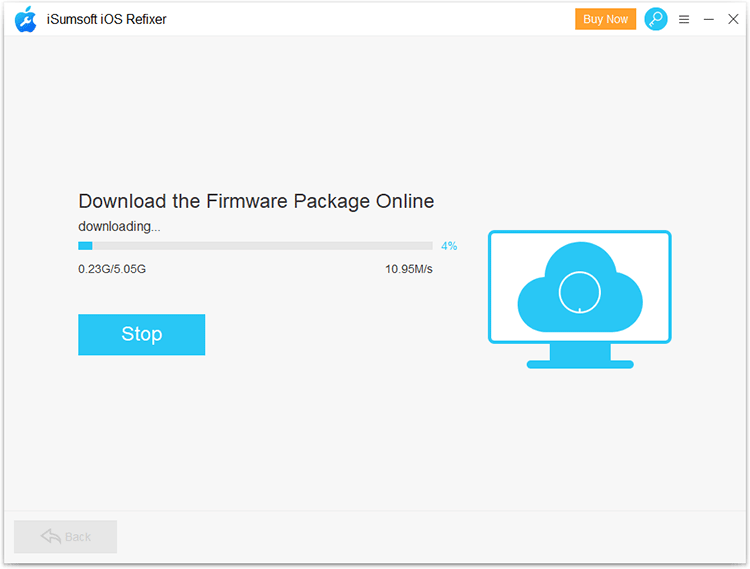
Step 4: Click Download to get the software to start downloading the latest firmware required to fix the iPhone issues.
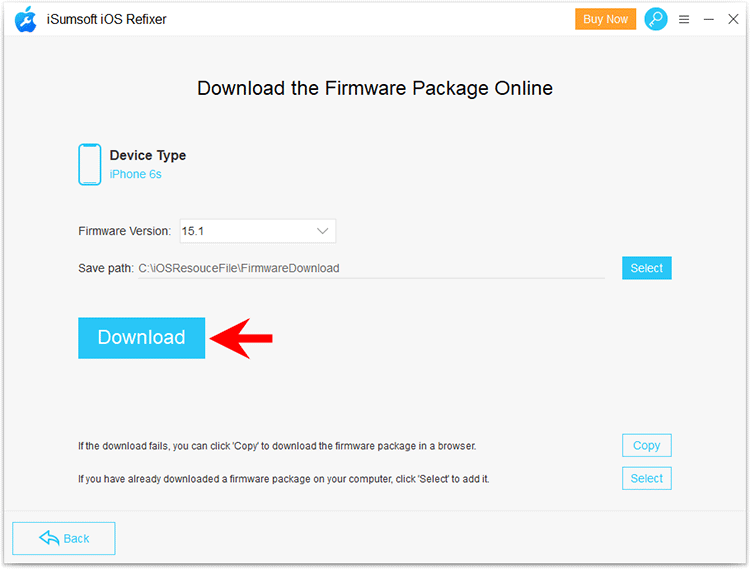
Step 5: The download will take a few minutes. Keep the iPhone connected and wait for the download to complete. When the download is complete, proceed to the next step.
Step 6: Click Repair and the software will immediately start repairing your iPhone.
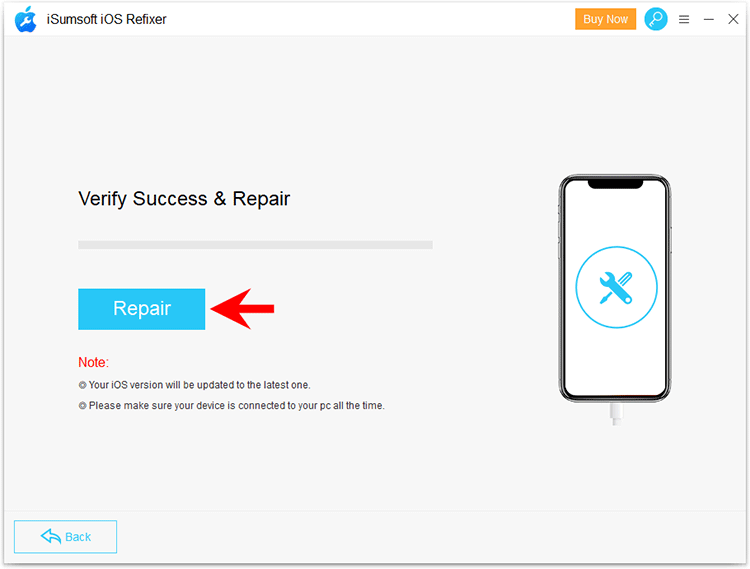
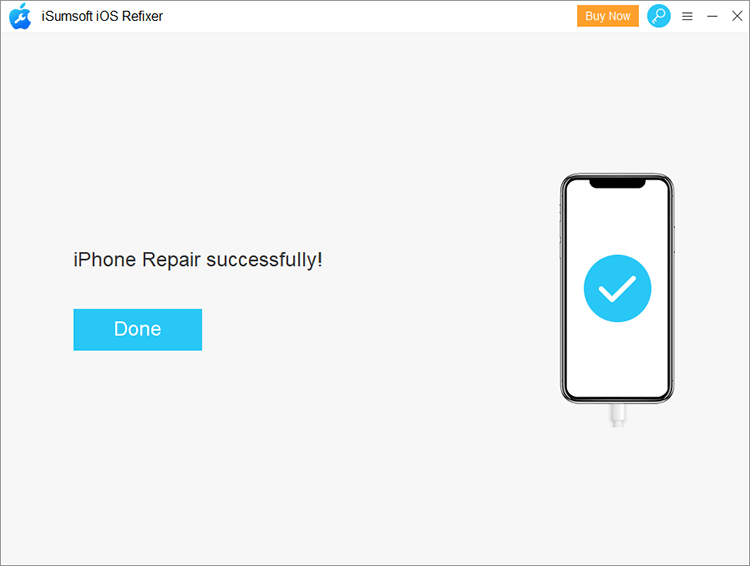
Step 7: When the software displays the message "iPhone Repaired Successfully", your iPhone will restart and the problem should have been resolved. The software has fixed any software issues that cause the iPhone to always ask if you trust this computer.