iSumsoft Android Refixer is a great repairing tool for Android system problems like app crash, phone black screen, and so on. Now, this article aims to show you how to use iSumsoft Android Refixer.
iSumsoft Android Refixer is a software program for windows. So please download and install it on your Windows computer first, and then follow the steps below.
Free DownloadiSumsoft Android Refixer helps you repair your phone quickly, and access your phone successfully. Please follow the steps below.
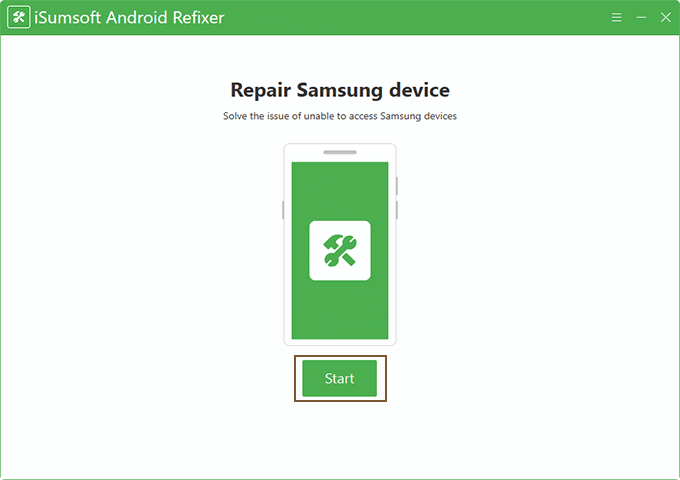

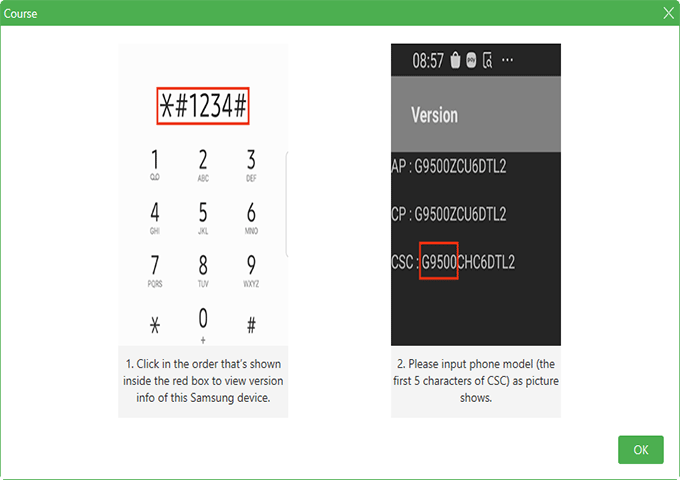
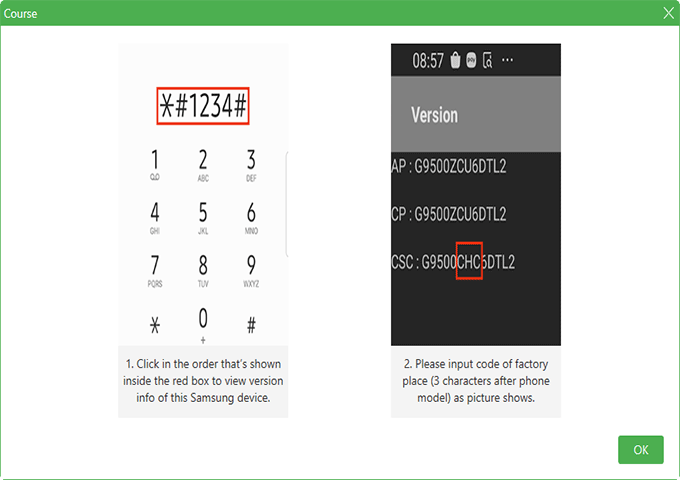
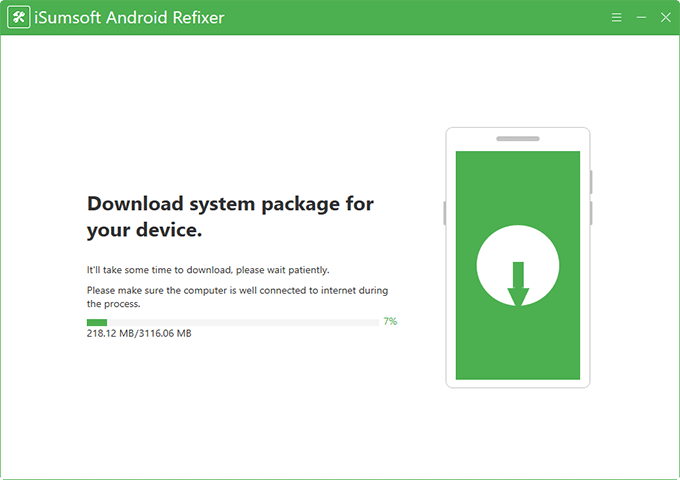
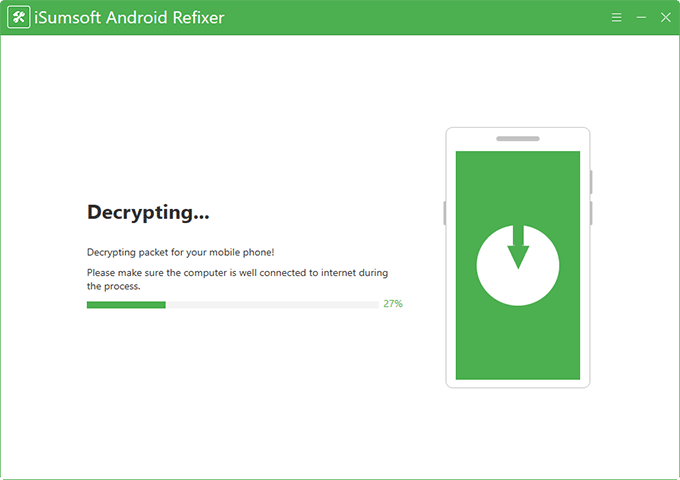

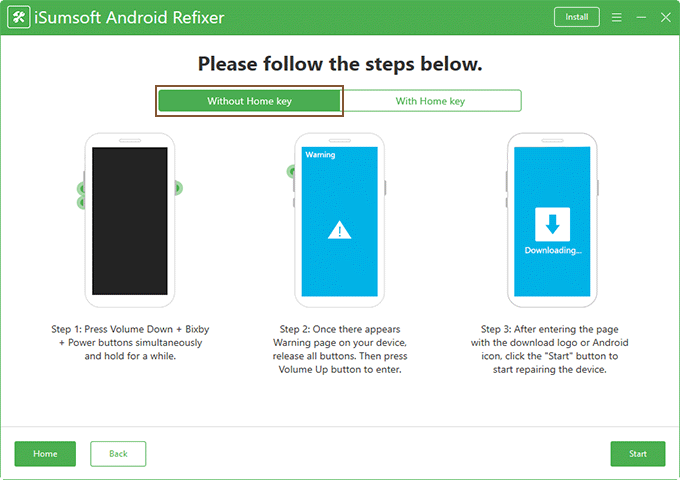
First, observe whether your phone has a home key, and then switch to the corresponding page according to the type of your phone. Next, use a usb cable to connect your phone with your computer. After connecting successfully, please reading the specific steps carefully and operate your phone according to it. Now, you can click "Start" to repair your device after finishing the above operations.

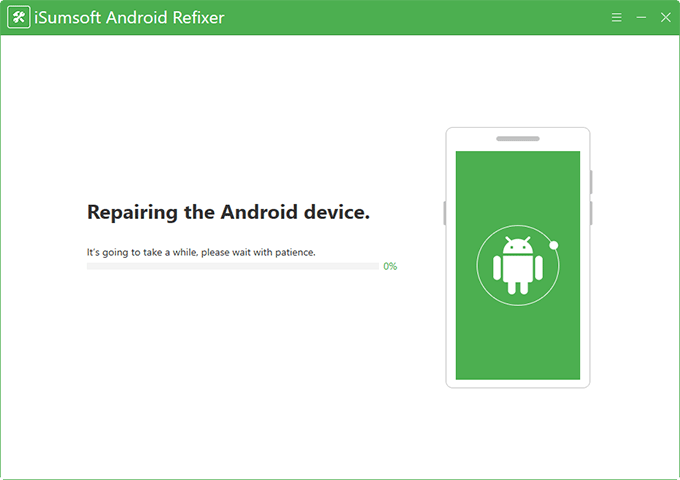
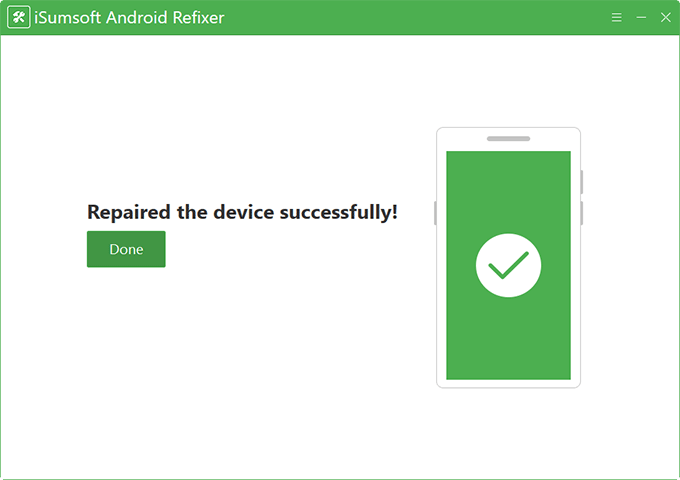
Now, the screen will show that your Android device is being repaired. After waiting patiently for a period of time, the computer will tell you that the repair is successful. At this time, you can hold your phone to reactivate it.
You may also encounter a situation that you fail to repair the device. Next, I will show you how to solve the problem of failed repairs.
If you fail to repair your device, you can see the following page.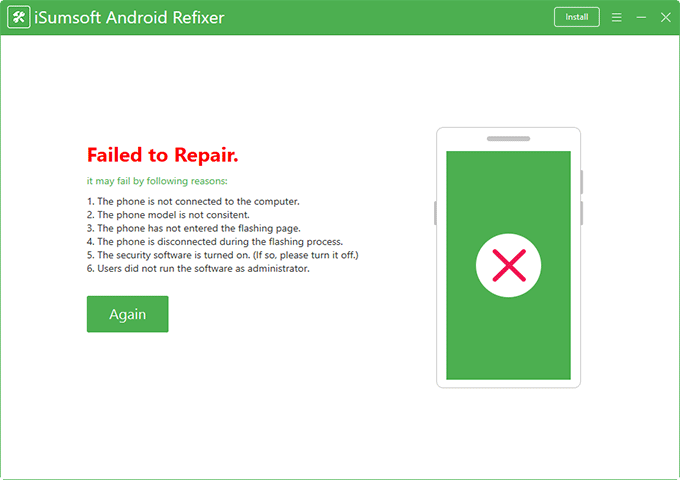
Firstly, check whether your usb cable is valid. If it is invalid, the phone will not connected to your computer. Secondly, check whether your device information is correct, especially the device model. Thirdly, make sure your phone has entered the flashing page, and keep connecting with your PC during the flashing process. Forthly, turn off your security software on your PC. Fifthly, please run this software as administrater. According to the above five points, follow the steps in the part 1 and operate again.