Want to take Windows 10 with you, but don't want to take your computer? Thanks to USB technology, you don't have to. USB drives can run portable Windows. Just create a portable version of Windows 10 on a USB drive, then take the USB drive with you and you can use your Windows 10 wherever you go. This page shows you how to make portable Windows 10 on a USB drive.

When you are going on a business trip or long-distance travel, you may want to carry your laptop with you, because it has your important work, frequently used apps, and familiar settings. However, if you have other luggage, it may not be convenient to lug your laptop. In addition, there is a risk of loss or theft of your laptop by carrying it around with you.
In either case, a portable Windows 10 USB drive is a good option when you want to take your personalized Windows 10 with you but can't take your own computer. It enables you to instantly access your own Windows 10 via USB on any host with a monitor, anytime, anywhere.
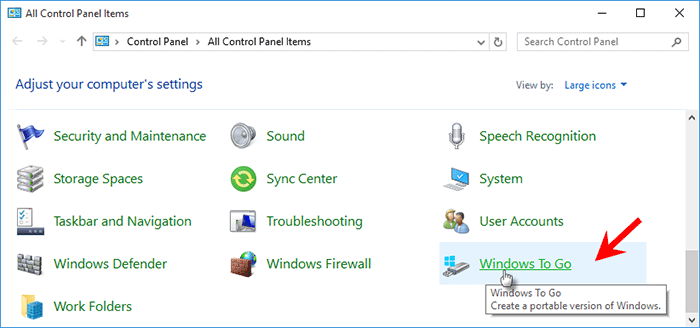
Windows To Go is a feature built in Windows 10, which is specially used to create a portable version of Windows 10 on a USB drive. You can find this feature in the Control Panel. It can not only create a portable copy of your current Windows 10 installation on the USB drive, but also install a fresh, portable version of Windows 10 on the USB drive.
However, Windows To Go is available only in Windows 10 Enterprise and Windows 10 Education, and it requires the use of Windows To Go certified 3.0 USB drives. More unfortunately, due to difficulties with feature updates, Microsoft has removed Windows To Go in Windows 10, version 2004 and later.
We have a guide on how to create a portable version of Windows 10 on a USB drive using Windows To Go in Windows Enterprise.
Rufus is a small utility for creating bootable USB drives for Windows and Linux. It can create a bootable USB drive from an ISO image for installing Windows or running a portable version of Windows. The program works for Windows 11/10/8 and supports most USB drives. To create a portable Windows 10 USB drive using Rufus, follow the steps below.
1. Download Rufus and a Windows 10 ISO file on your computer, and insert a USB drive into a USB port of your computer.
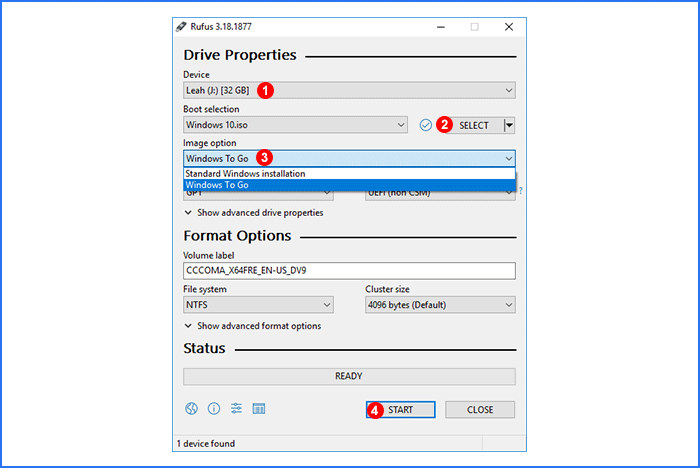
2. Run Rufus and select the USB drive on which you want to create portable Windows 10 from the Device drop-down menu.
3. Click the SELECT button, navigate to the Windows 10 ISO file on your computer, and then select the ISO file to add it to Rufus.
4. Once the ISO file is added, Rufus displays the Image option. Choose Windows To Go from the Image option drop-down menu.
5. Leave the other options on the page at their default values, and then click the START button at the bottom.
6. Select the version of Windows 10 you want to install on the USB drive and click OK. Click OK again and Rufus will start creating a portable version of Windows 10 on your USB drive.

7. All that's left is to wait for the creation to complete. This will take 10 to 30 minutes, depending on the write speed of the USB drive itself. When the progress bar at the bottom reaches 100% and then shows Ready, it means the creation is successful.
iSumsoft SYSOnUSB is another simple and yet powerful tool for creating portable Windows 10 on USB drives. It works for any versions of Windows 11/10/8/7 and Windows Server, and supports any USB drives.
The software is designed with two methods of creating portable Windows. One is to create a portable copy of an existing Windows, and the other is to install a clean, portable version of Windows on the USB drive.
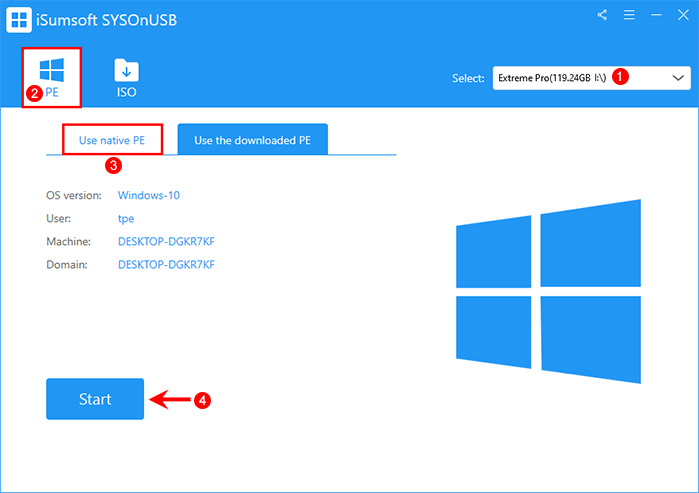
1. Run iSumsoft SYSOnUSB, select your USB drive from the drop-down menu in the upper right corner, and then select PE > Use native PE > Start to start creating a WinPE bootable USB drive.
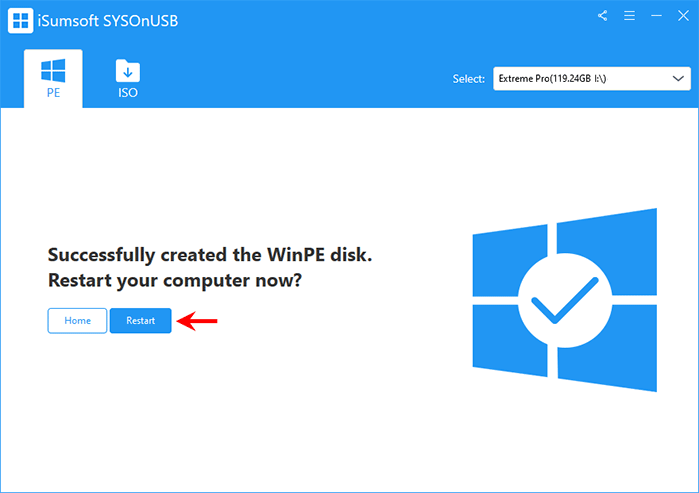
2. When the WinPE USB drive is created successfully, keep the USB drive connected and restart your computer. As soon as your computer restarts, immediately press and hold F12 or Del to enter the Boot Menu, and then choose the USB drive as the primary boot device.
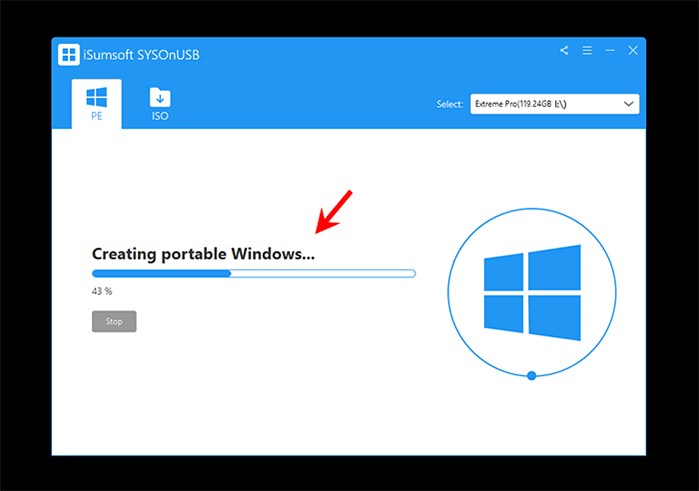
3. After your computer boots from the USB drive, iSumsoft SYSOnUSB will automatically start creating a portable copy of your existing Windows 10 onto the USB drive.
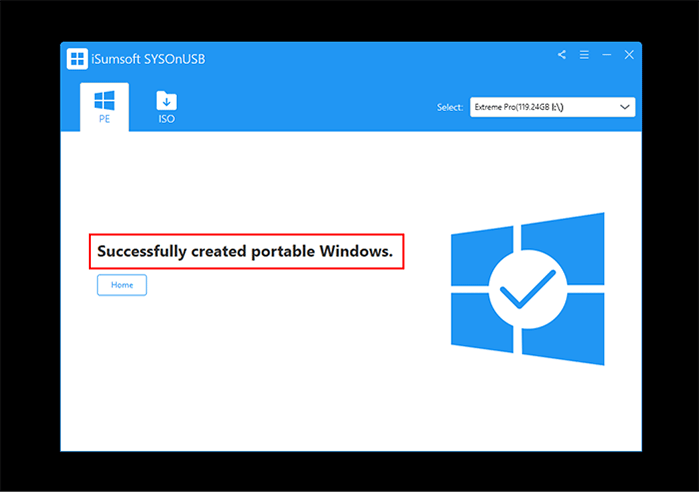
4. Wait for the creation process to complete. When the software screen displays the message "Successfully created portable Windows", your portable Windows 10 USB is ready.
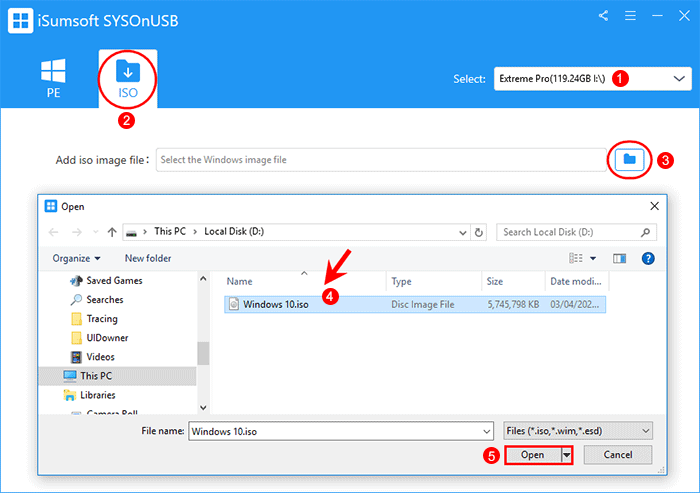
1. To begin with, select your target USB drive from the drop-down menu in the top right of the software page.
2. Select the ISO option in the top left, and under this option, click the file icon to add the Windows 10 ISO file to the software.
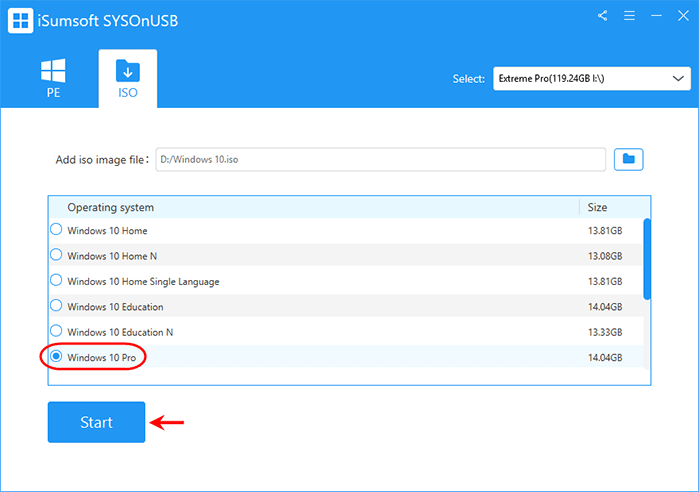
3. Select the version of Windows 10 you want to install on the USB drive, and then click Start. The software will start creating a portable version of Windows 10 on the USB drive.
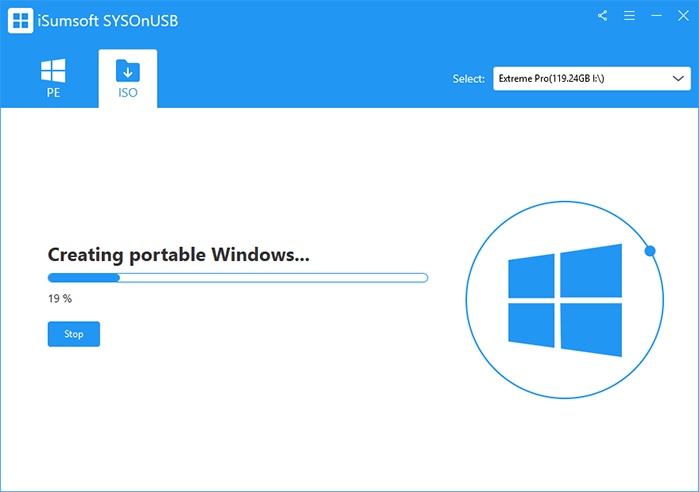
4. Just wait until the creation is complete, and once it is completed, you will receive the success message on the software page.
Now that you have a made a portable version of Windows 10, how do you use or run it from the USB drive? Apparently, you can't use it without a host computer with a monitor. Portable Windows will not run automatically if you just plug the USB drive into the computer. You need to use the USB drive as the host computer's primary boot device.
1. Plug the portable USB drive into any computer around you.
2. Start or restart the computer and enter its Boot Menu or BIOS settings to set the computer to boot from the USB drive.
3. Once the computer has finished booting from the USB drive, portable Windows 10 will run directly on the monitor via the USB drive. This won't affect the operating system installed on the host computer's internal hard drive.