
Unleashing the full potential of a second-hand iPhone can be an exciting prospect, but encountering a device locked to the previous owner, with an iPhone Locked to Owner screen, can present unexpected challenges and a frustrating experience.
Fear not, however, as this article will walk you through the steps and options available to bypass iPhone Locked to Owner and regain full ownership and control of your newly acquired iPhone.

iCloud Activation Lock is a security feature implemented by Apple on its iOS devices, including iPhone, iPad, and iPod touch. It is designed to prevent unauthorized access and use of a device in case it is lost, stolen, or sold without the original owner's consent.
Activation Lock turns on automatically when the owner sets up Find My. After it's turned on, Apple securely stores the owner's Apple ID on its activation servers and links it to the owner's device. The owner's Apple ID password or device passcode is required before anyone can turn off Find My, erase the device, or reactivate and use the device.
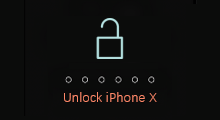
On a device with iOS or iPadOS 15 or later that is protected by Activation Lock, you see an iPhone Locked To Owner screen when you turn on or wake the device.

Contacting and asking the previous owner to remove the Activation Lock from the account using a browser is the fastest way to solve this problem. Try the following steps.
Step 1: Go to iCloud.com and sign in with Apple ID and password.

Step 2: Click on Find iPhone, then enter the password to access the Find My Phone page.

Step 3: On the top, click All Devices, then select the locked iPhone.

Step 4: Click Erase iPhone, then click on Erase to erase all the data on the iPhone.

Step 5: After erasing the iPhone, continue to click on Remove from Account to complete.

If you are stuck on the iPhone Locked to Owner screen and cannot contact the previous owner, you may need the help of third-party software, and iSumsoft iLock Refixer can totally help you out.

Before using the software, it is noted that you cannot set a Screen Passcode, Fingerprint and Face ID for the device running iOS 15 and later after bypassing Activation Lock, or you will be locked out of the Activation Lock again. If this happens, you need to remove it again.
Step 1: Launch iSumsoft iLock Refixer and connect the locked iPhone to the computer, then select Bypass ID.

Step 2: You need to agree on the agreement by checking the box, then click on Start and your iPhone will access Recovery mode automatically. (Note: If you are already in recovery mode, you will be asked to exit Recovery mode by clicking OK.)

Step 3: The software will begin downloading files for jailbreak.

Step 4: Once the download is complete, you will need to put your iPhone into DFU mode. Select your iPhone model and follow the on-screen instructions to complete the process.

Step 5: When the device is in DFU mode, the software will start jailbreaking.

Step 6: If your iPhone is successfully jailbroken, it will return to recovery mode and you will need to put it back into DFU mode.
Step 7: Then the software will begin bypassing the iCloud Activation Lock once it accesses DFU mode.

Step 8: Click Done when "Successfully Bypassed" appears, and your device will restart automatically. Then you can set up your device.

Step 1: Connect a USB flash driver and your iPhone to the computer, then launch the software and select Bypass ID.
Step 2: Check Have read and agreed on the agreement, then click on Start.
Step 3: You will be prompted to jailbreak your device, click OK to prepare for jailbreak or you can click on the iOS jailbreak tutorial to learn the complete process.
Learn jailbreak iOS 14 and earlier or jailbreak on iOS 15 and later.

Step 4: The software will detect your USB device automatically. Click Auto Burn, then Start, and this operation will erase all the data on the USB driver, enter Yes to burn a disk.
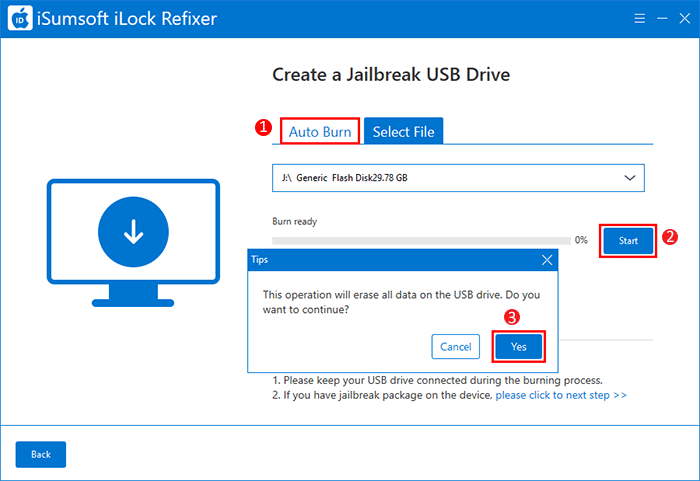
Step 5: If "Burn Success" appears, then click OK.

Step 6: Follow the onscreen instructions to jailbreak your device.

Step 7: After the successful jailbreak, your device will restart automatically. Open iSumsoft iLock Refixer and select Bypass ID > Start again, which will immediately start bypassing the activation lock.
Step 8: When "Successfully Bypassed" appears, your device will restart automatically and you can click Done to exit the program. You can now reset your device.
![4 Ways to Remove Apple ID from iPhone without Password [2021]](../images/apple/how-to-remove-apple-id-from-iphone-without-password/remove-apple-id-without-password.png) 4 Ways to
Remove Apple ID from iPhone without Password [2021]
4 Ways to
Remove Apple ID from iPhone without Password [2021]
 Reset Screen
Time Passcode iOS 12/13/14/15 without Apple ID
Reset Screen
Time Passcode iOS 12/13/14/15 without Apple ID
 How to Factory
Reset iPhone without Passcode/Computer/iTunes
How to Factory
Reset iPhone without Passcode/Computer/iTunes
 How to Fix
iPad Unavailable/Security Lockout in 4 Useful Ways
How to Fix
iPad Unavailable/Security Lockout in 4 Useful Ways
 How to Turn on or off
iCloud Backup on iPhone
How to Turn on or off
iCloud Backup on iPhone
 4 Ways to Unlock iPhone
X/11/12 without Passcode or Face ID
4 Ways to Unlock iPhone
X/11/12 without Passcode or Face ID