
As the latest version of Windows created by Microsoft, Windows 11 has attracted many people for its updating features such as Snap Layout and Group, Widgets, Android App Support, etc. However, some users can not install Windows 11 on their Computer due to the hardware issue or hesitate to install it because of the unknown bugs. To get rid of these problems, you can test Windows 11 on VMware without making any changes on your original system and data. Now follow the steps to learn how to install VMware Workstation 16 Pro.

Before you install Windows 11 on virtual machine, you need to:
Install VMware Workstation 16 Pro for Windows on Computer
Download Windows 11 Disk Image (ISO) to Computer
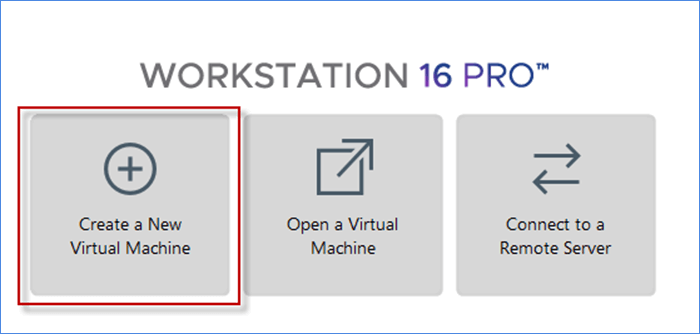
1. Launch VMware Workstation 16 Pro, click Create a New Virtual Machine or press Ctrl + N.
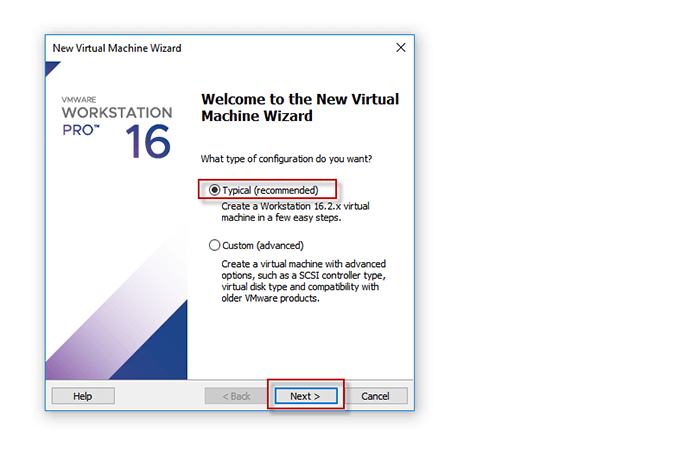
2. In the new virtual machine wizard, choose Typical configuration and click on Next to create a virtual machine in easy steps.
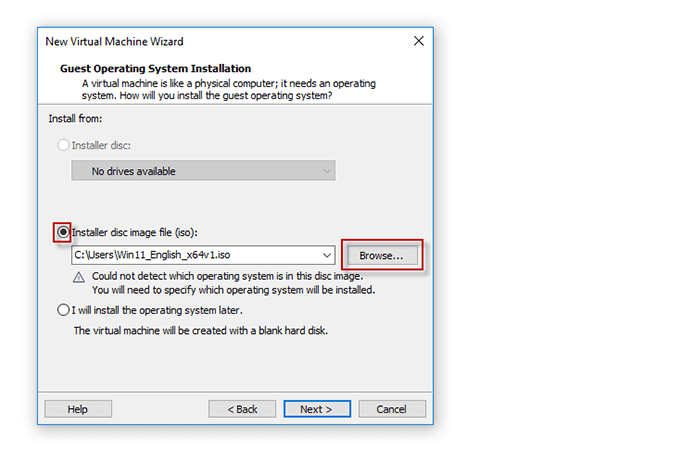
3. Choose Installer disc image files and click on Browse to select the Windows 11 ISO file stored on PC.
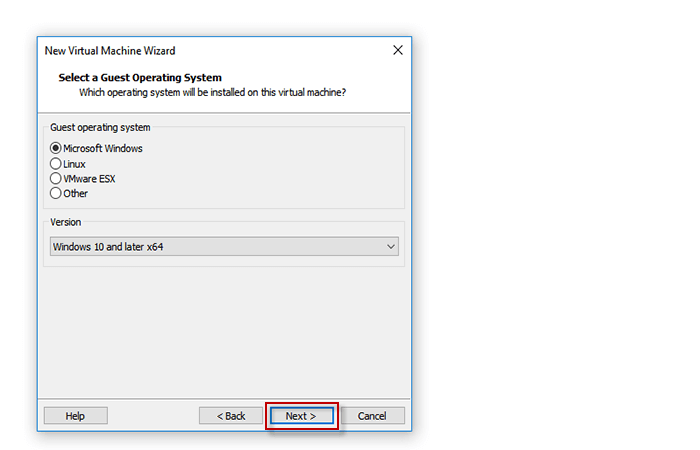
4. Select Microsoft Windows and Windows 10 and later x64 version by default. Then click on Next.
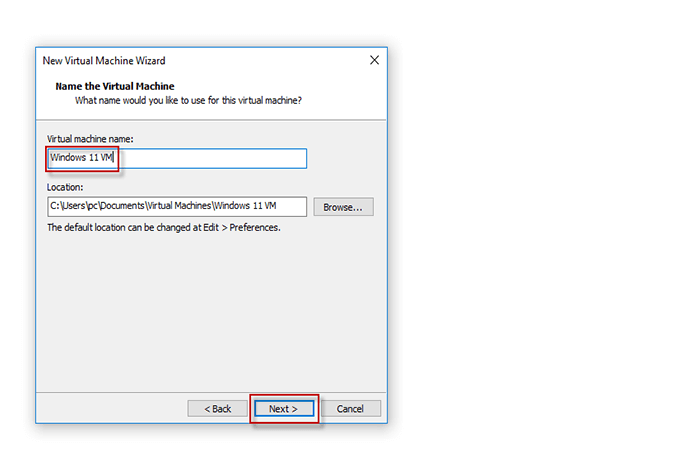
5. Name your virtual machine such as Windows 11 VM according to your preference.
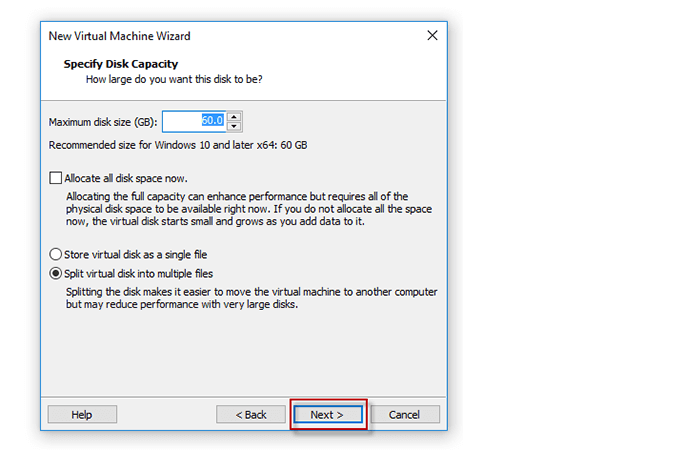
6. Set maximum disk size. For Windows 11, 100 GB or 120GB is suggested. Then click on Next.
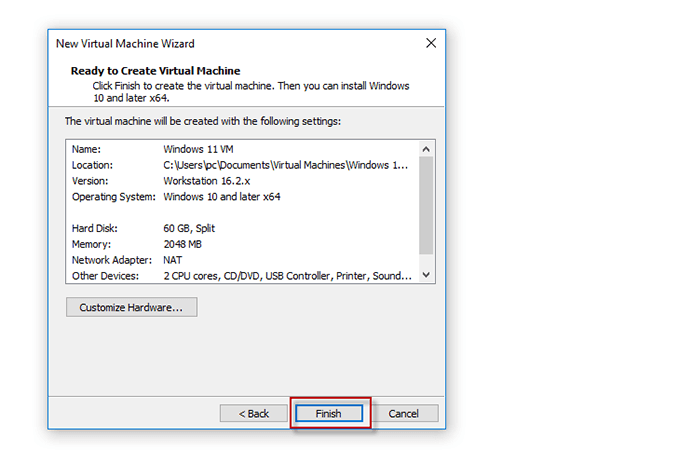
7. Finally click Finish and you can successfully create a new virtual machine.
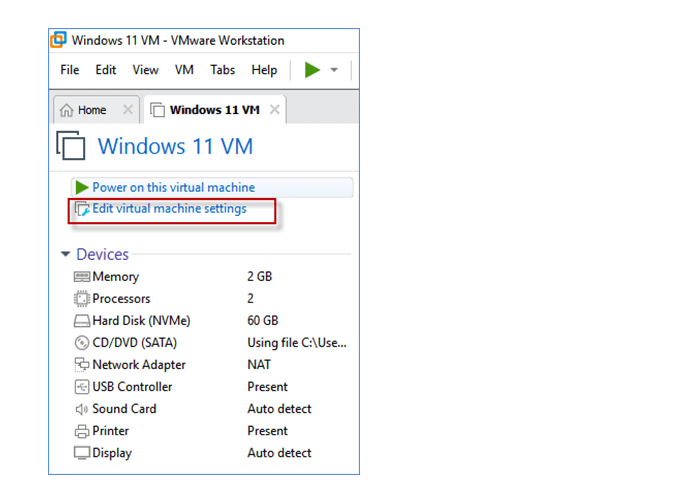
Follow the step 1 you will create a new virtual machine with Windows 10 and later x64. If you want to install Windows 11 on VMware Workstation 16 Pro, you need to adjust the virtual settings to meet the minimum system requirements to install Windows 11.
1. Click on Edit virtual machine settings to change the device configuration.
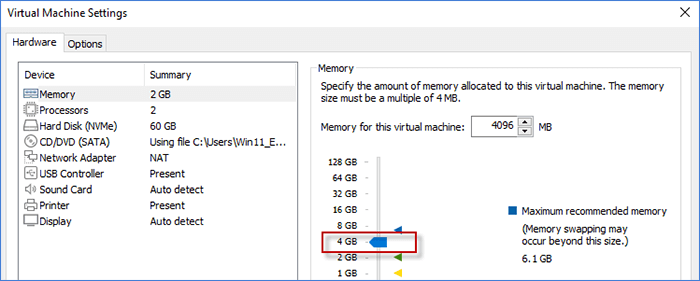
2. Choose Memory and drag the slider to choose 4 GB or greater for Windows 11.
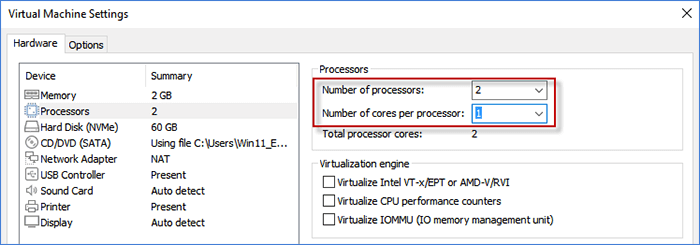
3. Choose Processors and configure your CPU. Ensure your virtual machine has 2 or more virtual processors for Windows 11. Then click OK if you finish the adjustments.
After the adjustment of virtual settings to meet the install requirements for Windows 11, you can start to install Windows 11 on VMware Workstation 16 Pro as follows.
1. Click on Power on this virtual machine and press any key to boot from CD or DVD. If you meet error "EFI network timeout" on VMware Workstation, click here to fix it.

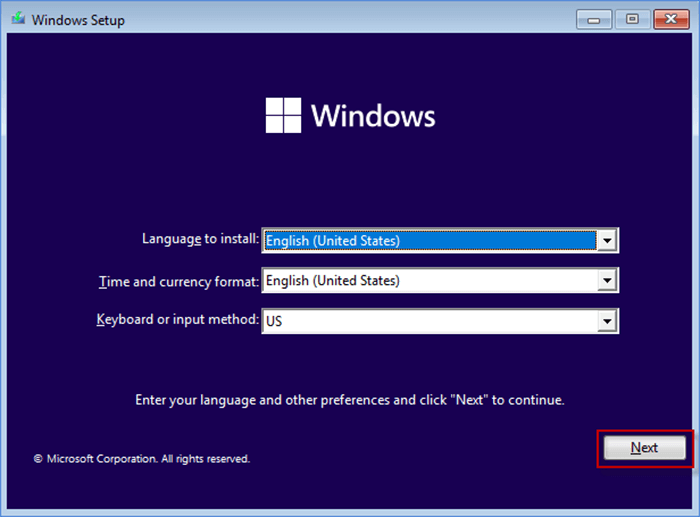
2. Set your language, time and currency format and keyboard. Then click on Next.
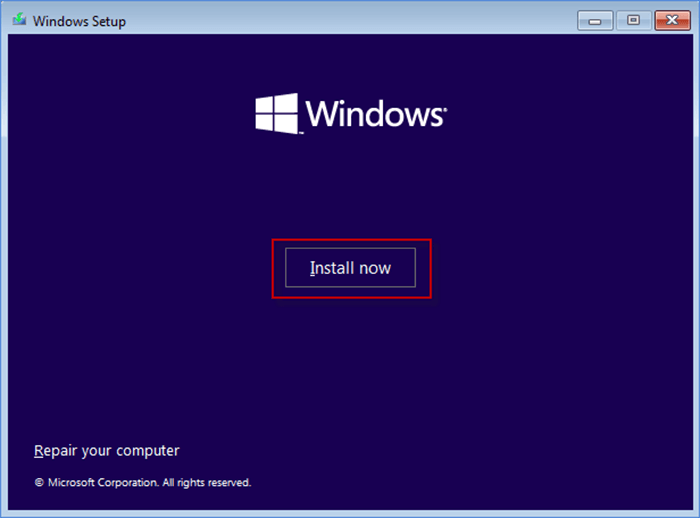
3. Click on Install now to start Windows Setup.
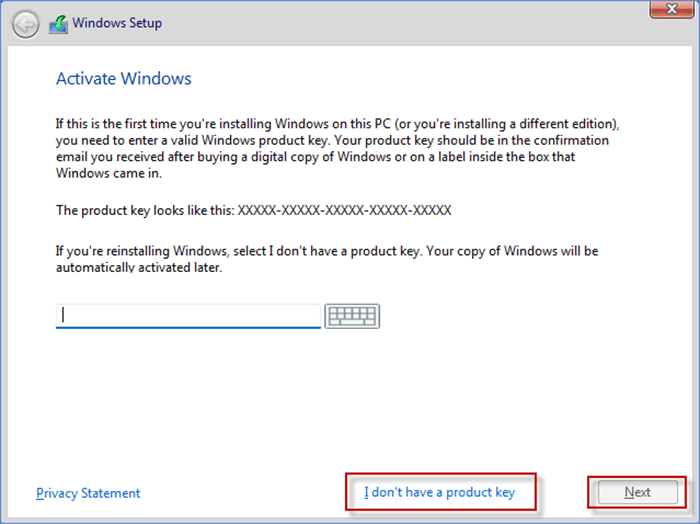
4. Enter the product key if you have one or just choose I don't have a product key. Then click Next.
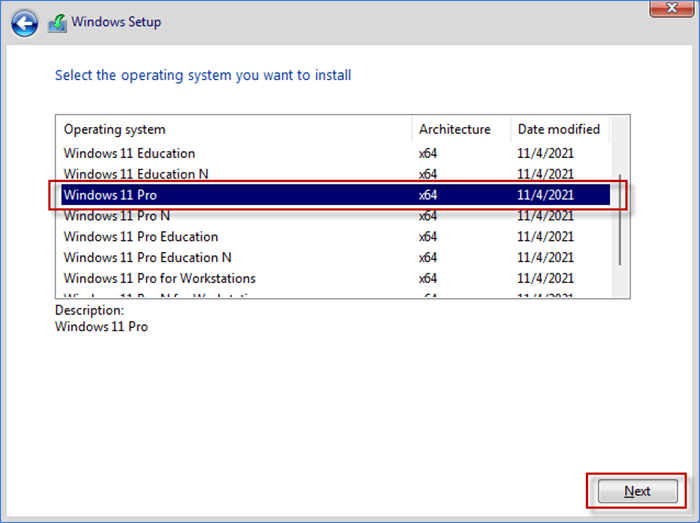
5. Choose Windows 11 version you prefer to install and click on Next.
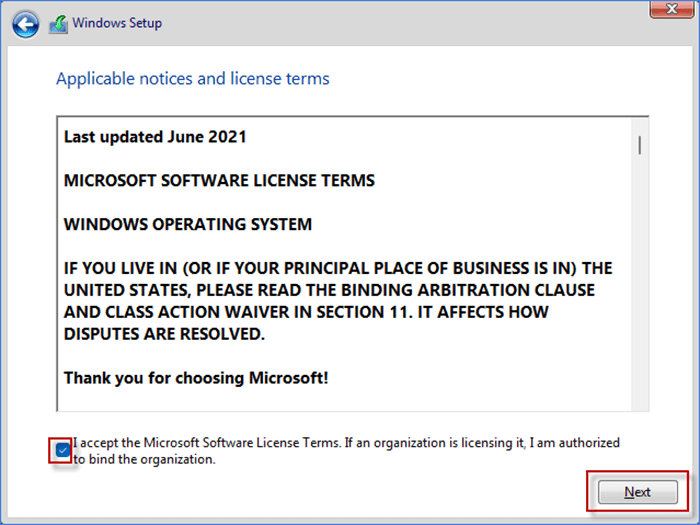
6. Check the box to accept the Microsoft Software Terms and click on Next. If you meet an error "This PC can't run Windows 11", you need to fix it first.
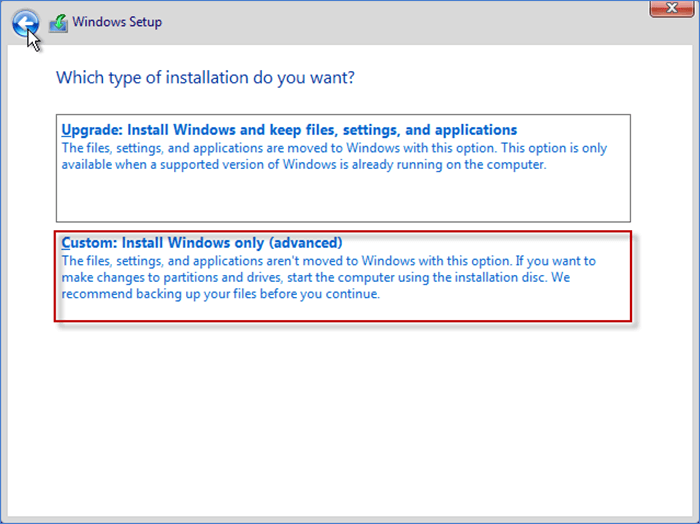
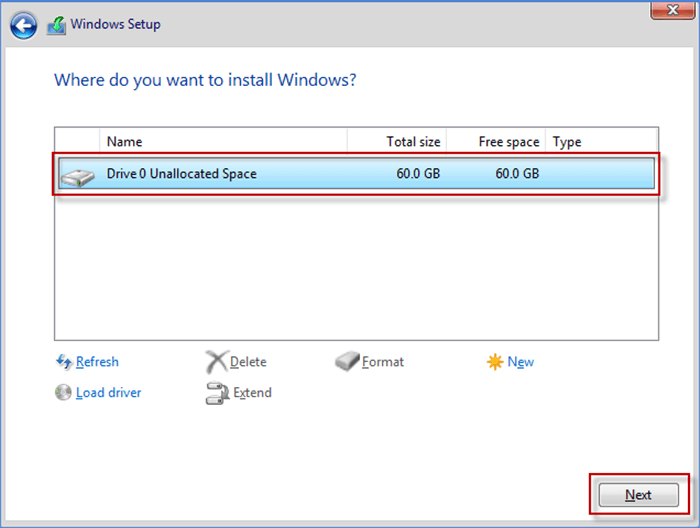
7. Select Custom: Install Windows only(advanced)
8. Choose virtual hard disk and click on Next. It may cost few minutes to install Windows 11 on VMware Workstation 16 Pro.
When you install Windows 11 on VMware Workstation 16 Pro, you need to finish the initial setup including region, keyboard layout and account information to get in the Windows.
1. Choose your country or region and click Yes. Then set your keyboard layout or skip. Next, you can name your device.

2. Choose Set up for personal use and click on Next.

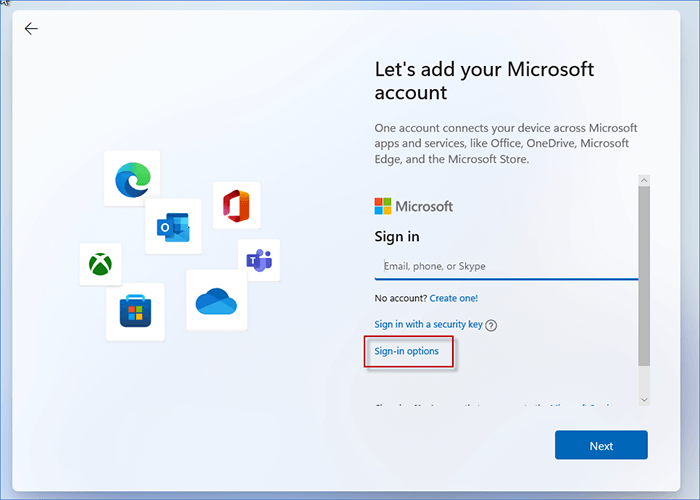
3. Click Sign-in options and select Offline account to sign in. Then click Skip for now to continue. Next, you are able to set your user name and enter a password. Finally click on Accept to save your privacy settings for device.
4. Wait for a few minutes and you will successfully install Windows 11 on VMware Workstation 16 Pro.
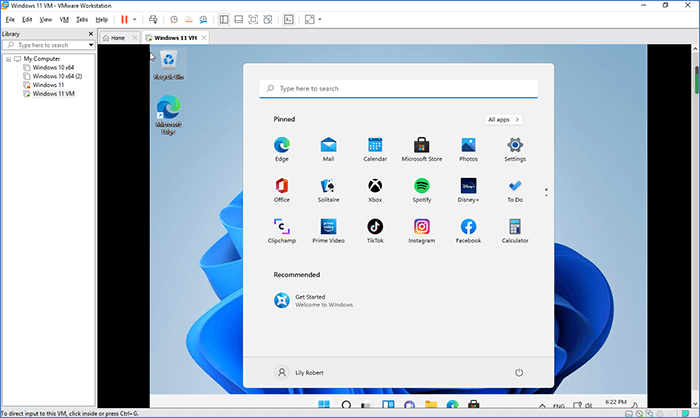
That's all the steps on how to install Windows 11 on VMware Workstation 16 Pro. Hopefully, this can help you enjoy the features of Windows 11 without upgrading. Thank you.