A virtual machine enables you to run an operating system in an app window on your desktop that behaves like a full, separate computer. With VM, you can boot different operating systems and test software not supported in current OS in a safe environment. However, when you create a new Windows VM, you may meet an issue that called VMware EFI network timeout.

The VMware EFI network timeout issue is usually caused by a firmware mismatch. BIOS and UEFI are two firmware interfaces for booting an OS, but UEFI has limited compatibility, and not all motherboards support it. If you select UEFI as the firmware type for your VMware virtual machine, it may result in an EFI network timeout error. To resolve this, switch the VMware firmware type from UEFI to BIOS to improve compatibility and avoid VMware timeout EFI network issues.
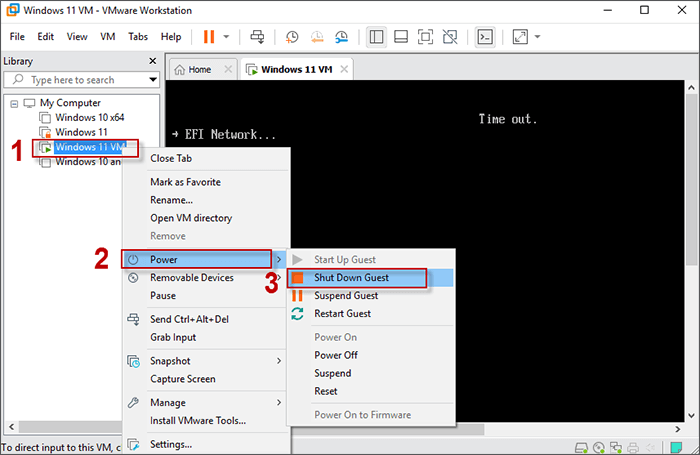
Step 1 Under Library, right-click on the virtual machine, and you will find Power option. Then extend Power option to click Shut Down Guest.
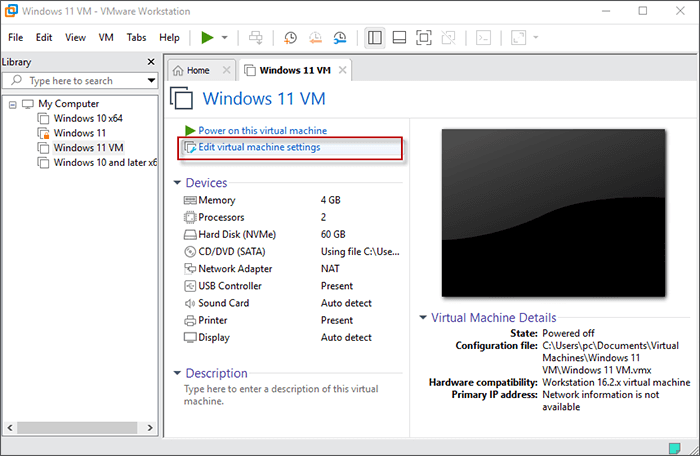
Step 2 Click on Edit virtual machine settings to reconfigure your virtual machine.
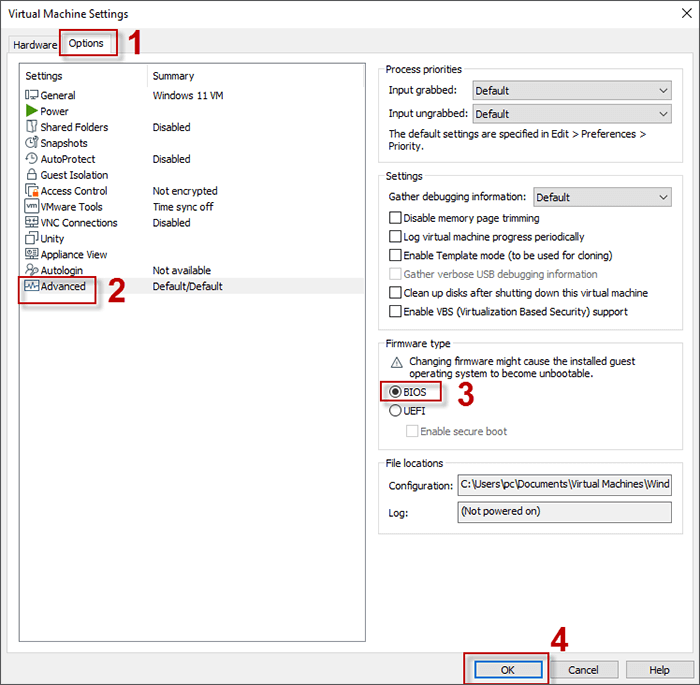
Step 3 Select Options on the upper left, and then choose Advanced in settings. Under firmware type, switch from UEFI to BIOS. Then click OK to confirm this adjustment.
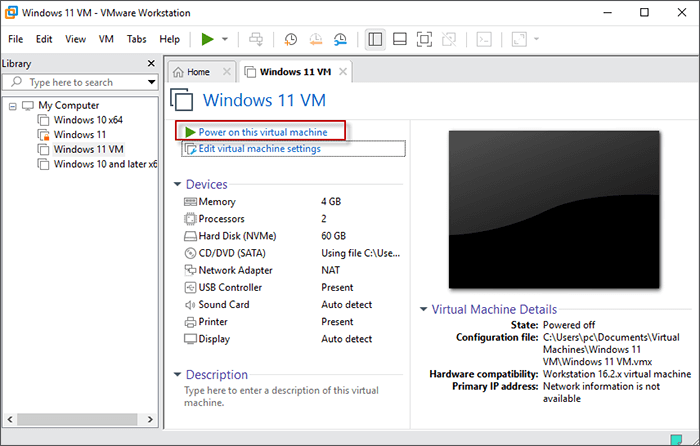
Step 4 Click Power on this virtual machine and you can boot your virtual operating system without EFI network timeout on VMware Workstation this time.
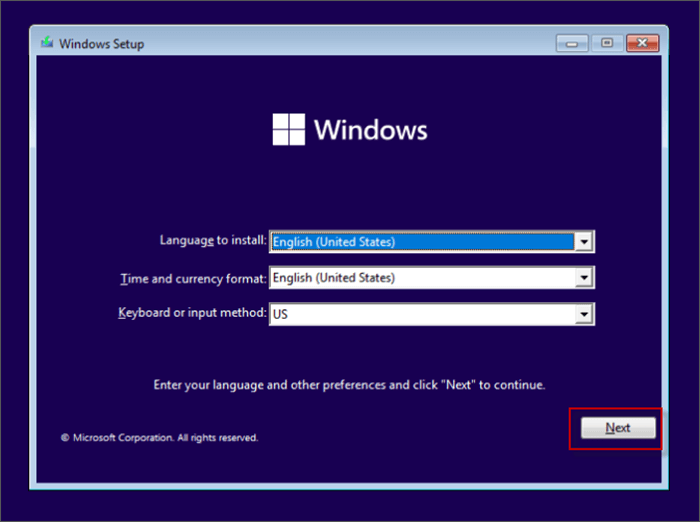
Step 5 When setting up Windows, enter your language and other preference. Then click on Next to continue.
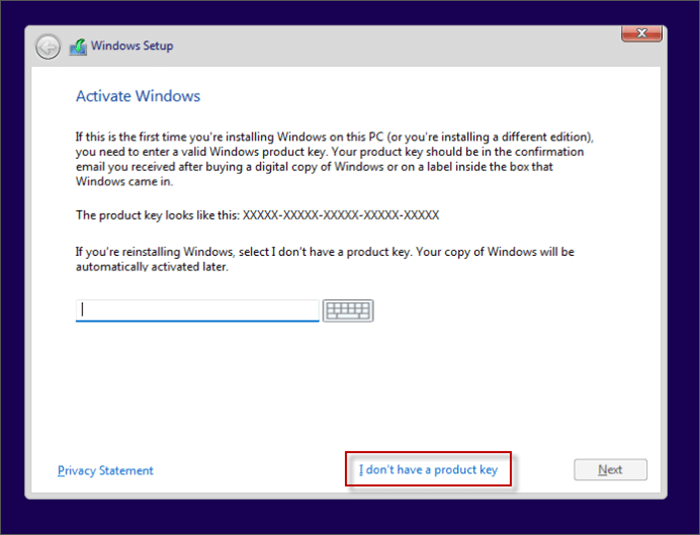
Step 6 To activate Windows, you are required to enter a license key. Here you can also choose I don't have a product key to install unactivated version of Windows, but some features on Windows may be limited.
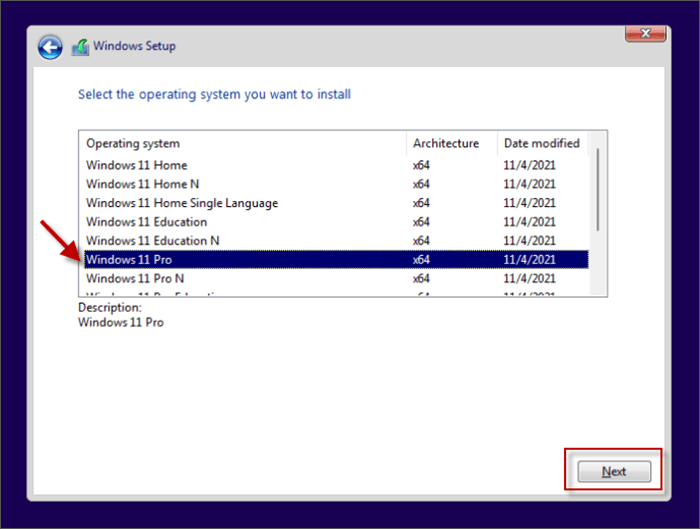
Step 7 Select which operating system you want to install. Here I choose Windows 11 Pro and click on Next. Then accept the Microsoft Software Terms and go ahead.
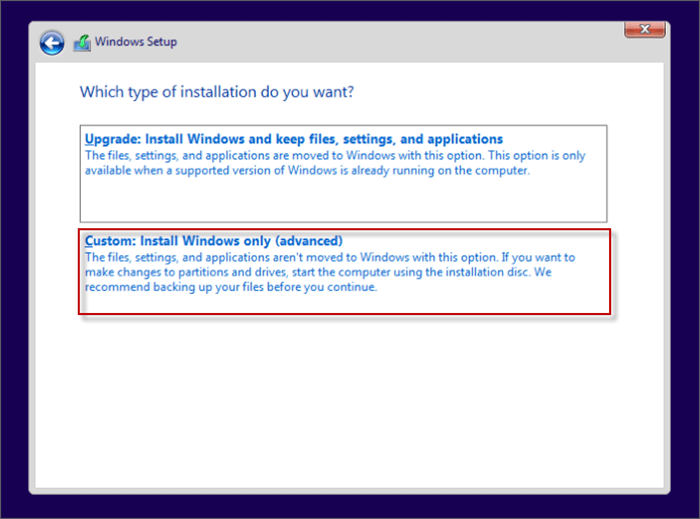
Step 8 Click on Custom: Install Windows only(advanced) to perform a clean installation of Windows.
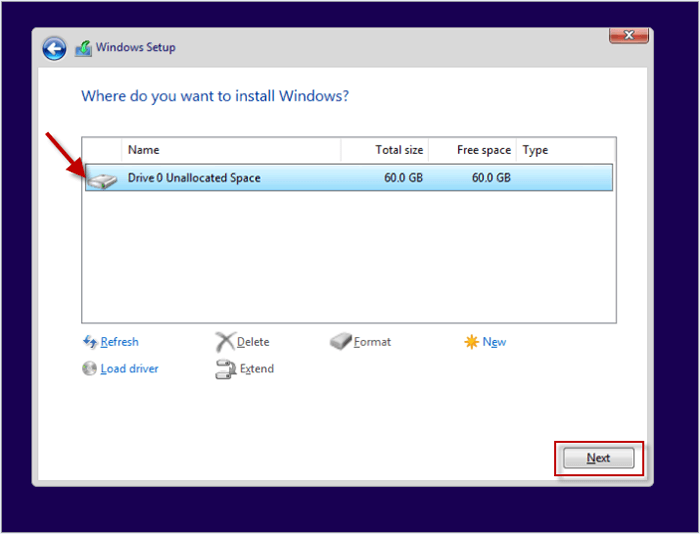
Step 9 Choose a disk to install Windows and click Next.
Step 10 Wait for a few minutes to get files ready for Windows installation.

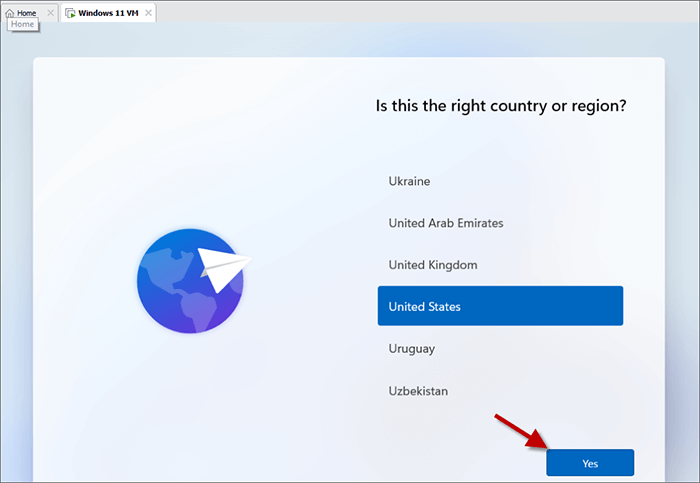
Step 11 Finish initial settings of the Windows such as region, keyboard, account settings and etc.
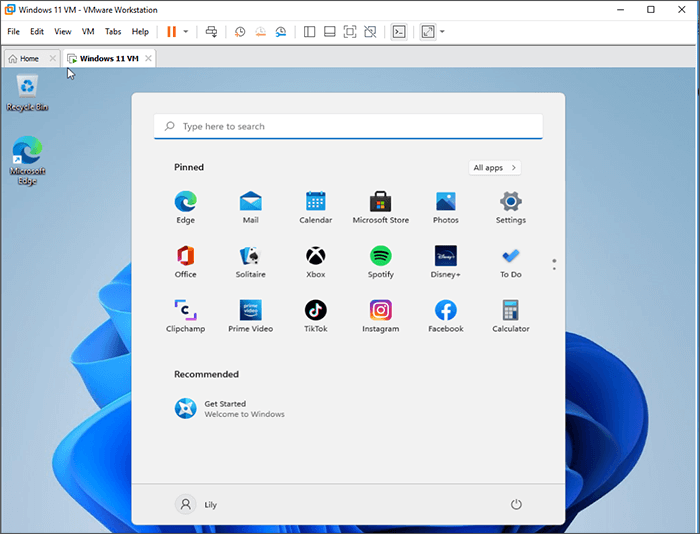
Step 12 When initial settings are completed, you will find your virtual operating system works successfully.
That's all the steps onhow to fix VMware EIF network time out. Hope this can be helpful. If the problem still exists but you are eager to find a way to boot Windows without affecting the current system, you can try to boot Windows from USB drive. Based on Wins To Go feature, a bootable USB drive will offer you a portable and clean Windows, which enables you boot the Windows anywhere on different PCs easily.