
Guided Access, which limits your iPhone to one application to help you focus on what you are doing, is one of the practical features of the iOS system. If your iPhone or iPad Guided Access is not working, you have come to the right place. In this article, we will discuss how to fix Guided Access not working on iPhone or iPad.

Below are some reasons why Guided Access not working on your iPhone or iPad:
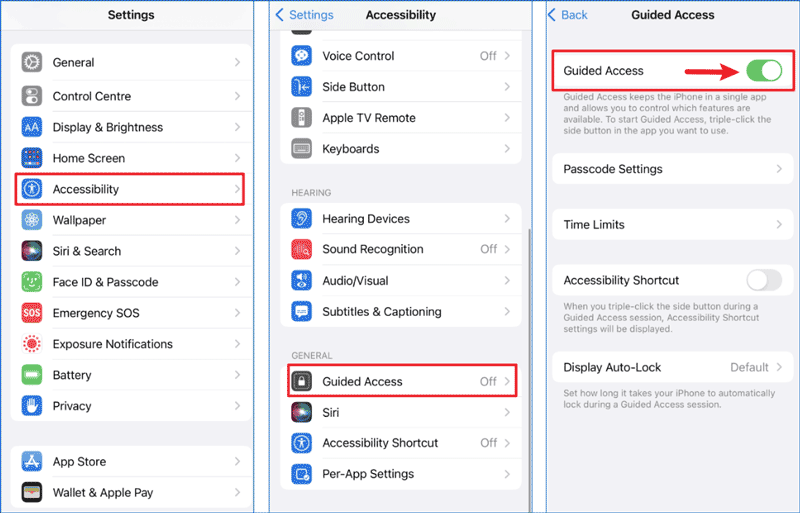
As we have mentioned, sometime Guided Access feature will be disabled automatically or mistakenly. So, you’d better check if the Guided Access has enabled.
Steps: Settings > Accessibility > Guided Access > Set the Guided Access toggle to on.
If you find that Guided Access is already turned on, you can turn it off and then turn it on again.
It is an effective way to force restart your devices for deep clearing. If Guided Access stops working, you can try to restart your iPhone/iPad.
How to force restart your iPhone or iPad? Please read this comprehensive article.
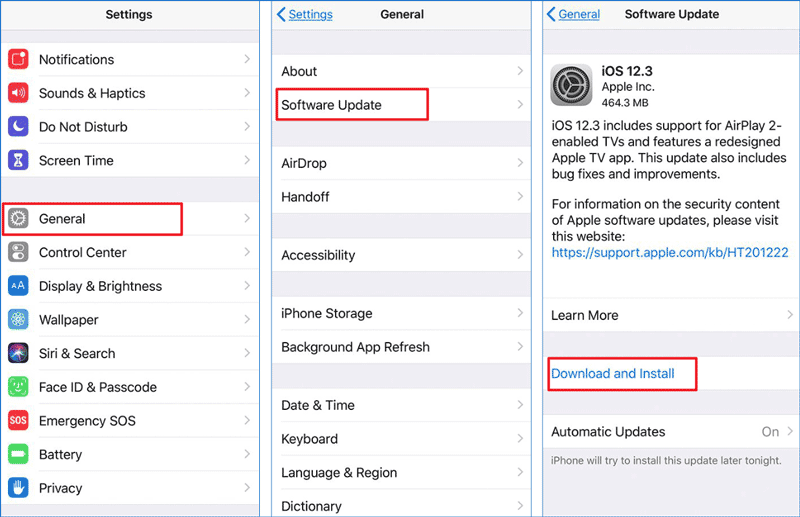
The latest update will release the patch to fix the Guided Access not working issue. You can check if the iOS or iPadOS has been updated to the latest version.
Steps: Settings > General > Software Update > Download and Install.
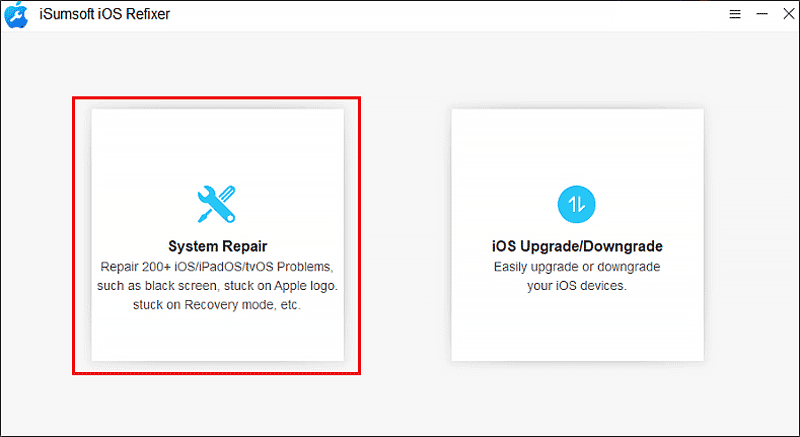
Using iSumsoft iOS Refixer to perform iOS system repair is a quick and safe way to fix Guided Access not working on your iPhone or iPad. iOS Refixer can not only fix iphone/ipad-related issue, but also upgrade or downgrade iOS with one-click.
Here are the steps to fix Guided Access not working via iSumsoft iOS Refixer:
Step 1: Download and install iSumsoft iOS Refixer .
Step 2: Select System Repair.
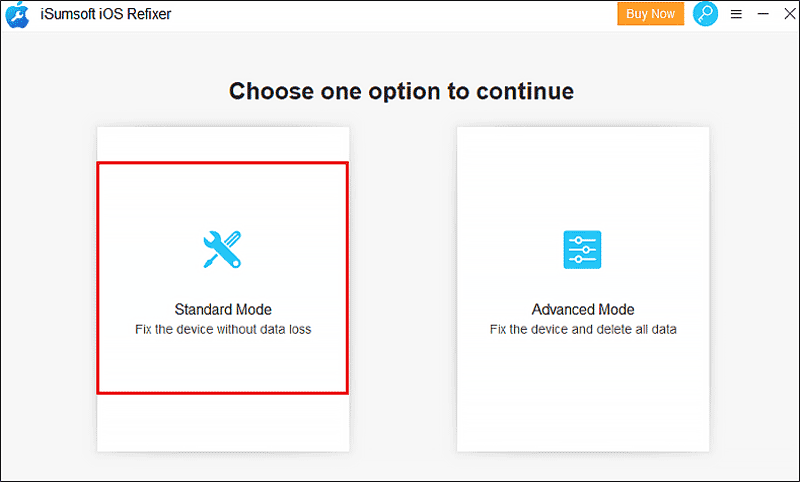
Step 3: Choose Standard Mode, this mode will fix the device without data loss. And connect your iPhone or iPad to your computer with a suitable USB cable.
Note:
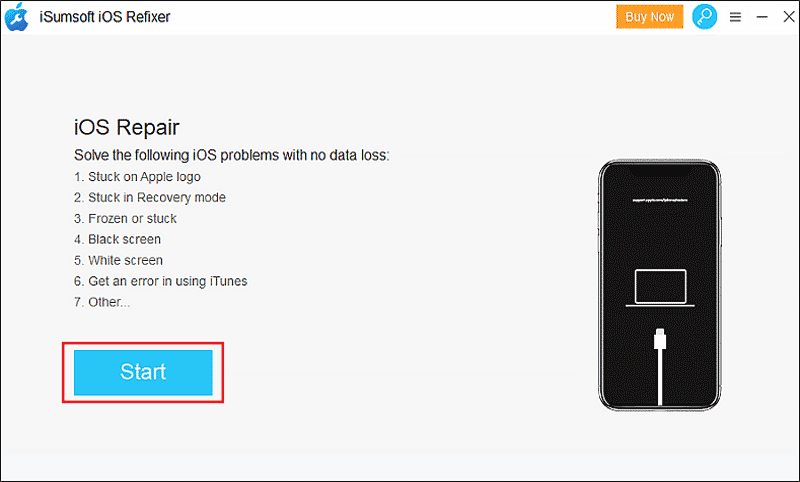
Step 4: When you reach the iOS Repair interface, click Start to begin the repair process.
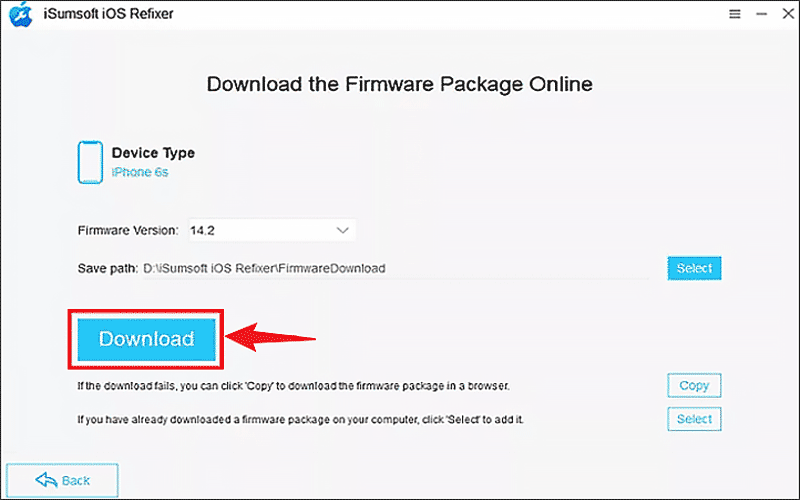
Step 5: Download the system repair firmware package.
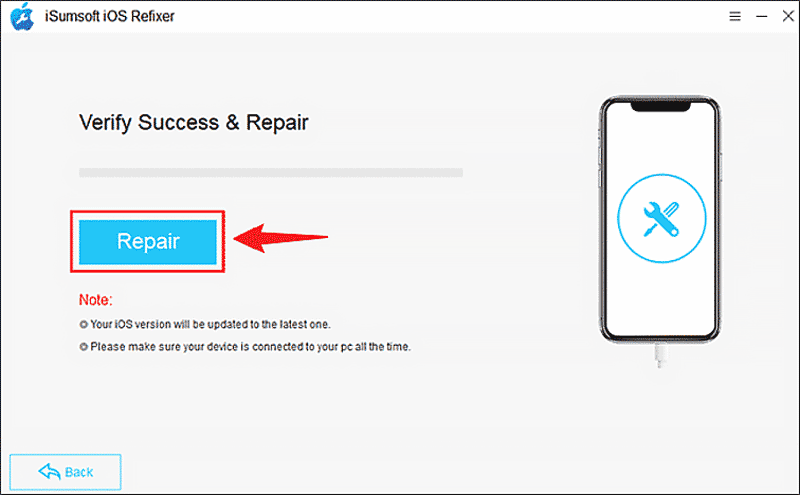
Step 6: After downloading, click Repair. It may take a few minutes to complete the process without any data loss. When the process is finished, see if the Guided Access not working problem on your iPhone or iPad has been fixed.
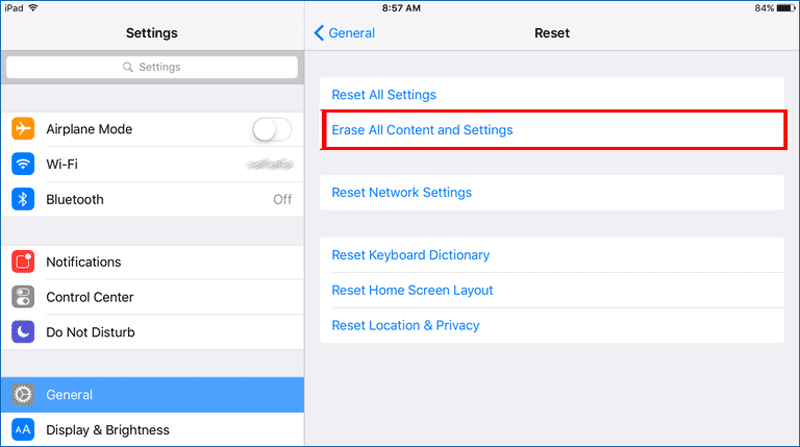
In general, factory resetting a device will fix all problems, but the downside is that it will erase all your data. So, make sure you have backed up your data before performing a factory reset.
Steps: Go to Settings > General > Reset > Erase all Contents and Settings.
If triple-click Guided Access does not work, you can first check if the power buttons have been damaged and the device case has restricted the buttons.
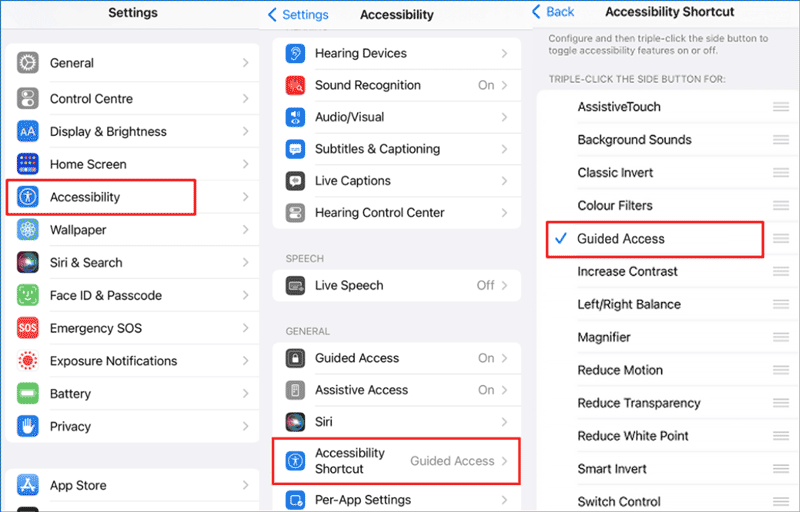
You can triple-click to raise Guided Access when you have enabled Guided Access Accessibility Shortcut, you can check if you have enabled Guided Access Accessibility Shortcut.
Here are the steps on how to enable an Accessibility Shortcut for Guided Access.
Steps: Go to Settings > Accessibility > Accessibility Shortcut > Make sure Guided Access is ticked.
If you have Siri enabled and your phone is stuck in Guided Access triple click not working, you can ask Siri to turn on/off Guided Access: "Hey Siri, turn on Guided Access."
Many users have reflected that Guided Access not working. I believe that you can fix Guided Access not working whether on iPhone or iPad with the above methods. It is recommended to run a System Repair with iSumsoft iOS Refixer to scan and fix the potential problems in your devices.
![iPhone Unavailable on Lock Screen? Solutions to Fix or Unlock [2024]](../images/apple/how-to-fix-iphone-unavailable/iphone-unavailable-fix.png) iPhone Unavailable on Lock Screen? Solutions to Fix or Unlock [2024]
iPhone Unavailable on Lock Screen? Solutions to Fix or Unlock [2024] 4 Ways to Fix iPhone Stuck in Boot Loop
 2 Ways to Backup iPhone to Computer without iTunes or iCloud
 How to Force Restart Any iPhone/iPad
 How to Fix iPhone Stuck in Guided Access?
 2 Ways to Allow or Disallow to Access to Siri from Lock Screen