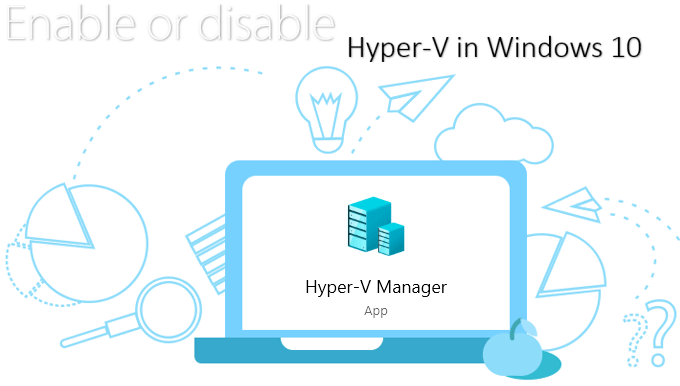
Virtualization Technology allows us to run a virtual machine inside the operating system in your current machine. Before you can use Hyper-V to create a virtual machine, you have to enable Hyper-V. Here this article will show you how to enable or disable Hyper-V in Windows 10.
Requirements:
- Windows 10 Professional, Enterprise or Education 64-bit version. If you’re not sure if you have a 32-bit or 64-bit version, click here to check it out.
- You must have a minimum of 4 GB RAM.
- Your CPU must support VM Monitor Mode Extension (VT-c on Intel CPU’s)
How to get Hyper-V
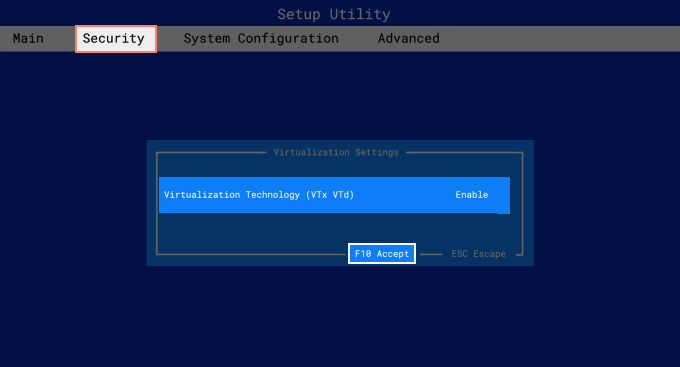
You have to enable Virtualization Technology in your BIOS settings.
To Do: Enter BIOS setup by repeatedly pressing the DEL key or other BIOS setup access key while your PC is loading. Search for Virtualization Technology and enable it in your BIOS settings. It’s usually listed under one of these tabs: Security, Advanced or System Configuration.
How to enable Hyper-V in Windows 10
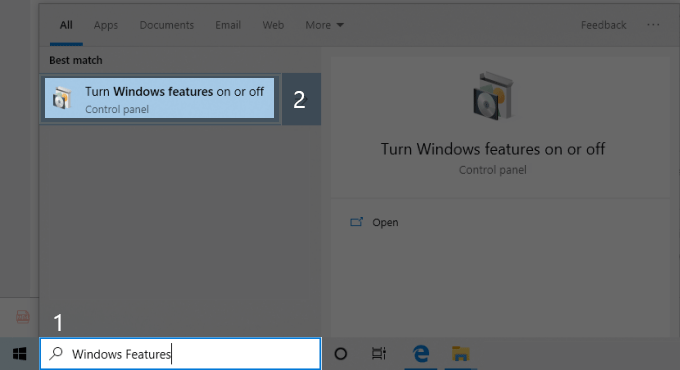
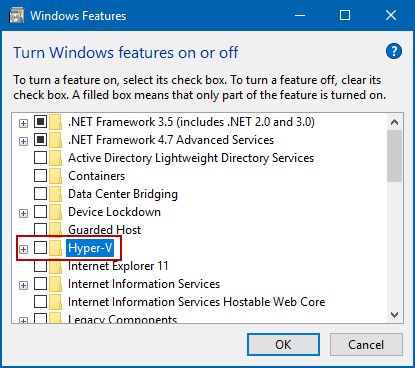
Search for “Windows features” in the Start menu, hit the Enter key to open it.
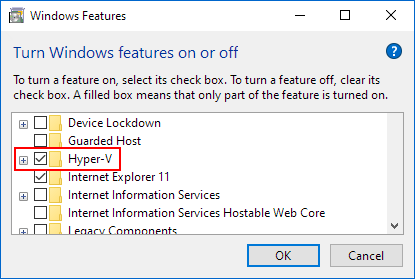
Here, scroll down to Hyper-V and enable it by clicking in the white box next to it. Then click OK.
After it finishes setting the feature, you’ll have to restart your computer to make the change take effect. Now once computer rebooted, search for hyper in your start menu and open Hyper-V Manager.

You are now ready to start enjoying Virtualization Technology by creating new virtual machines, run existing ones from another computer and even migrating your old machine to your Hyper-V.
How to disable (remove) Hyper-V in Windows 10
Now follow any of the following methods to disable Hyper-V:
Option 1: Search for “Turn Windows features on or off” in the Start menu, hit the Enter key to open the Windows Features window. Here, scroll down to Hyper-V and disable it by clearing checkbox next to it. Then click OK.
Option 2: Disable Hyper-V by using command.
Press Windows logo key + X, then hit A to run Command Prompt as administrator. In Command Prompt window, type bcdedit /set hypervisorlaunchtype off and hit Enter key to execute this command.

Option 3: Disable Hyper-V by stopping its service.
Search for “service” in the Start menu, hit the Enter key to open the Component Service window. Then click Services option in the left panel and the hit H key on your keyboard. This can help you quickly locate and find the Hyper-V Virtual Machine Management service. When getting it, right-click on it and select Stop.

You have to restart your computer to finish turning this feature off.

