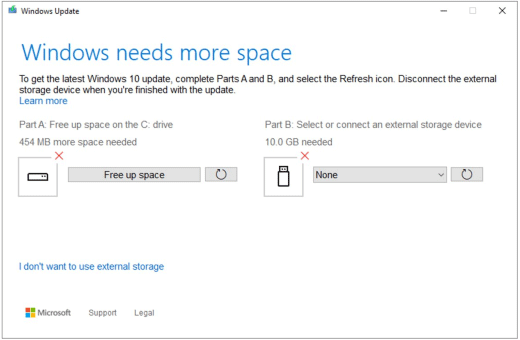
“On Microsoft Windows 10 systems that have limited storage space (such as thin clients or embedded systems), when you run Windows Update, the update initialization may fail. We recommend a regular regimen of system maintenance to help ensure that updates are successful,” Microsoft says.
Every Windows 10 update requires a certain amount of storage space on your hard drive to help the update install smoothly. Earlier this year, it announced it was setting aside 7 GB of “Reserved Storage” to ensure that updates won’t break because the system runs out of memory. Before downloading an update, Windows checks to make sure there’s enough space on your device for installation. If there isn’t, you’ll see a message asking you to free up some space.
This tutorial will show you how to free up space to install Windows 10 May 2019 update so that avoid crashes. It’s a simple procedure but very effective and we are not using any third-party programs to perform this cleaning process, so you don’t have to download another creepy tool to do this.
You can also learn about other ways to free up drive space and prevent future low disk space issues.
1. Upgrading your main hard drive to a larger SSD/HDD
Most manufacturers allow for the existing hard drive to be replaced with one that has more storage. If you find your C drive is out of space frequently and your computer runs very slow, it may be necessary to upgrade or add another hard disk to your computer. You can use iSumsoft Cloner to migrate the system partition to a new hard disk.
2. Clean temp files and folders in your C drive
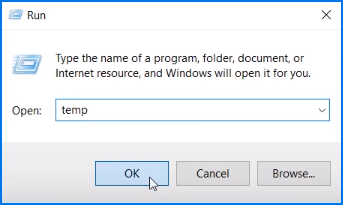
Press Windows + R to bring up Run box. Then enter temp and hit Enter key, which will open this folder, in case if it’s asking for any permission please click on Continue.
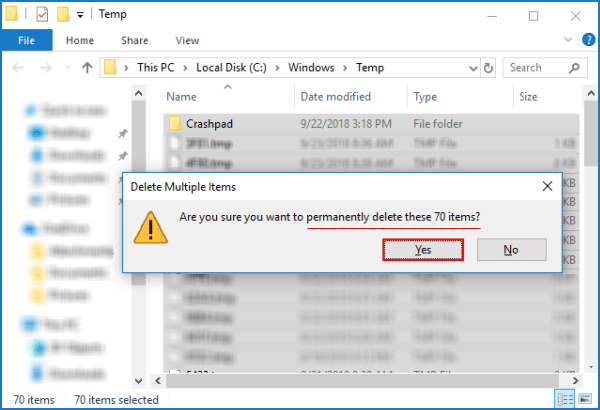
You will see all these files and folders, which are all not needed. They’re created only for a temporary purpose, So you can press Ctrl+A to select all of them and press Shift + Delete on your keyboard. Ignore the unable to deleted files and delete the rest.
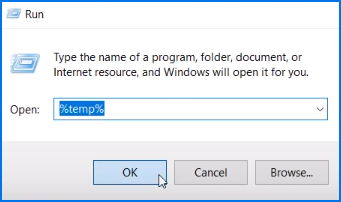
Now we have to open the run box again and this time type in %temp% click on OK, then another folder will appear. As same as we deal with the last temp folder, continue deleting all the files.
Once you do that, you have to open the run box for the final time, and this time type in prefetch, now you will see another folder opens, and maybe it asks you for the permission to access the files, in that case, click on Continue.
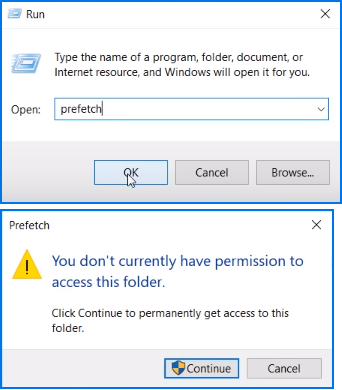
The files and folder will be revealed to you. Now do the same thing you did with the last two folders. Select all and hit Shift + Delete. That’s it.
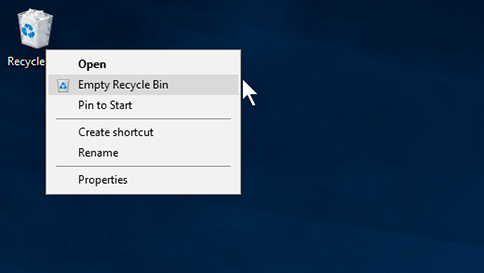
3. Empty Recycle bin
You may don’t know that whenever you delete a file by right-clicking delete option, it will not remove the files from your computer, it will keep all the deleted files on your recycle bin until a certain limit and the default Windows 10 recycle bin limit is somewhere around 50 GB.
For your information on the recycle bin is using your C Drive space, which will cause your system to go slow. So if you didn’t clean up the recycle bin frequently, it will acquire a good amount of space out of your C drive. So please delete all of the files from the recycle bin as well. After doing that, you will see improvements in your C drive space.
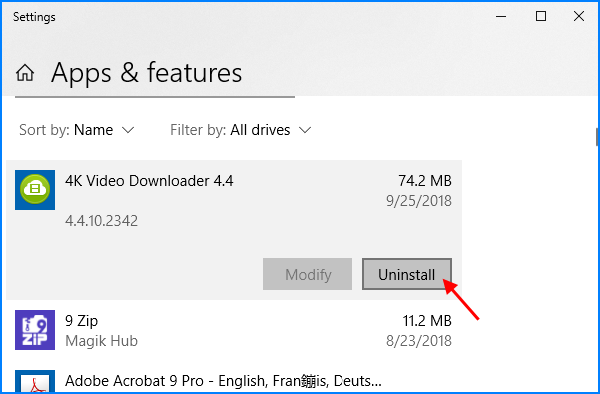
4. Uninstall apps and program that rarely using or unwanted
We will show you how to uninstall apps which is basically installed into your C drive by default. So by removing those unwanted programs, you can get a lot more space on your C drive.
Press Windows + X, and then hit F key to open Apps & features settings.
![]()
You’ll see a list of installed apps, including how much space each one uses and when it was installed. To uninstall an app, select it from the list and then select Uninstall.
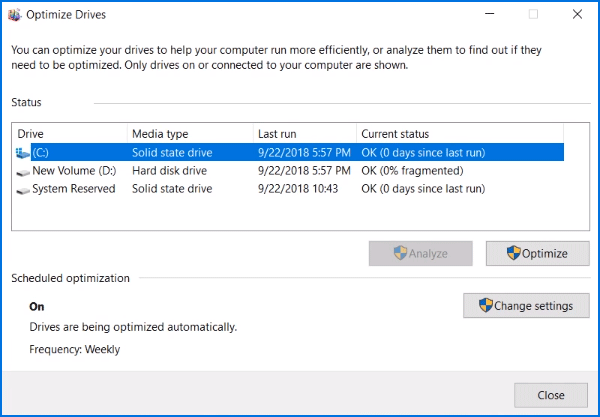
5. Optimize Drive
From the start menu, enter optimize and hit enter to open Optimize and defragment drive window. Then you will see this window, so make sure you have selected your C drive. Once you do that click on the Optimize button, it will analyze C drive to find out if they need to optimize. This can optimize your drives to help your computer run more efficiently.
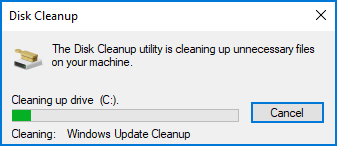
6. Run Disk Cleanup
You can use the Disk Cleanup tool to delete temporary files and system files from your device. To do: Select the Start button, type disk cleanup, then select Disk Cleanup from the list of results.
Select the checkbox next to the type of files you want to delete.
To free up even more space, select Clean up system files and then select the type of system files you want to delete. After you’ve selected the types of files you want to delete, select OK, and then select Delete files in the confirmation window to start the cleanup.
The cleanup process may take a while. I hope you are all experiencing a performance boost, free up space and a more enhanced system responsiveness.
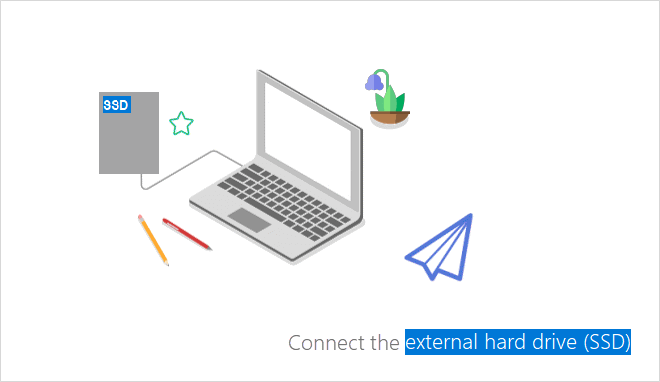
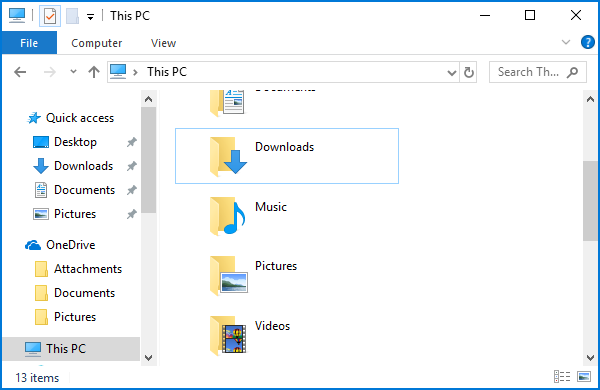
7. Delete Personal files or move them to an external storage device
Personal files such as videos, music, photos, and documents can take up a lot of space on your device.
To see which files are using the most space: Open File Explorer and then find the files you want to move. In the left menu of This PC, select a folder to see what files are saved in it.
If there are files you no longer need on your device, you can either delete them or move them to an external storage device like a USB drive or an SD card.
Saving new files to another drive will help prevent low space problems on that drive in the future, so you won’t have to move your files to another drive repeatedly. Instead of saving all your new files to the default drive, you can save some of them to a different drive that has more free space.
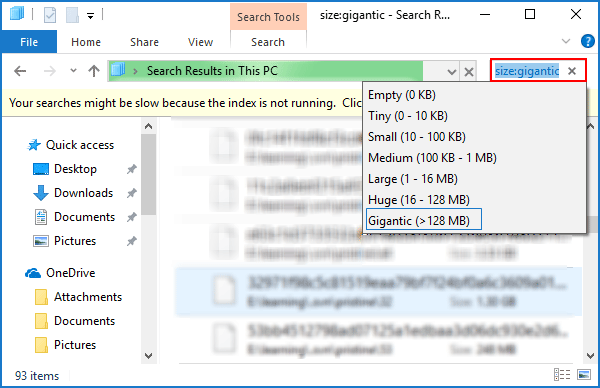
8. Use size: gigantic to reveal big size files on your computer
I will show you how to locate some heavy files that might have saved in some folders that we no longer remember and no longer need. This is a bit natural sometimes we download some files or applications for future use and we always forget to delete such files and then gradually get lost among other files and keep occupying disk space.
Use size gigantic command will help to reveal such big size occupation files, you can choose whether to delete or skip them. Here is how to do:
Go to File Explorer and open C Drive. Locate to the search box on the top right corner, and then type in size: gigantic then hit Enter key. This will scan your C Drive for all files larger than 1 to 8 MB.
The process could take a while depending on how much it has to scan. After it scans completely, you can select all unwanted files and delete them by pressing “Shift+Delete“.