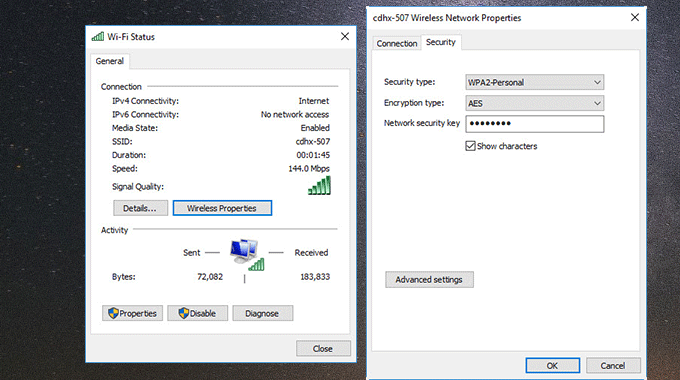
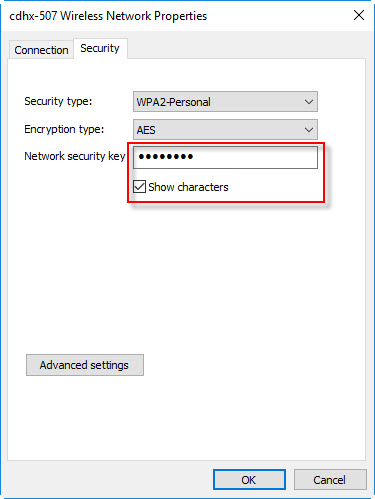
As you might know that anyone can easily find saved WiFi password in Windows 10/8/7 through the ”Show characters” function in the Wireless Network Properties window. This function is convenient but also might leak your WiFi password to anyone who has physical access to your laptop. If you’re concern about your network security and want to hide your WiFi password, this post is for you. We’ll show you how to hide WiFi password on Windows 10/8/7 laptop by disabling the Show characters function in the Wireless Network Properties window.
How to hide WiFi password in Windows 10/8/7
Tips: This operation will require you to modify your Windows registry, so it is recommended that you first create a system restore point before you start so that you can revert the changes when a mistake occurs.
Step 1: Open Registry Editor.
Type regedit in the Start menu search box, then right-click the regedit program appearing in the search result and select Run as administrator. This will open Registry Editor as administrator.
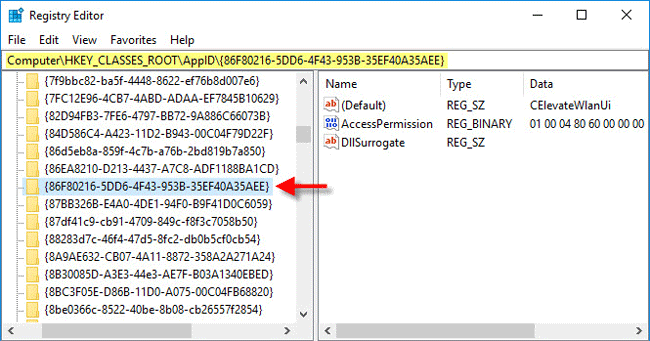
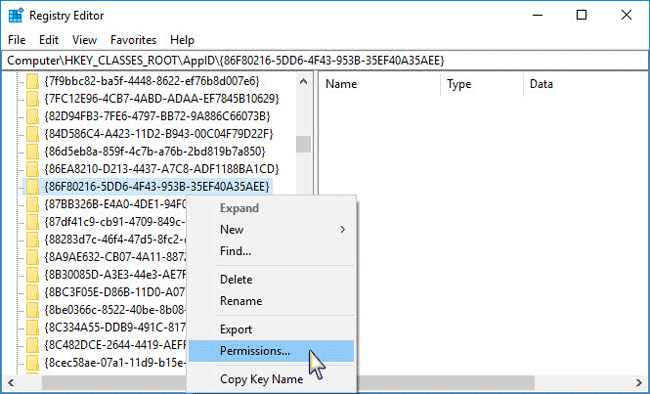
Step 2: Locate the following registry key.
HKEY_CLASSES_ROOT\AppID{86F80216-5DD6-4F43-953B-35EF40A35AEE}
Tips: This registry key determines whether you can show your WiFi password using the ”Show characters” function in the Wireless Network Properties window.
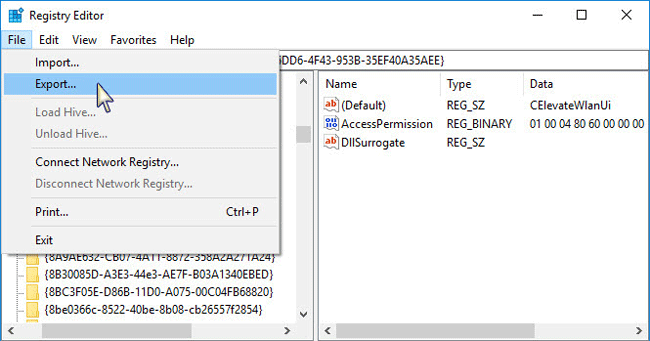
Step3: Backup the registry key.
Select the same registry key, then click File > Export to backup the key. You can save the registry key on your desktop or some other location you can easily find.
Step 4: Change permissions of the key.
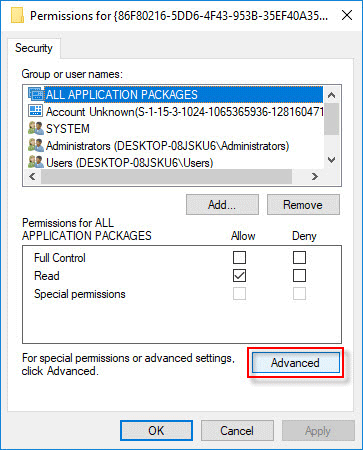
1. Right click on the same registry key and select Permissions from the context menu.
2. When the Permissions dialog opens, click the Advanced button.
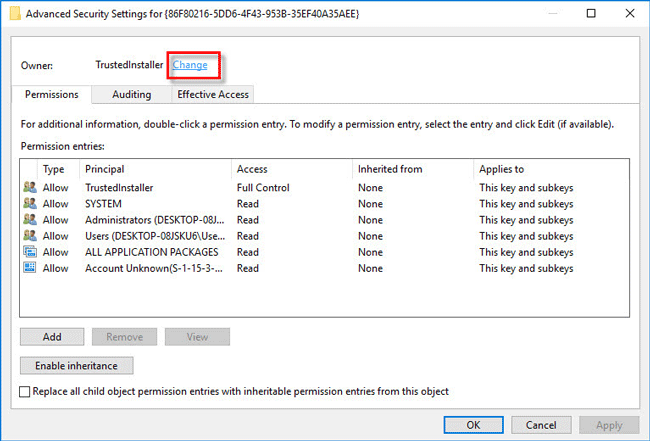
3. Click the Change link that follows the Owner.
4. In Select User or Group dialog, click the Advanced button in the lower-left corner.
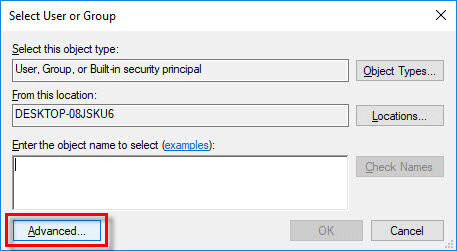
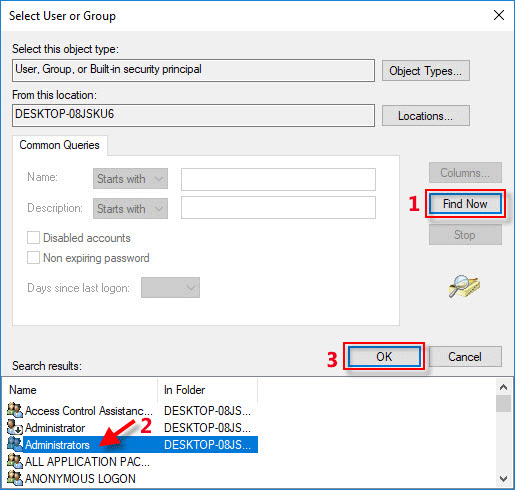
5. In the next dialog, click Find Now. Select the name of your Administrators group from the search results and then click OK.
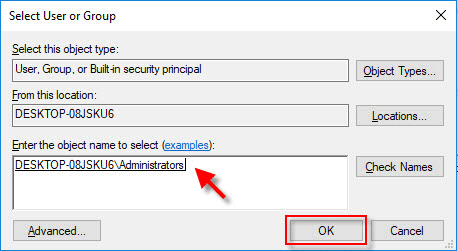
6. Now you’re back to the previous dialog and see the name of your Administrators group filled in the box. Click OK.
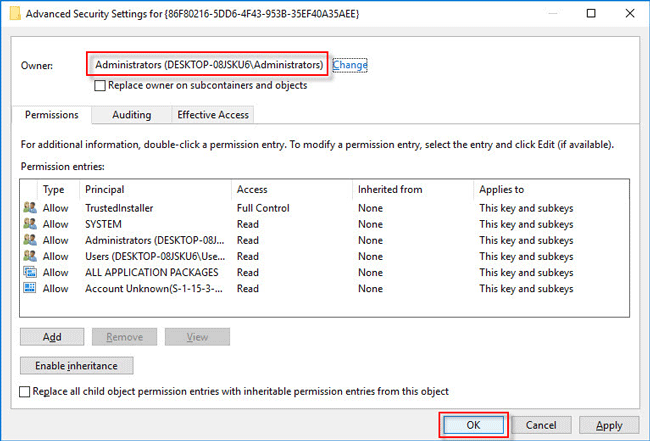
7. Back to the Advanced Security Settings window, now the Owner of the key has been changed to your Administrators group. Click OK.
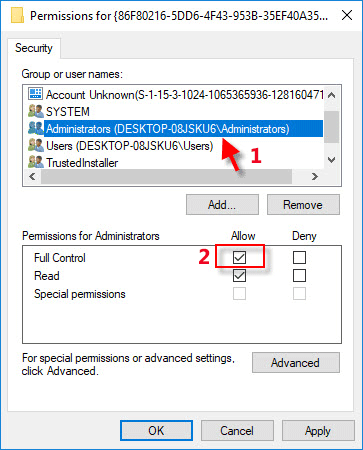
8. Back to the Permissions dialog. Under the Security tab, select your Administrators group, then check Full Control under Allow and click Apply followed by OK.
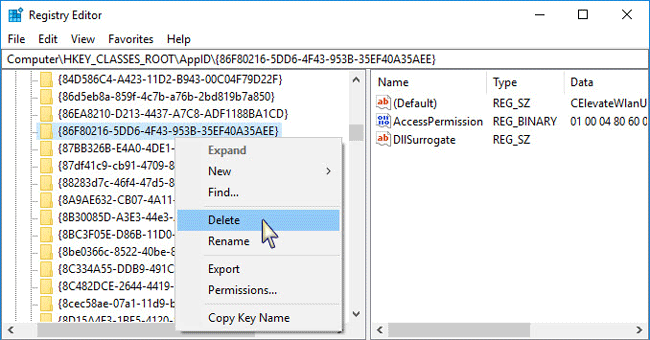
Step 5: Delete the registry key to hide your WiFi password.
Back to the Registry Editor, delete the registry key named {86F80216-5DD6-4F43-953B-35EF40A35AEE}. This will disable the ”Show characters” function in the Wireless Network Properties to hide your WiFi password from your Windows laptop.
After completing the above steps, restart your Windows to make the changes take effect. From now on, you will no longer be able to view your WiFi password from the WiFi network adapter’s Properties window because the Show characters function has been disabled. When you check the Show characters box, the WiFi password will still be hidden. However, this won’t prevent users from finding your WiFi password in Windows 10/8/7 through other methods, such as using command lines or third-party WiFi password finder software.
How to unhide WiFi password in Windows 10/8/7
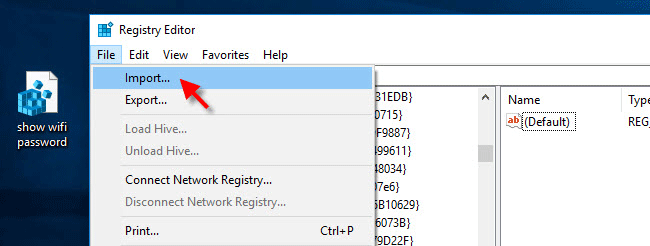
If later you want to unhide the WiFi password, just enable the “Show characters” function in WiFi Network Properties by importing the registry key you have backed up previously.
Open Registry Editor, click File > Import to import the registry key.