You know Windows 10 supports creating a password-free account for a local user account. However, you can not create a password-free account for a Microsoft account. Instead, you can chose to configure Windows 10 to log in automatically without entering a password, refer to How to automatically login to Windows 10.
- If you already have a password for the account, please refer to the How to turn off the password on Windows 10 guide.
- If you often carry a laptop or tablet, you must set a strong password and encrypt the hard drive.
Use the instructions given below to create a local user account without a password in Windows 10.
Option 1: Create a local account without password
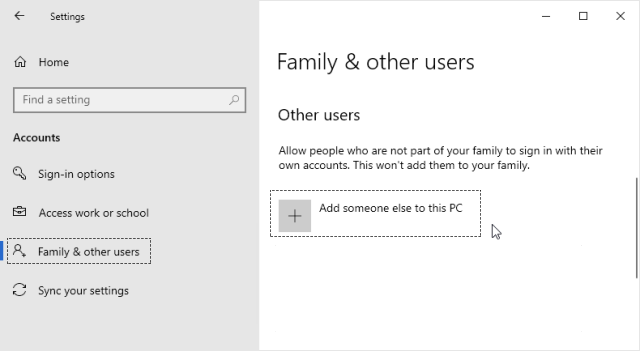
- On a Windows 10 computer, go to Settings > Accounts > Family and other users.
2. In the “Other users” section, click the “Add someone else to this PC” option. This will open the account creation dialog.
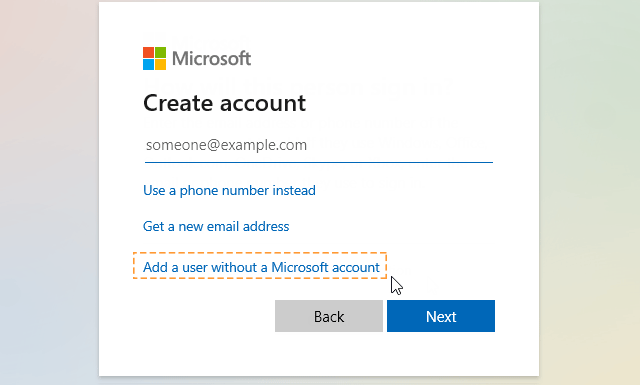
3. Click the “I do not have this person’s login information“.
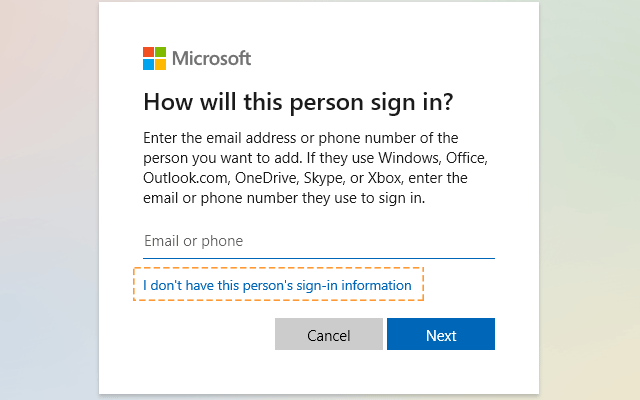
4. In the dialog box that appears, click the link to add a user without a Microsoft account.
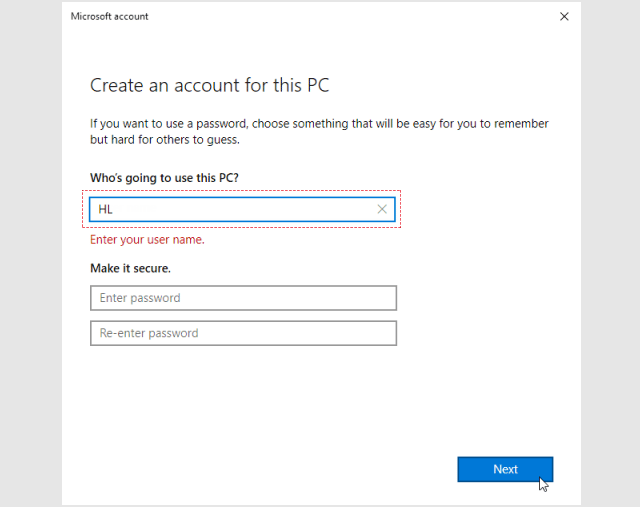
5. Now, enter the desired name for the user account, then enter nothing in the password, and then re-enter the password field.
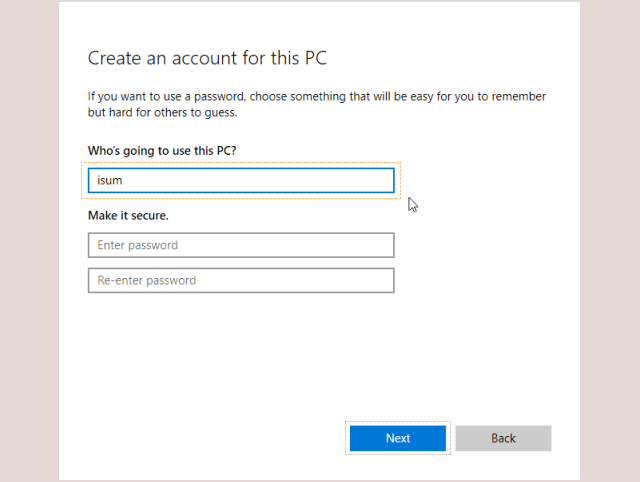
6. Click the Next button to create an account.
Option 2: Set up a local account without a password
Step 1: Turn off Wi-Fi on your computer or disable Ethernet temporarily.
Step 2: Go to the Settings > Accounts > Family and Other Users, and then click the “Add Someone else to This PC” option.

Windows 10 provides you with a local user account instead of pushing you to create a Microsoft account when you are offline.
Step 3: Enter the user account name for the new local account. To create an account without a password, you need to keep the password and then re-enter the password field to be blank.
Finally, click the “Next” button to create an account without a password.