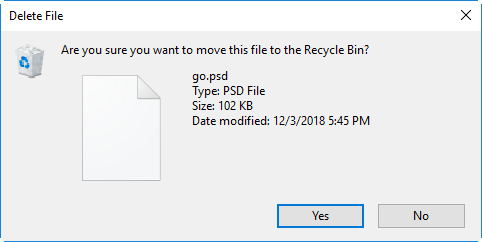
In Windows 7 and the earlier versions of Windows, each time when you delete a file, you are prompted with a delete confirmation dialog box asking if you are sure to move this file to the Recycle Bin. However, when you delete a file in Windows 10/8, you won’t be prompted with a delete confirmation dialog box anymore. That’s because Windows 10/8 disable it by default.
Most of the time, you are recommended to enable the delete confirmation dialog just in case of deleting some important files by mistake. In this post, I’m going to show three ways to enable Delete Confirmation dialog box in Windows 10.
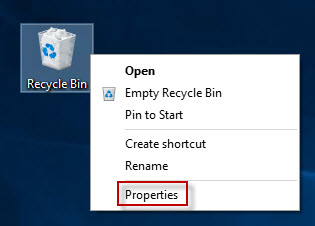
Way 1: Enable Delete Confirmation dialog box via Recycle Bin Properties
Step 1: Right-click on the Recycle Bin icon on Windows 10 desktop and then select Properties.
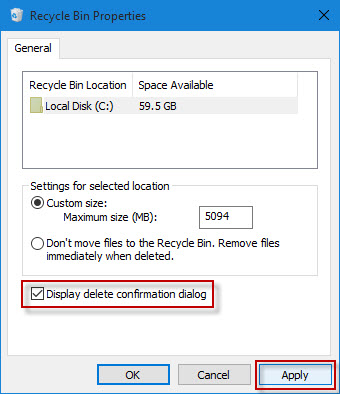
Step 2: After the Recycle Bin Properties dialog opens, check the box next to Display delete confirmation dialog. Then click Apply and OK.
Way 2: Enable Delete Confirmation dialog box by Group Policy Editor
Step 1: Type gpedit.msc in the Windows 10 Start menu. Then click on gpedit.msc in the program list.

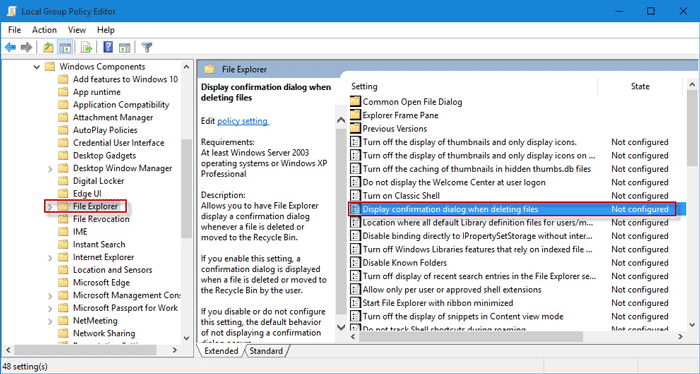
Step 2: After Local Group Policy Editor opens, navigate to “User Configuration\Administrative Templates\Windows Components\File Explorer”. Then in the right-side pane, double-click on the Display confirmation dialog when deleting files.
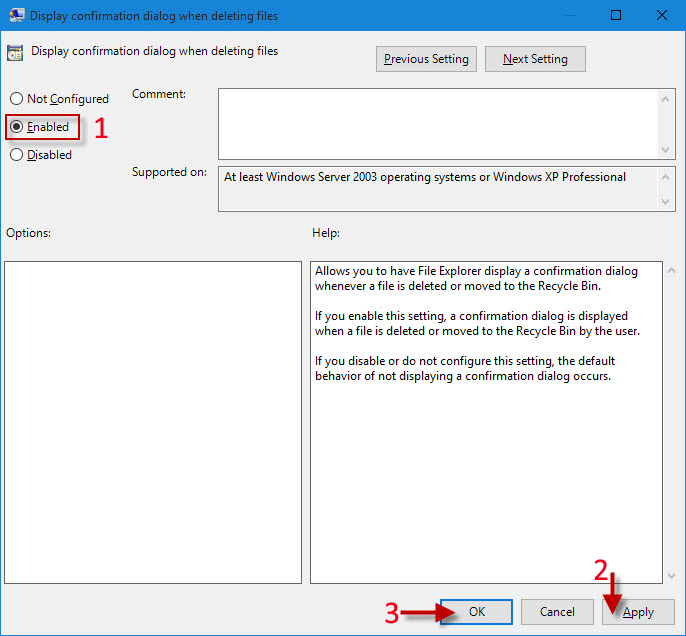
Step 3: Check Enabled. Then click Apply and OK.
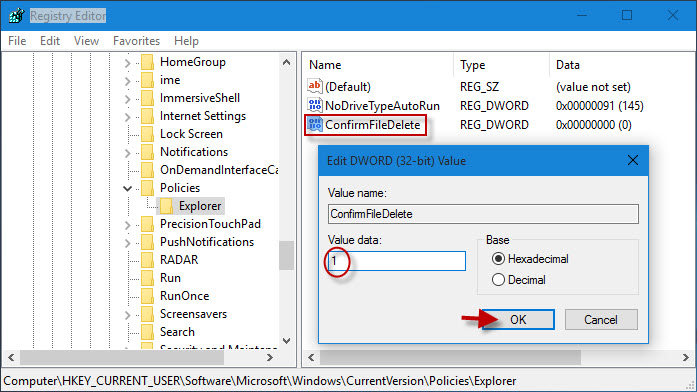
Way 3: Enable Delete Confirmation dialog box in Windows 10 by Registry Editor
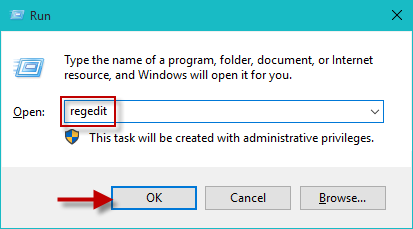
Step 1: Press Win + R to open the Run dialog. Type regedit and click OK. Confirm the User Account Control dialog if prompted.
Step 2: After Registry Editor opens, navigate to “HKEY_CURRENT_USER\Software\Microsoft\Windows\CurrentVersion\Policies\Explorer”. In the right-side pane, right click on the blank area and select New -> DWORD (32-bit) Value to create a new DWORD.
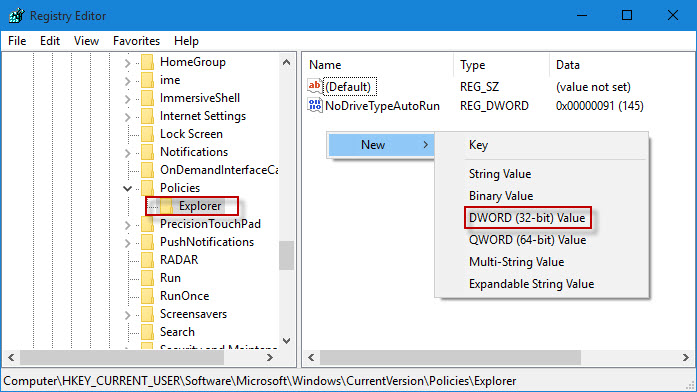
Step 3: Rename the new DWORD ConfirmFileDelete and then double click on it. Set its value to 1 so that the Delete Confirmation dialog box in Windows 10 can be enabled. To disable it, set the value to 0.