If you want to get rid of the cumbersome process of using various methods to find and open the Driver Verifier Manager in Windows 10, you can create a shortcut for Driver Verifier Manager on your Windows 10 desktop so that you can open it directly by double-clicking its shortcut icon. For specific methods, let’s see how it goes!
2 ways to create Driver Verifier Manager shortcut on Windows 10 desktop
- Way 1: Create Driver Verifier Manager shortcut on the desktop
- Way 2: Send Driver Verifier Manager shortcut to the desktop
Way 1: Create Driver Verifier Manager shortcut on the desktop
Step 1: Go to the Windows 10 desktop.
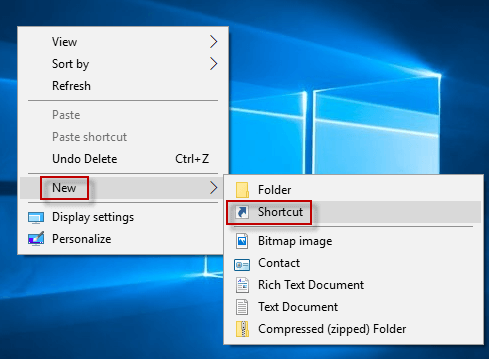
Step 2: Right-click any blank area of your desktop and choose New > Shortcut from the context menu.
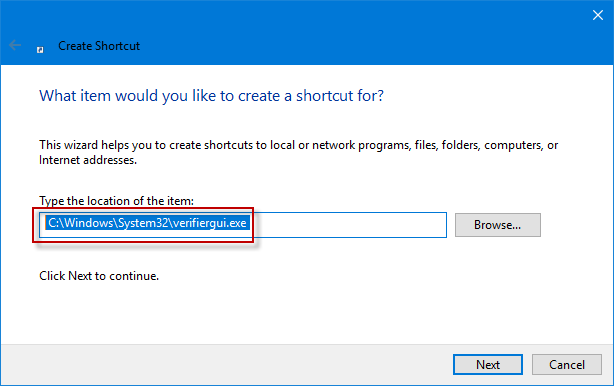
Step 3: In Create Shortcut wizard, input C:\Windows\System32\verifiergui.exe command in the location field and click Next to continue.
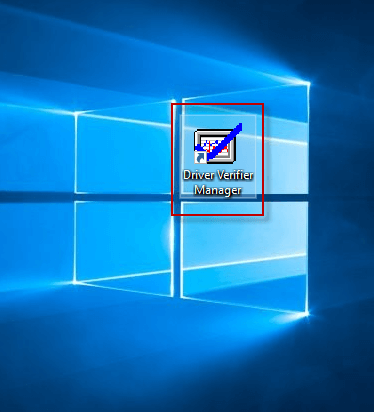
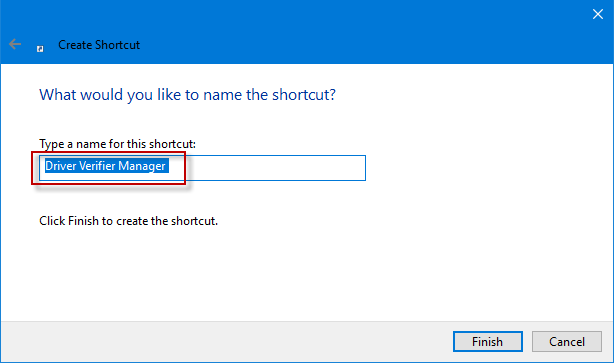
Step 4: Type Driver Verifier Manager and click Finish to create Driver Verifier Manager shortcut on the Windows 10 desktop.
Way 2: Send Driver Verifier Manager shortcut to the desktop
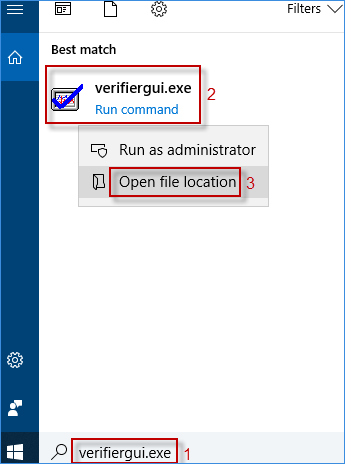
Step 1: Input verifiergui.exe in the Search field of Taskbar, right-click verifiergui.exe from the result list and select Open file location from the drop-down menu to launch File Explorer window.
Alternatively, you can also first open Windows 10 File Explorer, and go to Local Disk (C:) > Windows > System32 > verifiergui.exe in File Explorer.
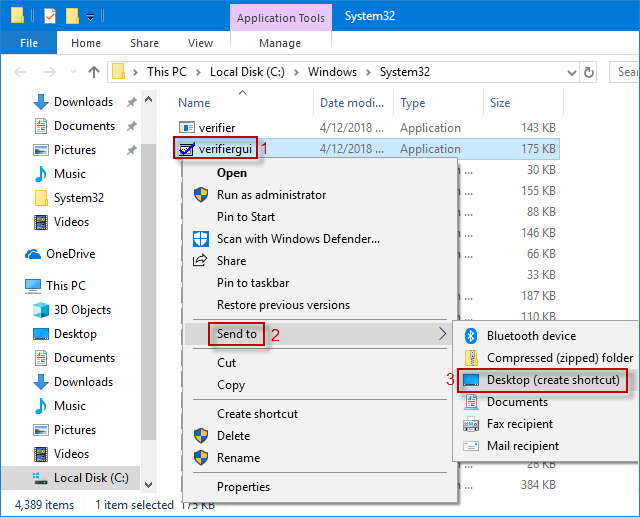
Step 2: Right-click verifiergui to choose Send to > Desktop (create shortcut) from the sub-menu.
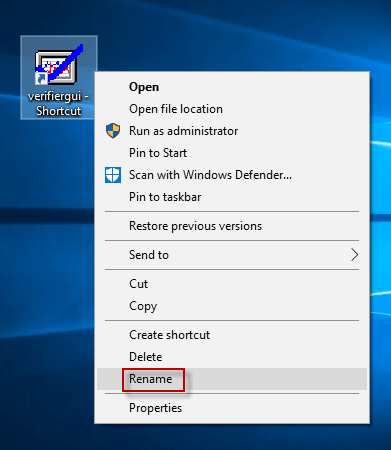
Step 3: When verifiergui shortcut shows on your Windows 10 desktop. You can right-click it and select the Rename option to change its name as Driver Verifier Manager.