
JPG and PNG are the most common image formats in our daily study or work. In order to ensure the clarity of the image, there is always a requirement that the width and height of the image must be within the range. When we encounter large images, we will try our best to compress them, but it turns out that the processed images are not ideal, such as the image pixel is blurred, and the image quality is not felt. Therefore, we should find a way to reduce image size and still keep them clear.
I personally think it is a good choice to use photoshop to reduce the image size of JPEG/PNG. If you’re a beginner, it’s necessary to know what is JPEG/PNG and what are the differences between them. Most importantly, you must know how to reduce the JPEG/PNG image size without losing quality. In this article, I’ll take you deeper into what you didn’t know before and what you’ve always wanted to know.
What is JPG/PNG?
JPG
Its full name is JPEG, which is a lossy compressed image format that supports the highest level of compression. It is suitable for colorful images.
PNG
PNG is a portable network graphics format as well as a bitmap file storage format, which can be compressed losslessly. It is suitable for monotonous color images and recognized as the most suitable web image format.
JPG VS PNG
1): JPG has great advantages in image compression, but it loses its quality by lossy compression. Generally, the PNG format image pixel higher in quality than JPG, but the image is larger than JPG.
2): Jpg images have no transparent background, while png images can retain transparent backgrounds.
3): PNG format is editable, JPG format is not editable.
4): For the resolution of both formats, PNG is higher than JPG.
How to reduce JPG/PNG image size without destroying quality in Photoshop?
When we use or upload images, finding the size of images is too large. To keep the images from taking up memory space, we always shrink them, but the pixels have since shrunk as well, which destroys the quality of the images. Is there any way to keep the image pixel unchanged and take up less memory? How can I compress an image without destroying its clarity? Now let’s take a look at how to reduce the image size of jpeg/png in photoshop without destroying its clarity.
Way 1: Reduce the image size through save for web.
Step 1: Run Adobe Photoshop CS6 and navigate to the target image.
Step 2: Go to File > Save for Web.
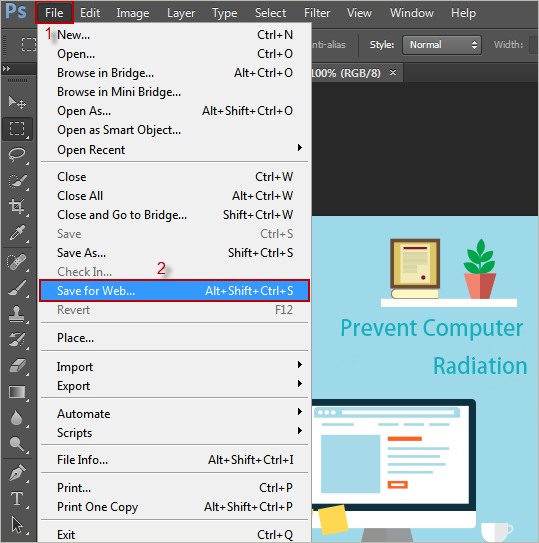
Step 3: When the dialog box pops up, select the format you want to save in the upper right corner. Generally, choose PNG-8 or JPEG, and then choose the parameters to resize the image according to the size of the image you want. Once the adjustment is done, click Save!

Tips: If your images are rich in color, choose JPG. If the image’s color is relatively simple, choose PNG-8.
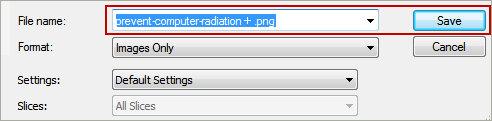
Step 4: At this time, a window will pop up again, select the place to store and modify the file name, and click Save. So that’s it.
Step 5: After saving, now open the modified image and compare it with the previous one. Obviously, the memory space becomes small, but the pixel is not changed.

Way 2: Shrink the pixels of the image.
Step 1: Launch Adobe Photoshop CS6 and search for Image > Image Size.
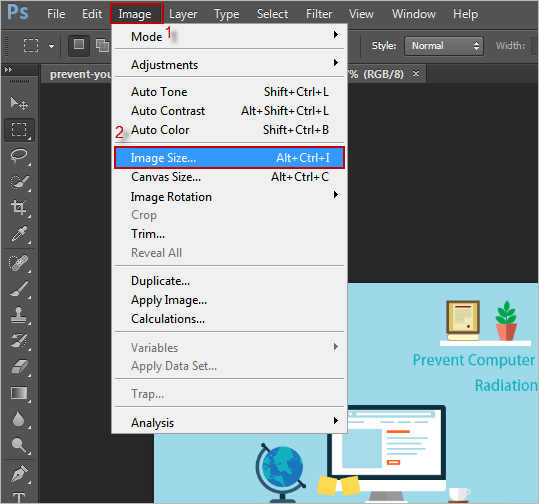
Step 2: In the Image Size window, adjust the image pixel and click OK to save it.
![]()

