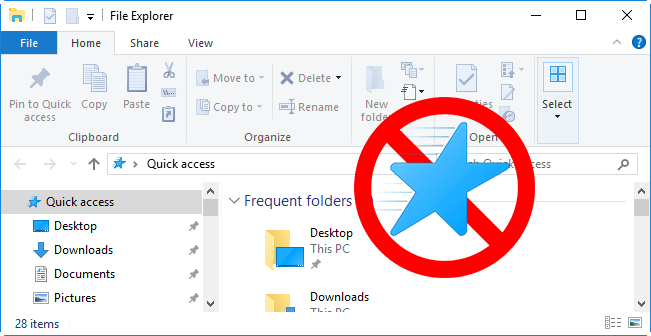
Each time when you open File Explorer in Windows 10, by default it directly opens to Quick Access, which displays frequently used folders and recently used files. If you use a shared computer, you may not want others to know what files you recently use through Quick Access. If in this case, you can completely disable Quick Access. Now, this post shows how to disable Quick Access in Windows 10 File Explorer.
How to disable Quick Access in Windows 10 File Explorer
It will contain two major steps.
Step 1: Configure File Explorer to open to This PC
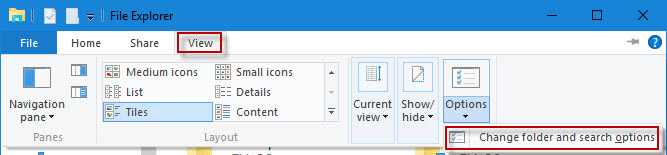
- Click the File Explorer shortcut icon on the taskbar to open File Explorer. Then click View -> Options -> Change folder and search options.
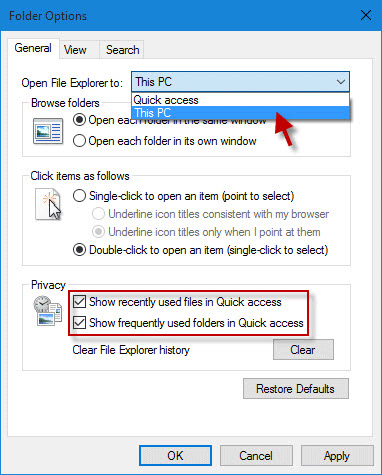
- After Folder Options opens, click the drop-down behind Open File Explorer to and select This PC. In addition, you can also disable both Show recently used files in Quick access and Show frequently used folders in Quick access. Then click Apply followed by OK. This will make Windows 10 open File Explorer directly to This PC instead of Quick Access. But Quick Access still exists in the File Explorer. To completely disable it, read on Step 2 below.
Step 2: Completely disable Quick Access in Windows 10
- Press Win + R to open Run dialog. Then type regedit and click OK to open Registry Editor.
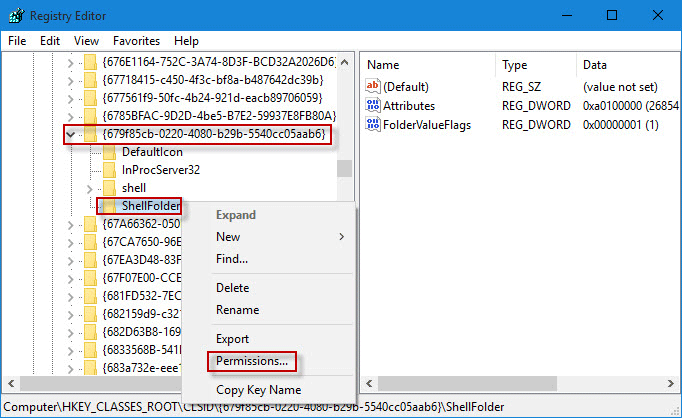
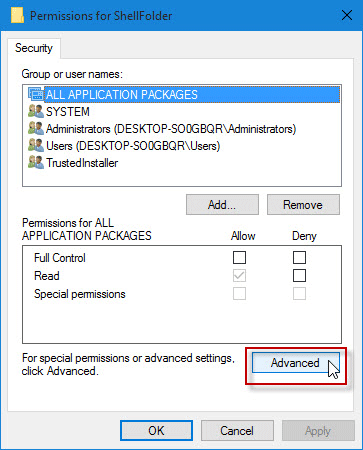
- Navigate to HKEY_CLASSES_ROOT\CLSID{679f85cb-0220-4080-b29b-5540cc05aab6}. Expand the {679f85cb-0220-4080-b29b-5540cc05aab6}; then right click ShellFolder and select Permissions.
- Click Advanced.
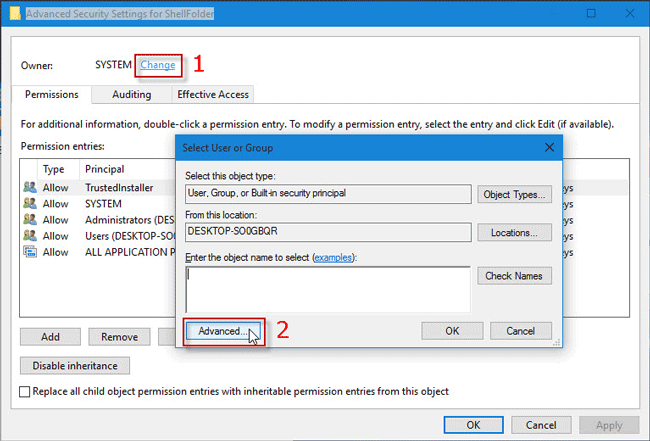
- Click Change near the top of the Advanced Security Settings for ShellFolder window and then in the Select User or Group box click Advanced.
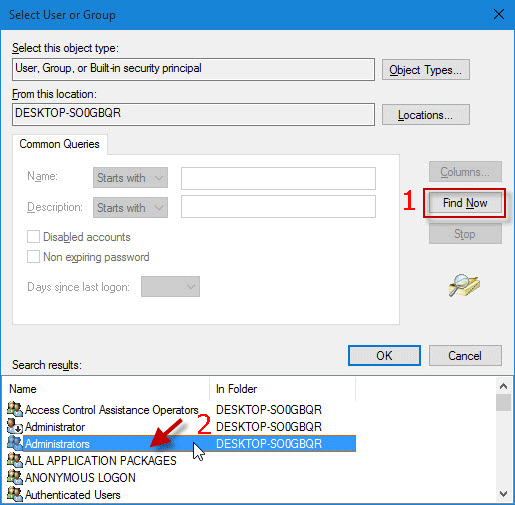
- Click Find Now. Then from the Search results list select Administrators. Then click OK and OK again.
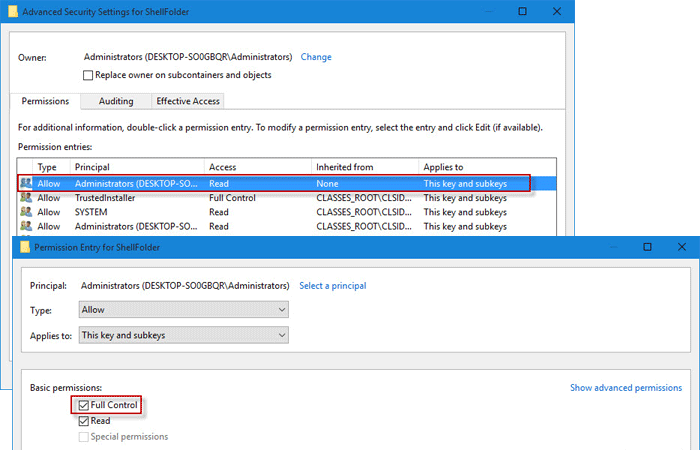
- Double-click the Administrators entry. Then in the next dialog check Full Control and click OK. Click Apply followed by OK.
- Click Apply and OK to close the Permissions for ShellFolder dialog.
- Select ShellFolder and on the right-side pane double-click Attributes.
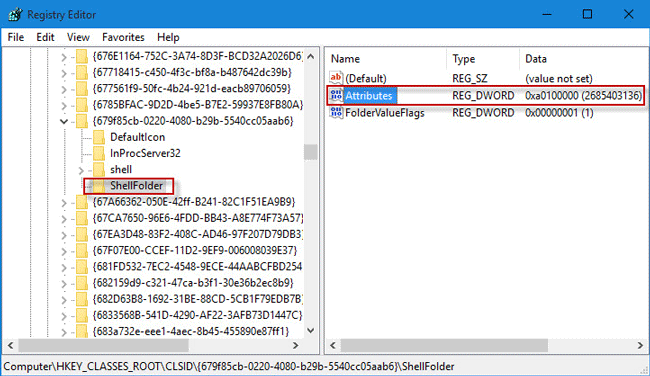
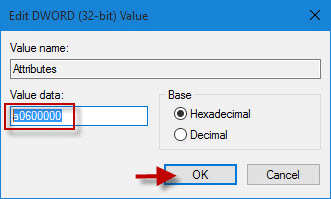
- Change the value data from a0100000 to a0600000, and click OK.
- Restart Windows 10 to make the changes take effect. Then Quick Access will be disabled and disappear from the navigation pane in File Explorer.
Tips: If you want Quick Access to come back to File Explorer, just need to change the Attributes data value from a0600000 to a0100000.

