For some reason, if all user accounts in your Windows 10 are disabled, you won’t be able to sign into the system and will get an error message on the sign-in screen, which says, “Your account has been disabled. Please see your system administrator.”
Then how can you sign into Windows 10 when all accounts are disabled? Fortunately, Windows 10 comes with one built-in Administrator account, which can be enabled even when all accounts are disabled and you can’t sign into Windows 10. Now, this post will show you how to activate the disabled built-in administrator account and then sign into Windows 10 to enable the rest accounts that have been disabled.
How to sign in Windows 10 when all accounts are disabled
Tips: In our previous post, we introduced the ways of how to enable a built-in administrator account in Windows 10 without login. In this post, we will show you another way, through the recovery environment. Steps are as follows.
Step 1: On Windows 10 sign-in screen, click on the Power button, and then click Restart while pressing and holding the Shift key on your keyboard. This will restart Windows 10 to the recovery environment.

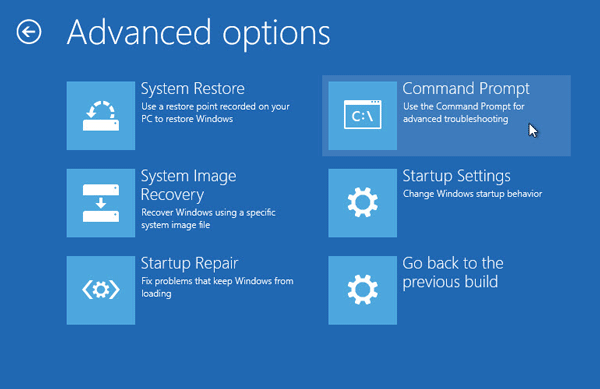
Step 2: Select Troubleshoot -> Advanced options -> Command Prompt. Then Windows 10 will restart and prepare the Command Prompt.
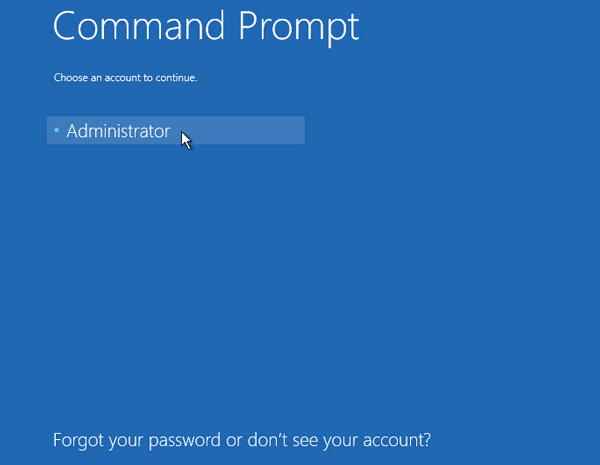
Step 3: After the Command Prompt screen appears, select the built-in Administrator account to continue. (The built-in Administrator will display on the Command Prompt screen although it is in a disabled state.)
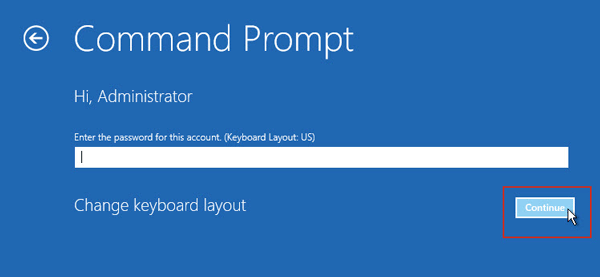
Step 4: Because the built-in Administrator account has no password by default, just leave the password field blank and click Continue.
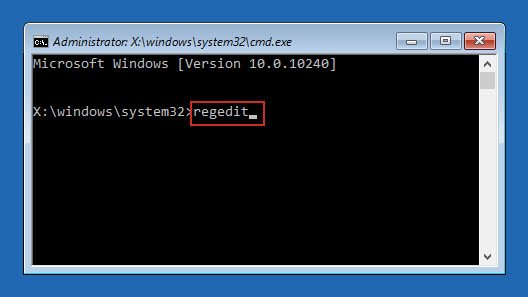
Step 5: After the CMD dialog opens, type regedit and press Enter to open Registry Editor.
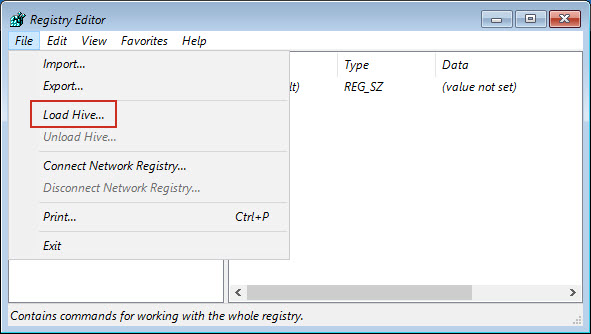
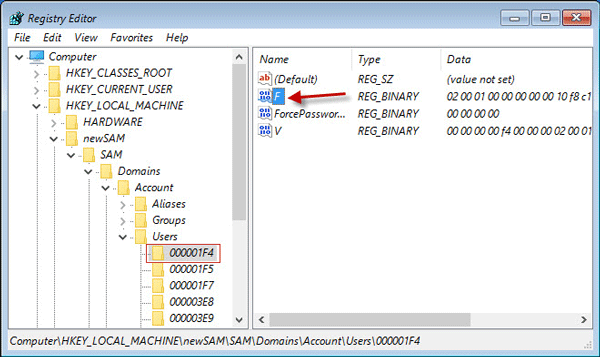
Step 6: In the Registry Editor, select HKEY_LOCAL_MACHINE, then click the File tab, and select Load Hive from the drop-down menu.
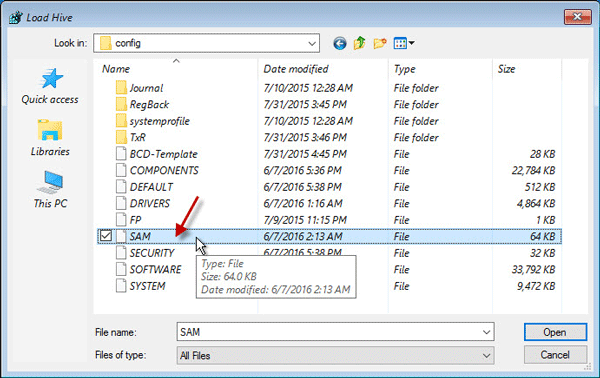
Step 7: In the Load Hive dialog, select This PC on the left side, then navigate to the drive where your Windows 10 is installed, and go to Windows\System32\config. Under the “config” folder, double-click the “SAM” file.
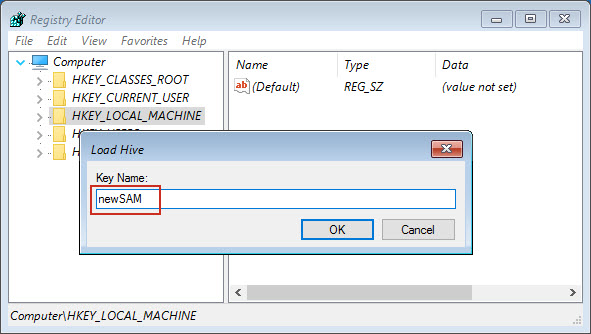
Step 8: You will create a new key. Type a name for the key, such as “newSAM”, and click OK.
Step 9: Now expand HKEY_LOCAL_MACHINE\newSAM\Domains\Account\Users. Click the key named “000001F4“, and then on the right-side pane double-click the entry named “F“.
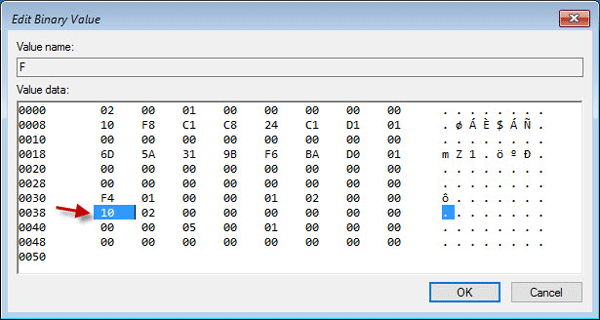
Step 10: Now you will modify the value data. Please be very careful and don’t make mistakes. Locate the line that starts with “0038“, double-click the value “11“, and change it to “10“, for 11 stands for “disabled” and 10 stands for “enabled”. Finally, click OK.
Step 11: Restart your computer. Then Windows 10 will directly sign into the built-in administrator account.
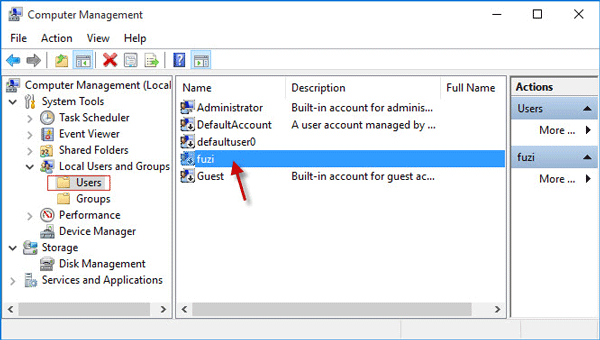
Step 12: Open Computer Management app. Navigate to System Tools -> Local User and Groups -> Users, then double-click the disabled account and clear the checkbox next to Account is disabled to enable it. Enable the rest accounts that have been disabled, so that they can be available to sign into Windows 10.