The DirectX is a diagnostic tool on the Windows platform. It can help check, diagnose and test the files, devices, and drivers running on the Windows, and help improve the computer’s capabilities to process sound and 3D graphics. Then how do you open or run DirectX Diagnostic Tool in Windows 10? This post will introduce four ways, as shown below.
Four ways to run the DirectX Diagnostic Tool in Windows 10
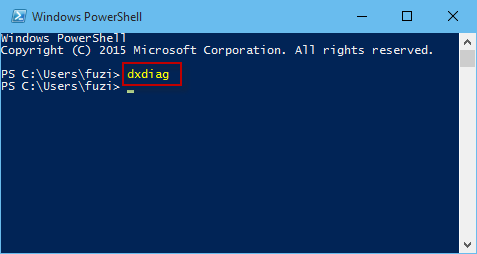
Either way, you need to use the dxdiag or dxdiag.exe command.
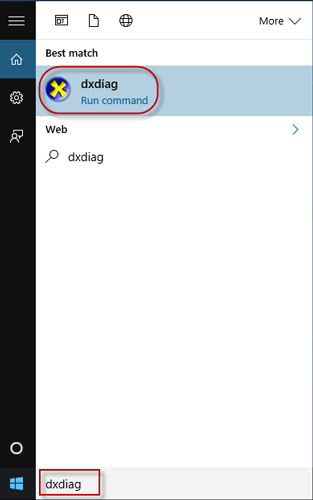
Way 1: from Start menu
Bring up the Start menu and start typing dxdiag (or dxdiag.exe) in the search box. After the dxdiag (or dxdiag.exe) icon appears under the ”Best match”, click it to run the DirectX Diagnostic Tool.
Tips: If it is the first time for you to run the DirectX Diagnostic Tool, a dialog will pop up asking whether you want to check if your drives are digitally signed. Just click Yes to confirm it.
Way 2: by Run box
Open the Run dialog box using Win +R keyboard shortcut, then type dxdiag (or dxdiag.exe) in the Open box, and click OK.

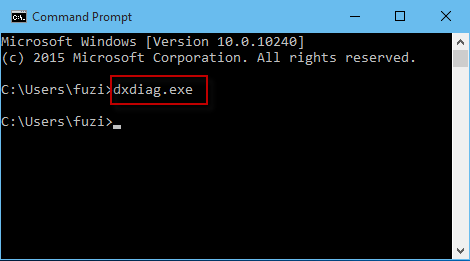
Way 3: with Command Prompt
Open a Command Prompt (or CMD) window, then type dxdiag (or dxdiag.exe), and press the Enter key on your keyboard.
Way 4: with Windows PowerShell
Open a Windows PowerShell window, then type dxdiag (or dxdiag.exe), and hit Enter key.