If you share your confidential Excel workbook with others, you may don’t want the worksheets to be deleted by someone else. So you need to take steps to protect the Excel worksheets from being deleted. Now, this post will show you two ways you can protect Excel sheets from being deleted.
Use workbook protection to protect Excel sheets
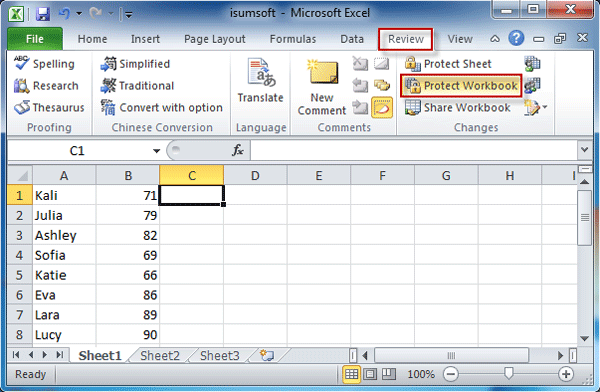
If you want to prevent all worksheets in an Excel file from being deleted, you can simply use the Protect Workbook feature under the Review tab of Excel. This feature can protect the structure and windows of an Excel workbook from being changed. Once this feature is enabled, the users of this Excel workbook won’t be able to add, delete, rename, or moving the sheets. Here are the steps.
Step 1: Open the Excel file.
Step 2: Click the Review tab, and then click the Protect Workbook command under the Review tab.
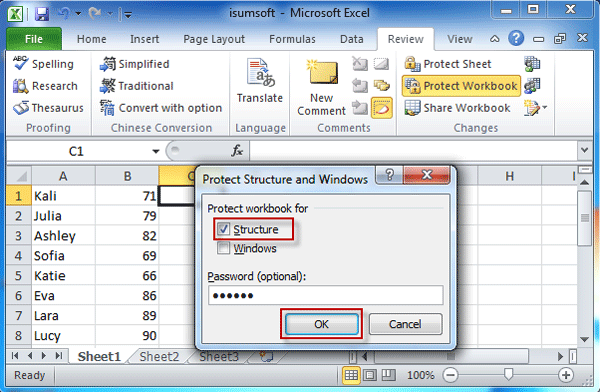
Step 3: In the Protect Structure and Windows dialog, check the Structure and Windows option, type in a password if you want, and then click OK. Note: The Windows option is greyed out in Excel 2013/2016.
Tips: If you assign a password for the workbook protection, keep the password in a safe place. If the password is forgotten or lost, it cannot be recovered and you have to remove the password using a third-party tool like Workbook Protection Refixer.
Step 4: Save the Excel file for the changes to take effect. Now all the sheets in this Excel workbook can’t be deleted.
Tips: If you want to allow the deletion of the worksheets, just need to remove the workbook protection using the Unprotect Workbook command.
Use VBA editor to protect Excel sheet from being deleted
If you just want to protect one or some particular sheets from being deleted, use the VBA editor to do that. Steps are as follows.
Step 1: Open the Excel file.
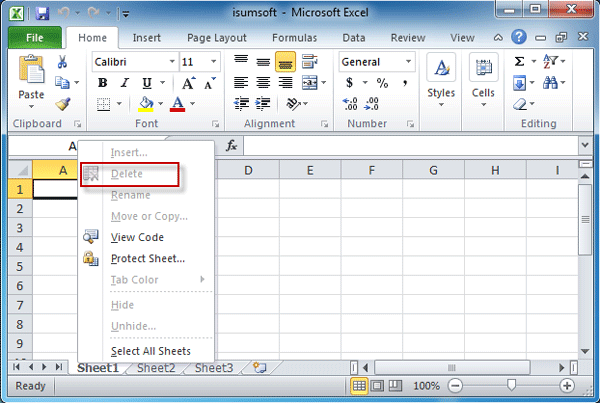
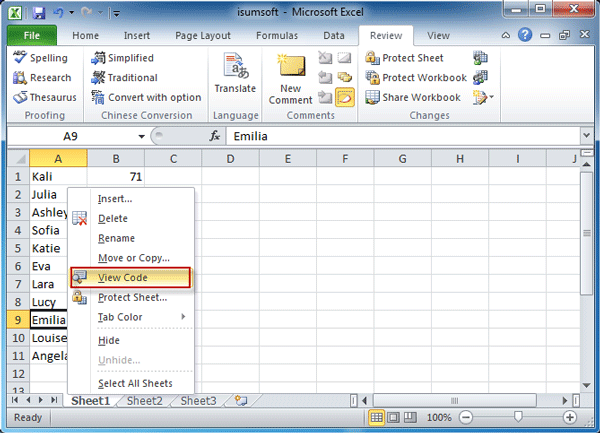
Step 2: Select the sheet you want to protect from being deleted, by clicking on the tab at the bottom of this Excel file. Right click on the tab and select View Code.
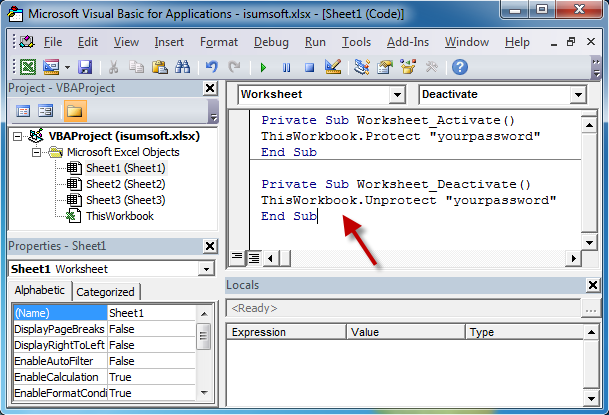
Step 3: Type in the following codes in the Code window. Replace yourpassword with your real password.
Private Sub Worksheet_Activate()
ThisWorkbook.Protect “yourpassword”
End Sub
Private Sub Worksheet_Deactivate()
ThisWorkbook.Unprotect “yourpassword”
End Sub
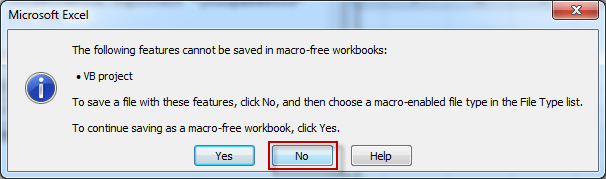
Step 4: Click the Save button or press Ctrl + S to save the VB project. When prompted with the following dialog, click No.
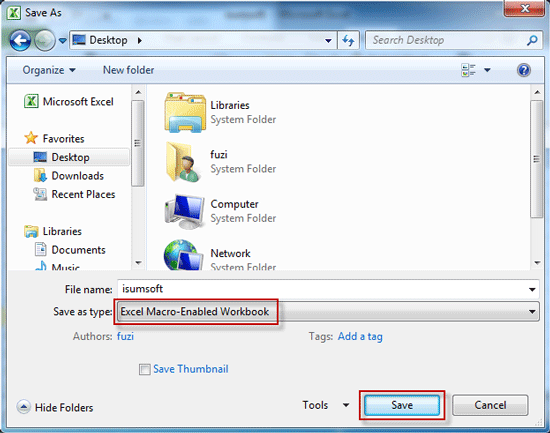
Step 5: In the Save As dialog, choose Excel Macro-Enabled Workbook from the Save as type drop-down list, and then click Save.
Step 6: When prompted with the Privacy warning, click OK.

Step 7: Now close all the windows.
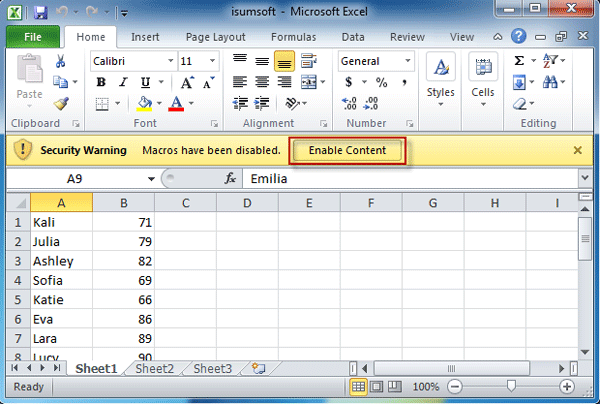
Step 8: Open the .xlsm file in Excel. You will see a Security Warning at the top that says Macros have been disabled, click the Enable Content button to enable Macros.
Step 9: Shift to another worksheet and go back to this worksheet again to activate the VBA codes. From now on, when you right-click on this sheet tab, you will find the Delete command is disabled and greyed out. By this way, you protect this sheet from being deleted, while other sheets still can be deleted.