The search box on the upper-right corner of Windows File Explorer lets you search and quickly find the files/folders on your computer. By default, all your typed terms in the search box of File Explorer should be saved into its history. As you type in the search box, it will show a list of the recent search terms.
The search history helps you easily access the folders/files, so you may have never thought to delete/clear it. However, if you share one computer with someone else, you may don’t hope any history to show up. Now, this page will show you how to clear or disable search history in Windows 10 File Explorer.
Way 1: Delete File Explorer search history one by one
Open Windows 10 File Explorer. Type in the search box to bring up the list of search history, then locate the term you want to delete, and press Delete key on your keyboard. Do the same to delete the terms one by one.
Way 2: Clear search history with Search Tools in File Explorer
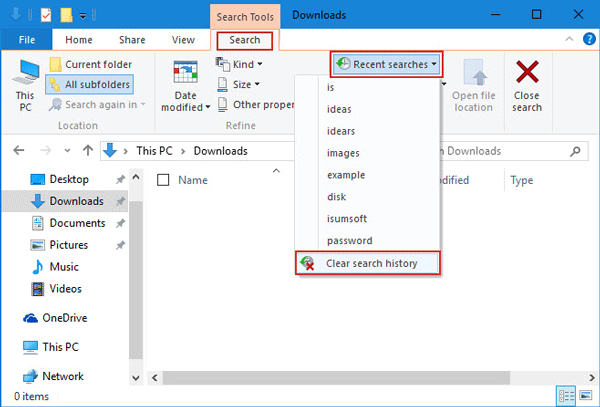
Step 1: Click in the search box of File Explorer. This will show the Search Tools.
Step 2: Click the Search tab under Search Tools, then click Recent searches, and click Clear search history from the drop-down menu. After the search history is cleared, the Recent searches button turns gray.
Way 3: Disable File Explorer search history via Group Policy Editor
Step 1: Open Local Group Policy Editor in Windows 10.
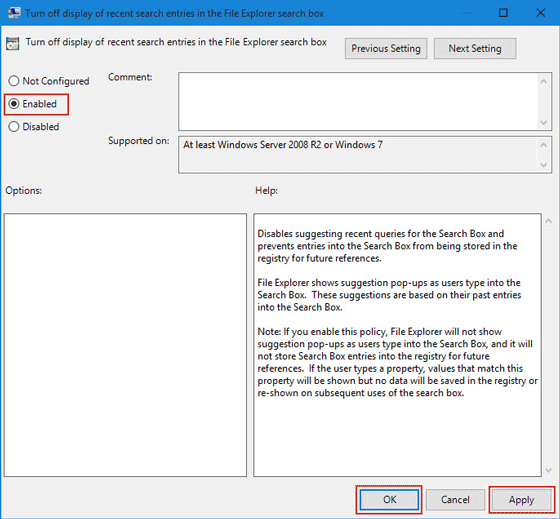
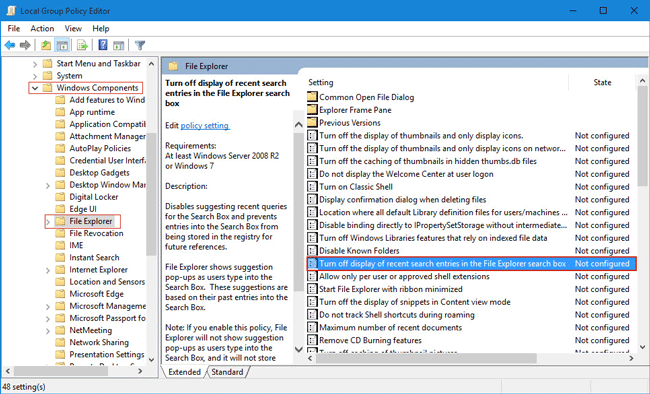
Step 2: Navigate to: User Configuration > Administrative Templates > Windows Components > File Explorer. Click on the File Explorer, then on the right-side pane, double-click on the item “Turn off the display of recent search entries in the File Explorer search box“.
Step 3: Select Enabled, and click Apply followed by OK. Then Windows 10 won’t display the search history in the File Explorer search box.