

If you are frustrated by an error message saying “Internet Explorer Has Stopped Working“, you’re in the right place. Here are several ways to fix the error message you receive.
- Way 1: Reset Internet Explorer
- Way 2: Reset all zones to default level
- Way 3: Disable the Hardware Acceleration
- Way 4: Delete Internet Explorer history
- Way 5: Run Internet Explorer Troubleshooter
- Way 6: Reinstall Internet Explorer
Way 1: Reset Internet Explorer
Step 1: Open Internet Options in Windows 10.
Step 2: Switch to the Advanced tab, click the Reset button under the Advanced tab.

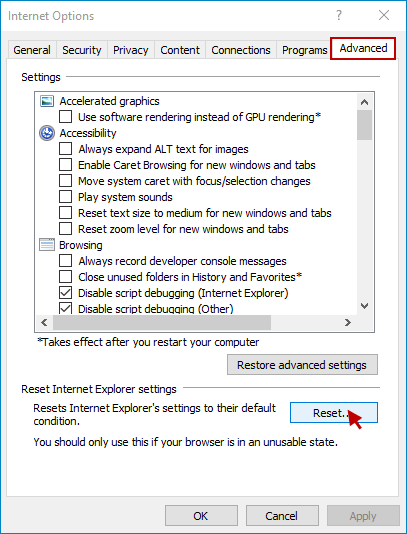
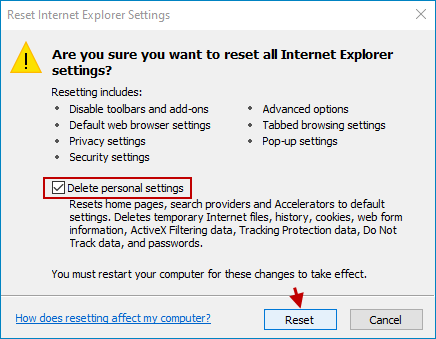
Step 3: In the next pop-up window, be sure to tick the checkbox named as Delete personal settings and then click the Reset button.

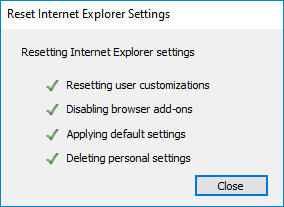
Step 4: Then, this will pop up a small window which displays all settings, just click the Close button to exit.

Restart your computer and check if Internet Explorer works properly. If the problem still exists, then move on to Way 2.
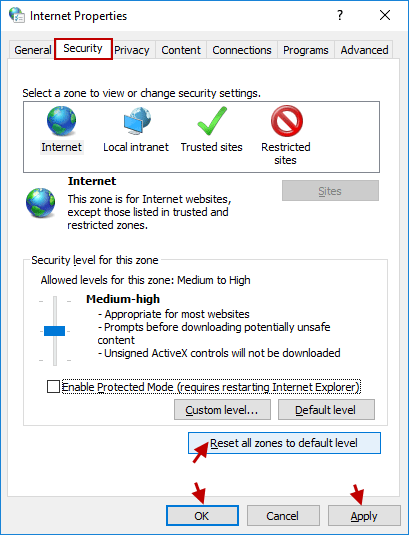
Way 2: Reset all zones to default level
Step 1: Press Win+R keys to open the Run dialog box, type inetcpl.cpl command and click OK to open Internet Properties.


Step 2: Under the Security tab, click Reset all zones to default level at the bottom of the window, then click Apply followed by OK to confirm your settings.

Once these steps are executed completely, restart your computer, then check to see if your issue has been resolved.
Way 3: Disable the Hardware Acceleration
Step 1: Launch Internet Properties again.
Step 2: Go to the Advanced tab and enable the checkbox which says Use software rendering instead of GPU rendering. Then click Apply followed by OK.

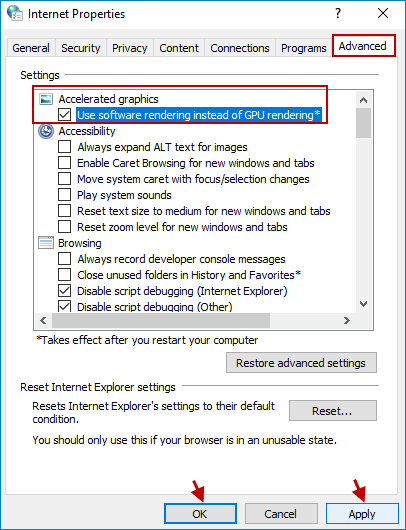
Now restart your computer to save the changes you made and see if you’re able to fix Internet Explorer Has Stopped Working issue. If disabling your Hardware acceleration doesn’t solve your problem, go to Way 4.
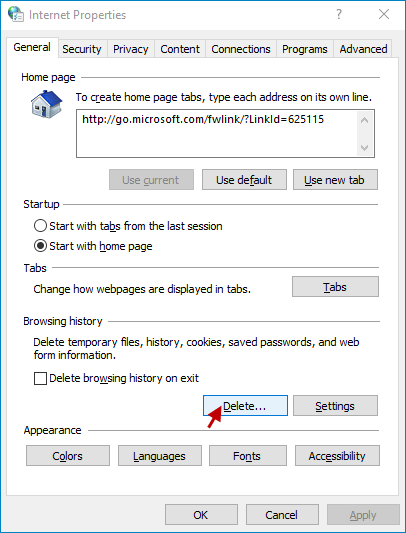
Way 4: Delete Internet Explorer history
Step 1: Go to Internet Properties window again.
Step 2: Click the Delete button under Browsing history in the General tab.

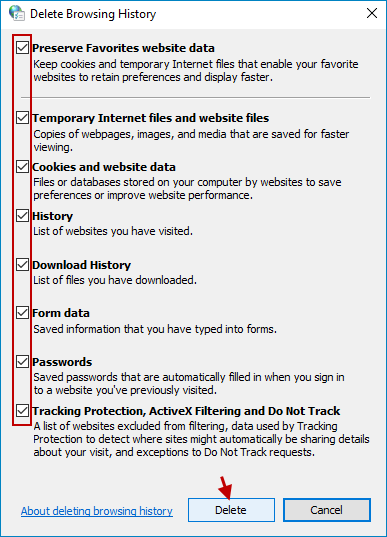
Step 3: When the Delete Browsing History window appears, check all of the following options and click Delete button.
- Preserve Favorites website data
- Temporary Internet files and website files
- Cookies and website data
- History
- Download History
- Form data
- Passwords
- Tracking Protection, ActiveX Filtering and Do Not Track

Step 4: Wait for the browsing history is deleted.

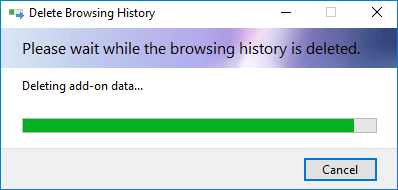
Then click Apply followed by OK to take effect the change you made.
Restart your computer and then check if Internet Explorer is working properly.
Way 5: Run Internet Explorer Troubleshooter
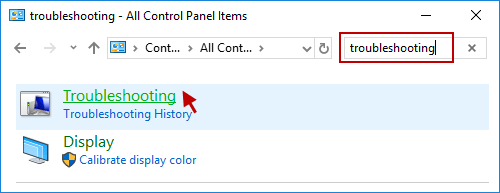
Step 1: Access Control Panel in Windows 10.
Step 2: In the upper right corner of the control panel, type troubleshooting in the Search bar. Click Troubleshooting link.

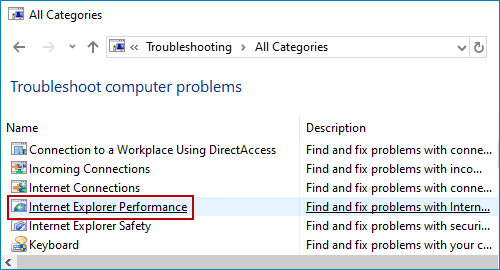
Step 3: In the left window of Troubleshooting, click View all link.


Step 4: Select Internet Explorer Performance.

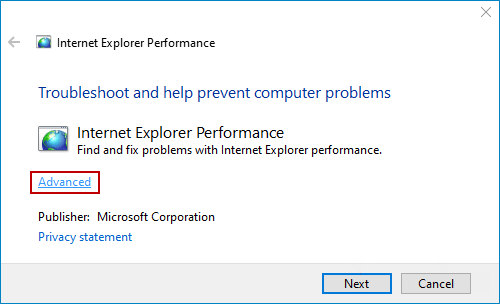
Step 5: Click the Advanced button.

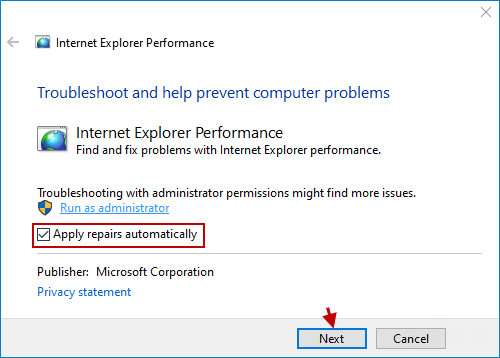
Step 6: Make sure that Apply repairs automatically option is checked. And click Next button to continue.

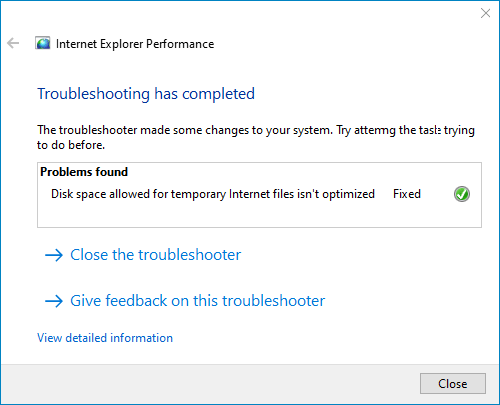
Step 7: Wait for Internet Explorer Performance Troubleshooter runs, and then you will see the Troubleshooter was fixed successfully.

Restart your computer and see if you are able to fix Internet Explorer Has Stopped Working issue.
Way 6: Reinstall Internet Explorer
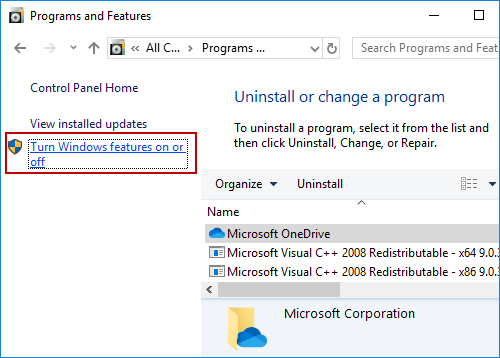
Step 1: Open Programs and Features in Windows 10
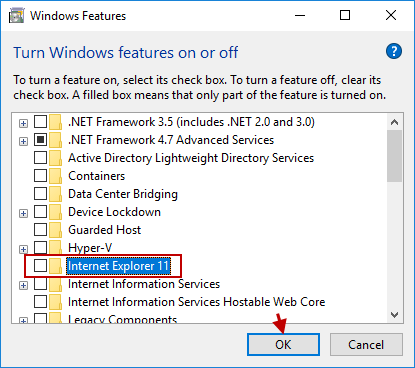
Step 2: Click the Turn Windows features on or off link.
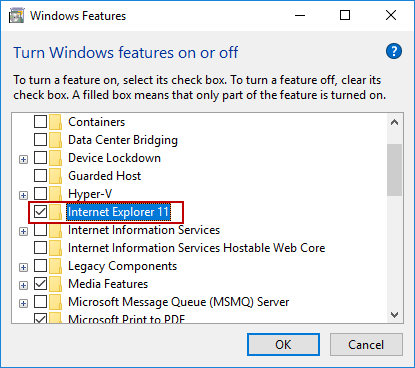
Step 3: Deselect Internet Explorer.

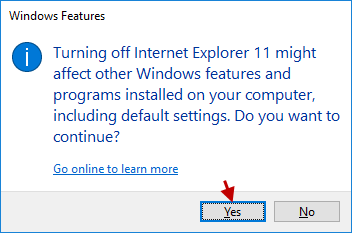
Step 4: Click Yes to confirm.

Step 5: Click OK and wait until Internet Explorer turns off.
Step 6: Restart your computer now.

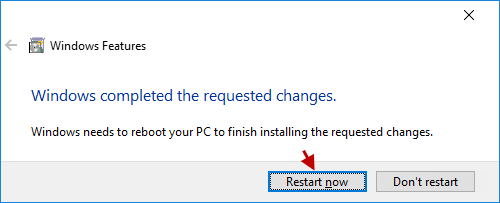
Step 7: Go back to Windows Features window, tick the Internet Explorer checkbox, then click OK.
Step 8: Wait until Internet Explorer turns on.
Restart the computer and see if it works properly.
See this tutorial video for details.