If you are bored with the default email font in Outlook 2016, you can change it based on your preferences. Now, this post will show you how to change the default font for emails in Outlook 2016.
Part 1: Change the default font for email messages in Outlook 2016
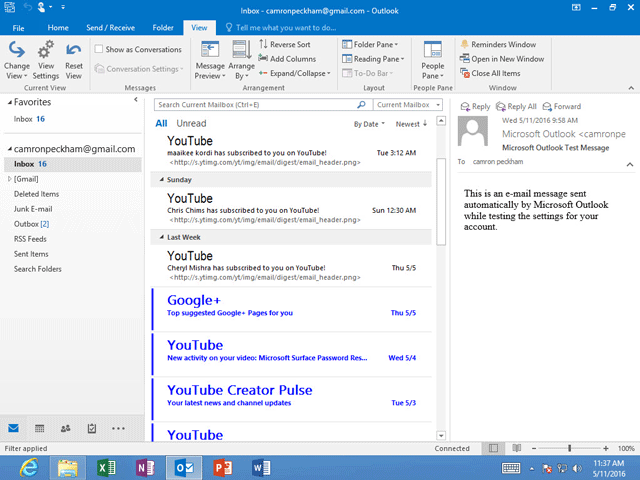
Step 1: Start your Outlook 2016 app.
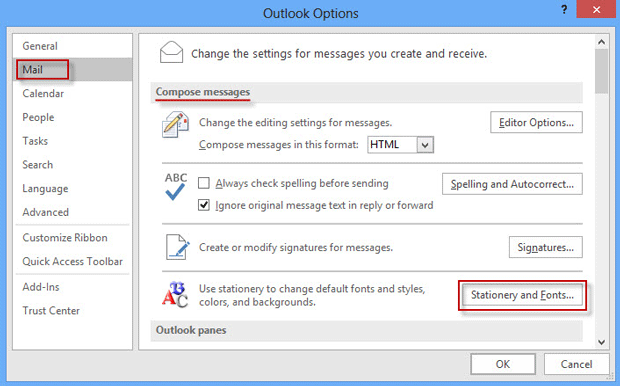
Step 2: Click the File tab, and then in the backstage view click the Options.
Step 3: After Outlook Options dialog opens, select Mail on the left-side pane, and locate the Compose messages section on the right side. Then click the Stationery and Fonts button at the back of Use stationery to change default fonts and styles, colors, and backgrounds.

Step 4: In the Signatures and Stationery dialog, select the Personal Stationery tab, and under the tab, you can change the font for email messages.
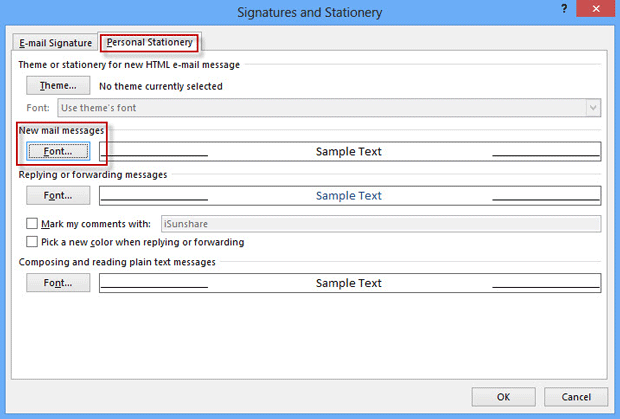

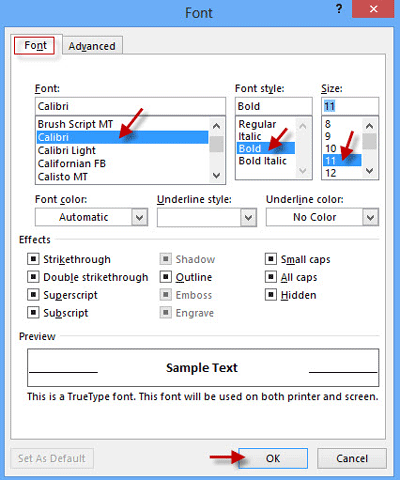
To change the font for new mail messages, click the Font button under New mail messages. In the Font dialog, select the Font tab. Then select the font you want from the list under Font, select the font style, size, color, etc. if you want, and then click OK. Click OK in the Signatures and Stationery dialog, and click OK in the Outlook Options dialog to make the changes take effect.

Similarly, you can change the font for replying or forwarding messages, and for composing and reading plain text messages.
Part 2: Change default font for email message list in Outlook 2016
You also can change the default font for the view of message list appearing between the Navigation Pane and Reading Pane.
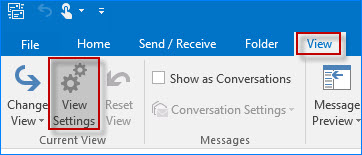
Step 1: Select the View tab and click the View Settings button.

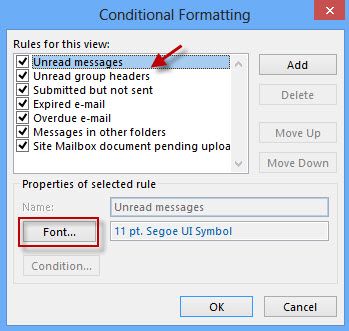
Step 2: In the Advanced View Settings dialog, click the Conditional Formatting button.


Step 3: In the Conditional Formatting dialog box, select the item such as “Unread messages”, “Unread group headers”, etc. and then click the Font button.

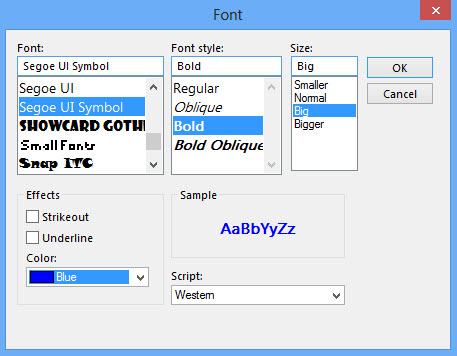
Step 4: In the Font dialog, select the font, font style, size, and color as you desire, and click OK. Click OK in the Conditional Formatting dialog, and in the Advanced View Settings dialog to make changes take effect.

Tips: In the Advanced View Settings dialog, you can also click the Other Settings button, and then change the font for column headings and rows displayed in the message list.
Then you can view the messages list displays the font as you desire.