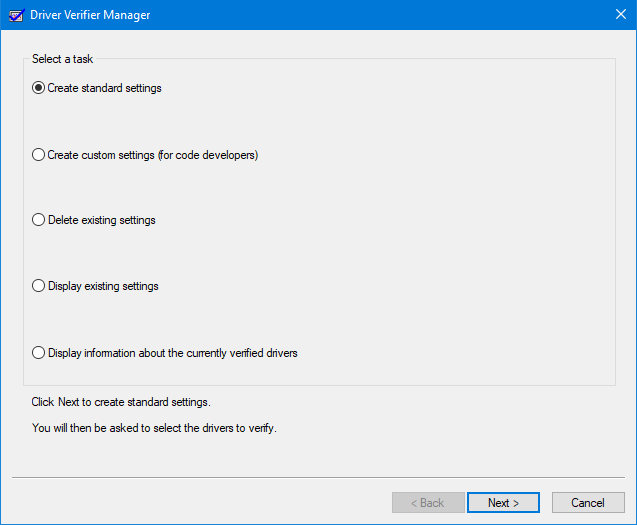
The driver verifier manager is a utility built into Windows 10. Not only does it help monitor the kernel-mode drivers in Windows, but also it can detect the improper work with various Windows drivers. If you want to use it, you have to open Driver verifier manager in Windows 10. To make it easier for you to work, we’ve introduced four methods for you. Let’s see how it works!
4 methods to turn on Driver Verifier Manager in Windows 10
- Method 1: via a Run dialog box
- Method 2: by searching
- Method 3: from Command Prompt(Admin)
- Method 4: from Windows PowerShell(Admin)
- Method 5: through File Explorer
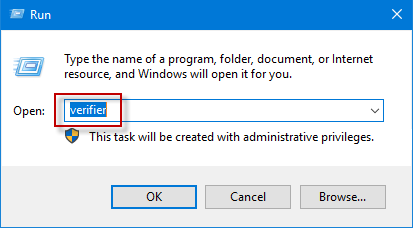
Method 1: Access Windows 10 Driver Verifier Manager via the Run dialog box
Press Win+ R keyboard shortcuts to launch Run dialog box, type verifier in the box and click OK/press Enter to turn on Driver Verifier Manager.

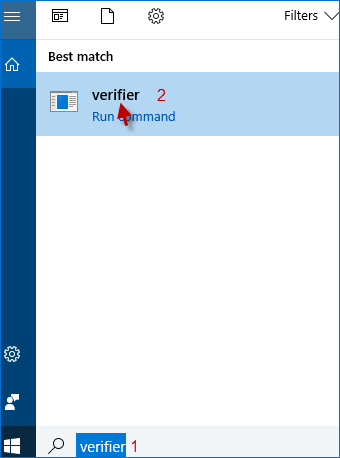
Method 2: Open Windows 10 Driver Verifier Manager by searching
Type verifier in Taskbar Search box and click the verifier/verifiergui.exe in the Search result to turn on Driver Verifier Manager.

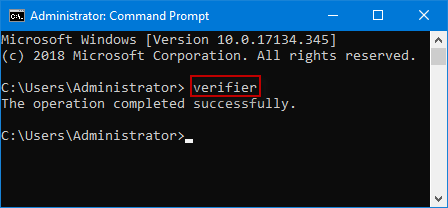
Method 3: Turn on Windows 10 Driver Verifier Manager from Command Prompt(Admin)
Step 1: Run Command Prompt as an administrator in Windows 10.
Step 2: After the Command Prompt(Admin) window opens, type verifier and press Enter to launch Driver Verifier Manager.

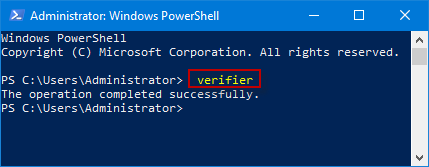
Method 4: Launch Windows 10 Driver Verifier Manager from Windows PowerShell(Admin)
Step 1: Run Windows PowerShell as an administrator in Windows 10.
Step 2: When the Windows PowerShell window has been opened, input verifier and press Enter to turn on Driver Verifier Manager.

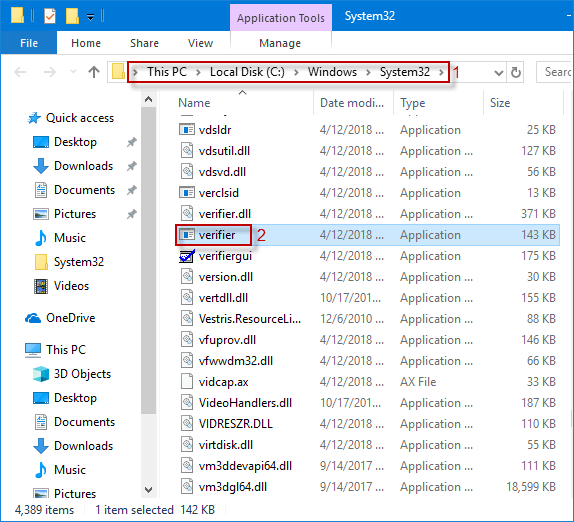
Method 5: Start Windows 10 Driver Verifier Manager through File Explorer
Step 1: Open File Explorer in Windows 10.
Step 2: In the File Explorer window, go to This PC >Local Disk (C:) > Windows > System32 folder. In the System32 directory, slide the mouse wheel to find and double-click verifier/verifiergui application to turn on Driver Verifier Manager.