Like any other Windows, Windows 10 comes with one built-in administrator account, whose default name is Administrator. This account has the highest level of authority to access and control the computer. Because of this, the built-in administrator account is usually the most targeted account by hackers or malicious programs. To enhance the security of the built-in administrator account, it is one good idea to rename the account. If you want to rename the built-in administrator account in Windows 10, you can use one of the following three methods.
Step 1: Open Computer Management in Windows 10 by pressing Win + X keys.
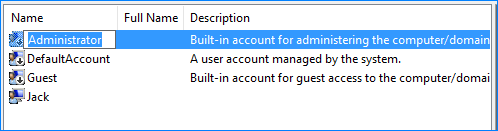
Step 2: On the left-side pane of the Computer Management window, expand Local Users and Groups and then select the Users folder. So you can see all user accounts including the built-in Administrator account on your Windows 10 listing on the middle pane.
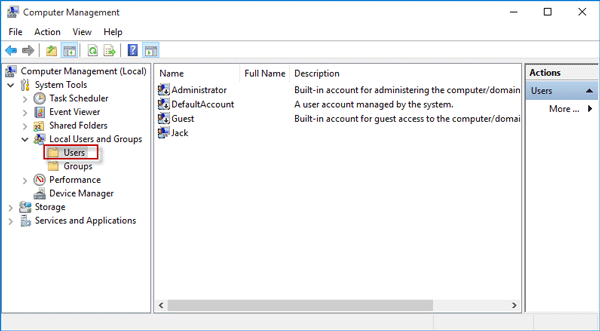
Step 3: Right-click on the built-in administrator account, and then select Rename from the context menu.
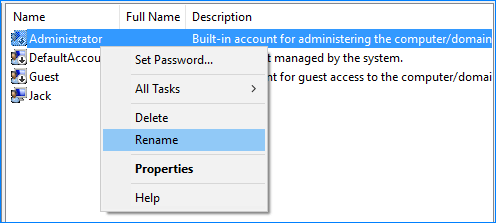
Step 4: The built-in administrator account's name will be highlighted and editable. You just need to type a new name and hit Enter.
Step 1: Open Local Group Policy Editor in Windows 10.
Step 2: On the left-side pane, navigate to: Computer Configuration -> Windows Settings -> Security Settings -> Local Policies -> Security Options. With Security Options selected, look for the policy named "Accounts: Rename administrator account", and then double click this policy.
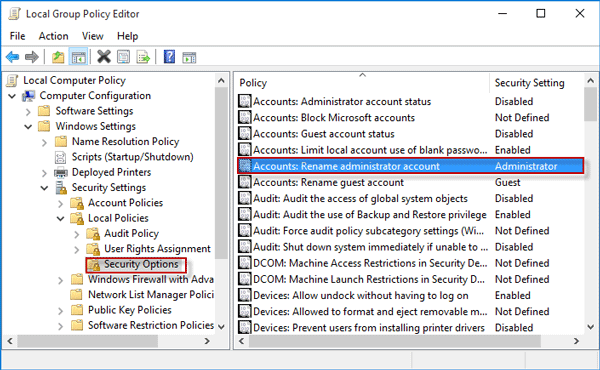
Step 3: With the "Local Security Setting" tab selected, the name of the administrator account is highlighted and editable. Type a new name in the field, and then click Apply followed by OK to rename the administrator account.

This method is only available when you have enabled the built-in administrator account.
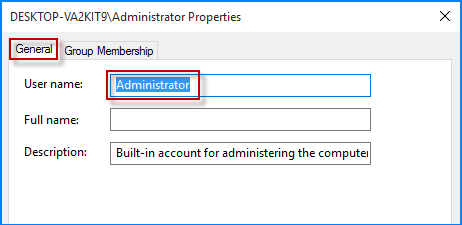
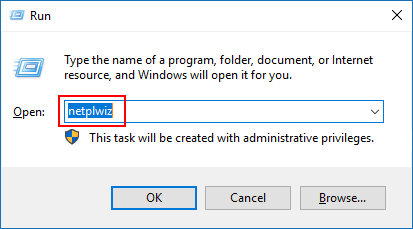
Step 1: Bring up the Run dialog box using Win + R, type in netplwiz, and click OK. This will open the advanced User Accounts applet.
Step 2: Choose the Users tab, select the built-in administrator account's name, and then click the Properties button. If the Properties button is greyed out and non-clickable, check the box next to "Users must enter a user name and password to use this computer" to activate the Properties button.
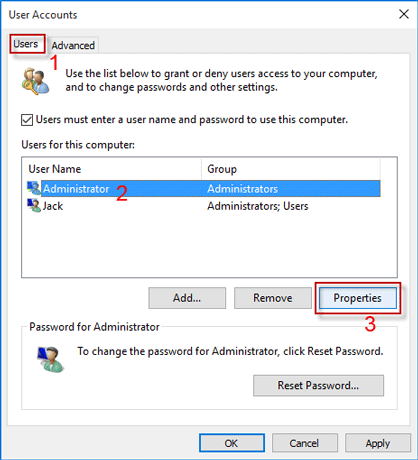
Step 3: Select the General tab, type a new name in the field next to "User name", and click Apply followed by OK.