
In file explorer, mapping folder to network drive can save you a lot of time and vigor, such as not having to look up it and type its network address every time. Here is going to map and disconnect network drive in Windows 10.
Step 1: Launch File Explorer in Windows 10.
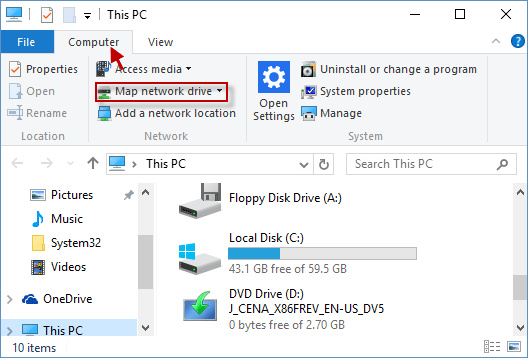
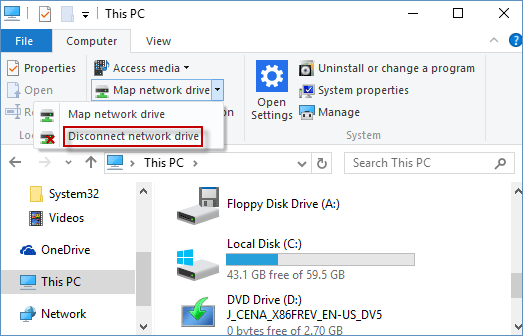
Step 2: Find and click This PC on the left pane. And click Computer option to choose Map network drive button.
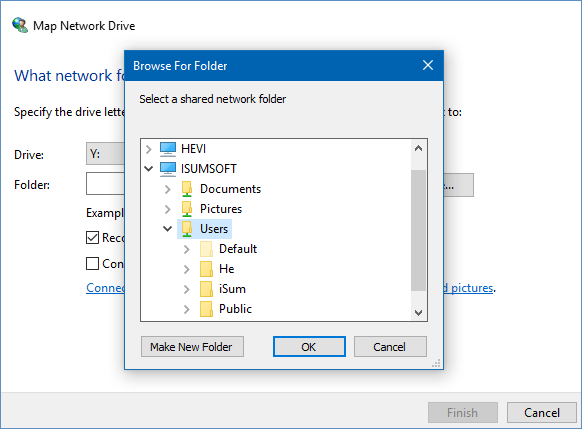
Step 3: In the blank box of Drive, select a drive letter you prefer. Then tap browse button to search the folder you want to connect to and click OK button. ( See screenshot below )
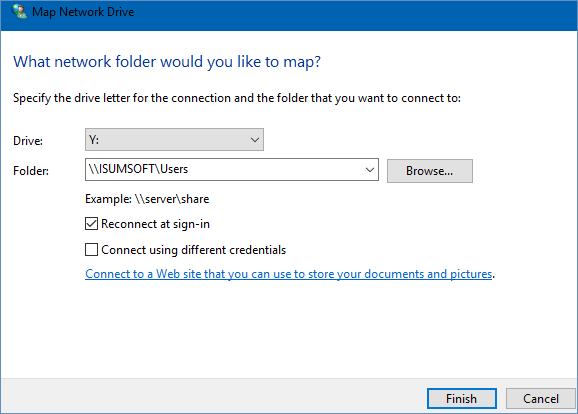
Step 4: The network folder name you look for will be listed in an instant and click Finish button. ( \\ISUMSOFT\\Users )
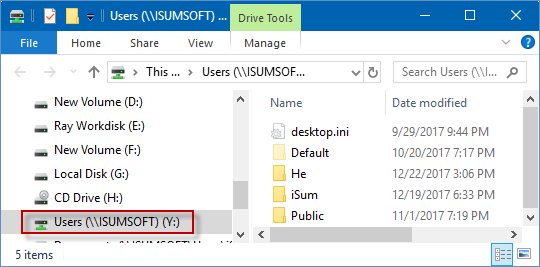
Step 5: When done the above steps, you will see the new network drive letter under This PC. This means that you have successfully mapped that folder to your network drive.
Step 1: Under Computer option, click Disconnect network drive button to open the next window.
Step 2: Select the network drive you want to disconnect, then click OK button.
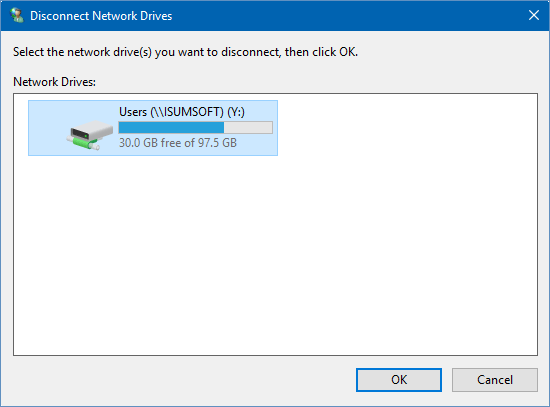
Step 3: Make sure if you want to disconnect this network drive anyway. Click Yes button.

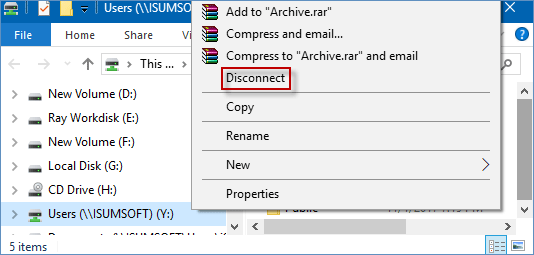
Note: ( Or you can right-click the new drive letter under This PC, and choose Disconnect option. )
 Launch File Explorer to Open This PC
 How to Change Your Windows 10 Network Type into Private or Public
 How to Add a Network Location Manually in Windows 10
 How to Allow or Disallow Remote Desktop Connection to a Windows 10 PC
 How to Share Files/Folders over Local Network and Stop File Sharing in Windows 10
 How to Add and Access Chrome Remote Desktop in Your Chromebook