The Windows operating system creates a cache for fonts so that each time you start an application, it loads fonts faster. However, if you have trouble displaying or using fonts, such as fonts appearing garbled, inability to switch fonts, program crashes while switching fonts, etc., then it may indicate that your font cache is corrupted. In this case, you need to clear the font cache, so that Windows operating system will rebuild it to fix any font related problems. Now, on this page, we will show you two ways to clear font cache in Windows 10.
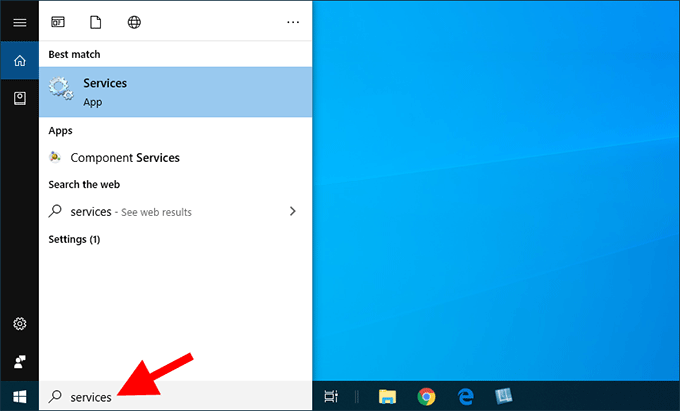
Open the Services app by typing services in the Cortana search box and pressing Enter.
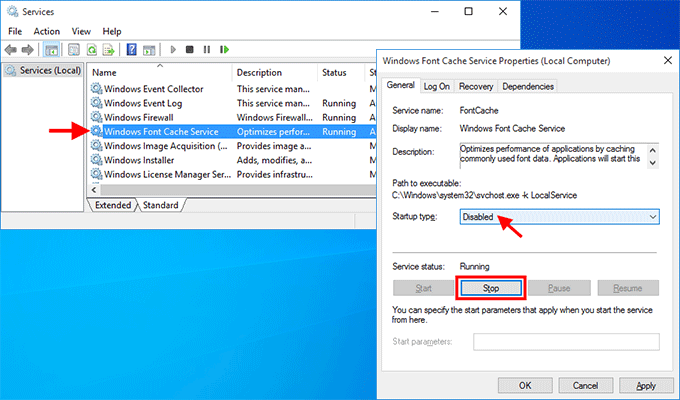
Locate the Windows Font Cache Service. Double click on this service to open its properties dialog. Click Stop under "Service status" to stop this service, and then select Disabled from the "Startup type" list to completely disable this service. Finally, click Apply.
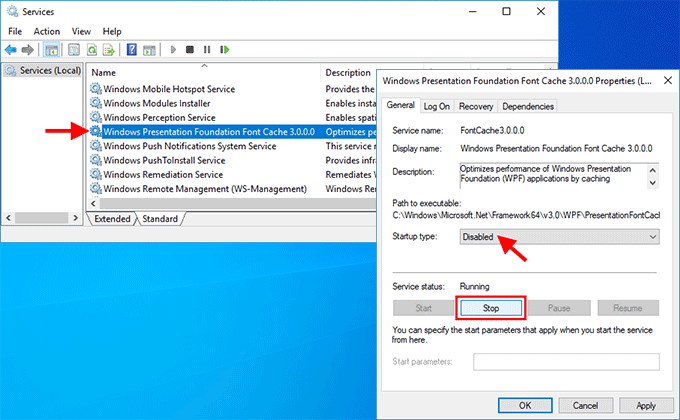
Locate the "Windows Presentation Foundation Font Cache 3.0.0.0" service. Double click on this service to open its properties dialog. Similarly, click Stop and select Disabled to stop and disable this service. Click Apply to save the changes.
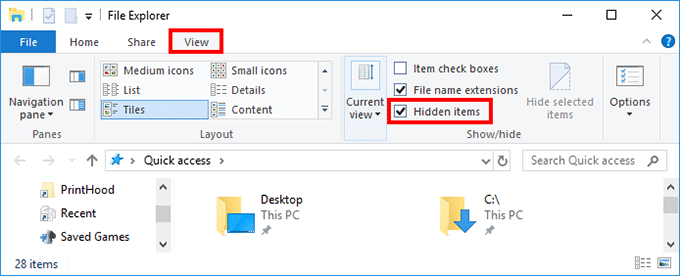
Open the File Explorer by pressing Win + E, click the View tab on the top, and make sure the "Hidden items" option is checked.
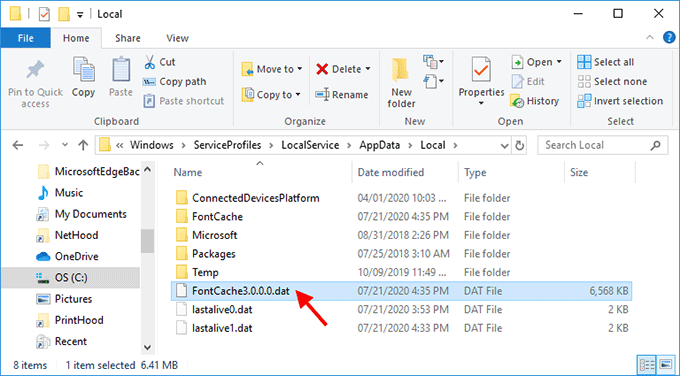
Navigate to the path C:\Windows\ServiceProfiles\LocalService\AppData\Local. If a warning dialog pops up saying you don't have permission to access this folder, just click on Continue to allow access. Then delete all .dat files that start with FontCache.
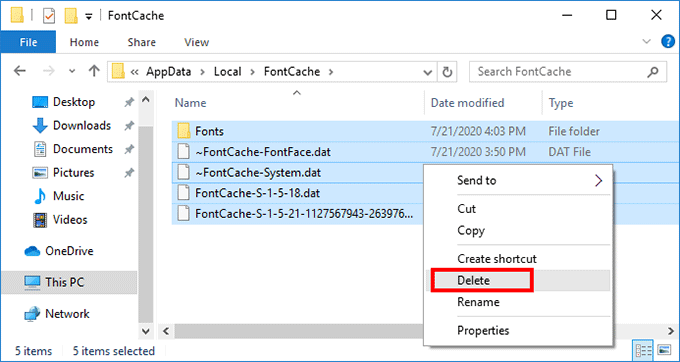
Next, open the FontCache folder. Select all files in this folder by pressing Ctrl + A, and then delete them all. If Windows 10 doesn't allow you to delete certain files, restart Windows 10 and try again.
After you have deleted all the font cache files, enable both the "Windows Font Cache Service" and the "Windows Presentation Foundation Font Cache 3.0.0.0" service. Then Windows 10 will rebuild font cache next time when it starts or restarts.
If you want an easier and faster way to clear the font cache in Windows 10, a Windows cleanup or optimization tool is a good choice. iSumsoft System Refixer is a simple but practical PC cleanup and optimization tool. It helps you remove all kinds of junk files in Windows 10, including the font cache. Follow these simple steps.
Step 1: Download iSumsoft System Refixer for free and install it on your Windows 10. After installation, launch this tool.
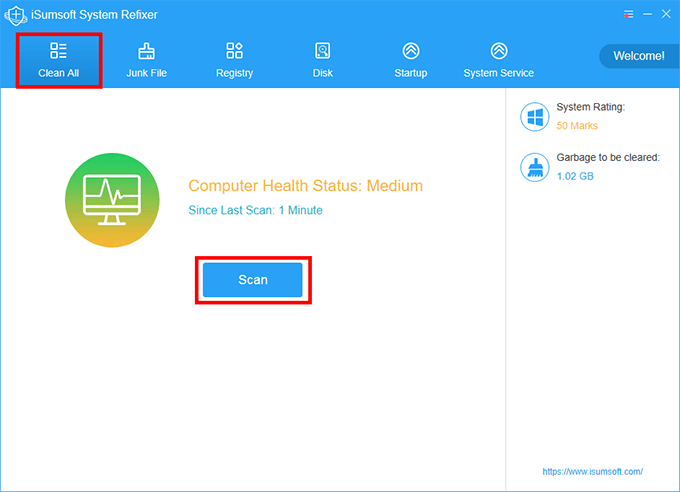
Step 2: Select the Clean All option at the top of the interface, and then click Scan. This tool will quickly scan the Windows system to find all unnecessary files.
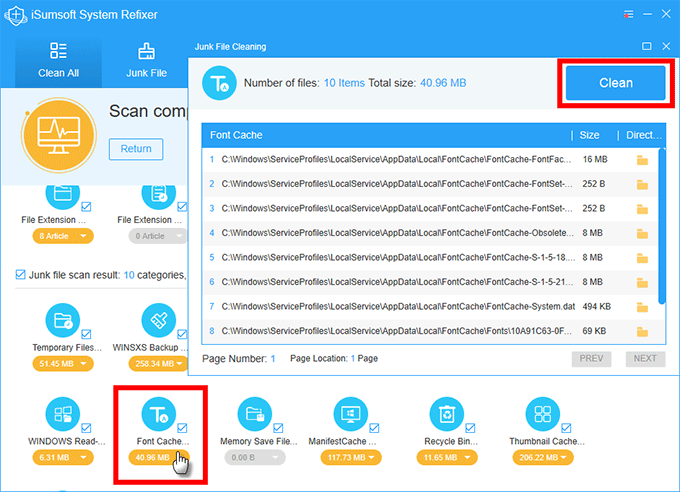
Step 3: Once the scan is complete, all unnecessary file types are displayed on the screen. Scroll down to locate the Font Cache category. Click on it and then click Clean in the pop-up dialog. This will clean all font cache files at once.
Tips: In general, font cache does not take up a lot of disk space and has no negative effect on the Windows system, so it is not necessary to clear it frequently. Deleting it does not significantly free up hard disk space or improve system performance. Only if you have font displaying problems, you need to delete the font cache to let Windows 10 reset/rebuilt it.