If you want to allow your PC to be found on the network by other PC and devices, you can set the network to private. Otherwise, set it as public. In this article, we show you how to change your Network type into Private or Public for Ethernet connections in Windows 10.
Step 1: Go to Settings app in Windows 10.
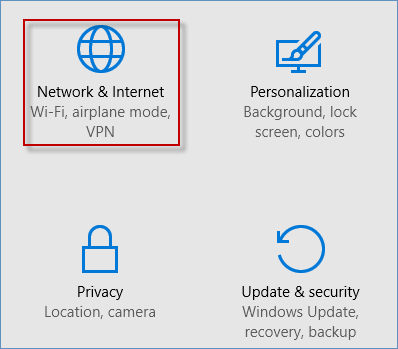
Step 2: In the Settings app, click Network & Internet option.
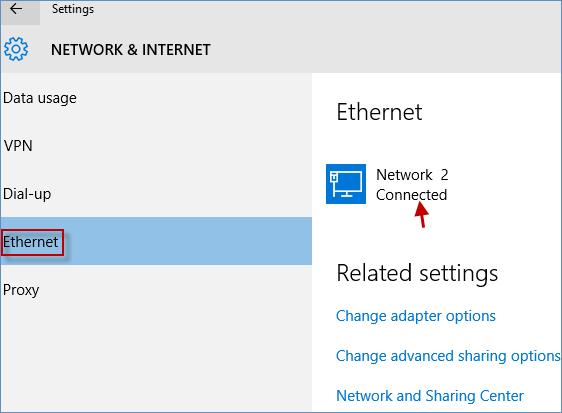
Step 3: If you use an Ethernet cable to connect to a network, select Ethernet in the column on the left. Then, click the name of the active network connection on the right.
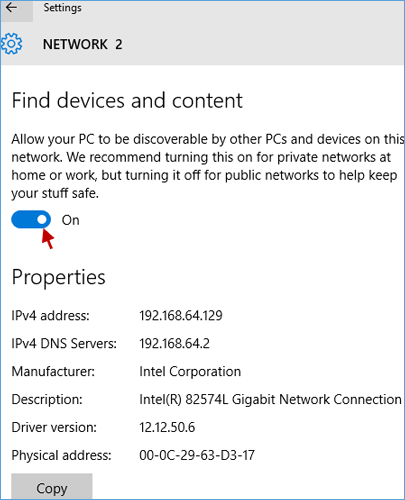
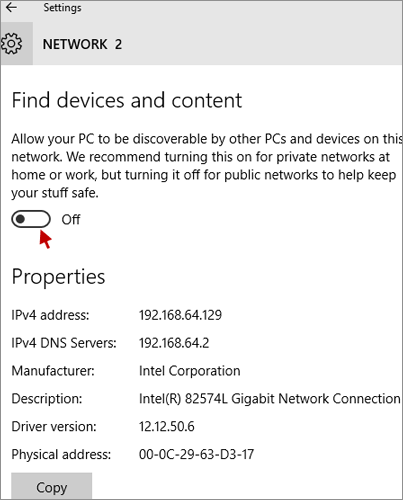
Step 4: Turn this on for private networks. ( See the following screenshot )
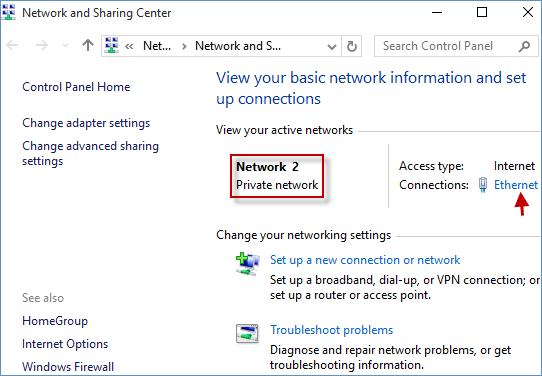
Step 5: When done, close the Settings app to check whether you have successfully set your network as private by opening Network and Sharing Center. In the network and the sharing center, you can see the actual location of private network connection, just under its name.
Step 6: Similarly, to turn this off for public networks. Please repeat the above three steps, such as Step 1, Step 2, Step 3. Then the new window will be opened, just click this On button, and it will automatically become Off button. ( See the following screenshot )
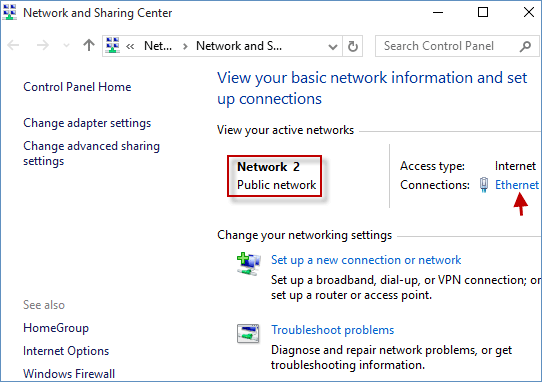
Step 7: After finished, close the Settings app. Launch Network and Sharing Center to check whether your network has been set as public. In the network and the sharing center, you can see the actual location of public network connection, just under its name.
Tips: Or when you have set your network by switching on or switching off for Ethernet connections, you can also go back to this NETWORK & INTERNET window to select the Network and Sharing Center option to check if the network has been changed into private or public. ( See the picture below )

Step 1: Launch Registry Editor in Windows 10.
Step 2: In Registry Editor window, navigate to the following command line:
HKEY_LOCAL_MACHINE\SOFTWARE\Microsoft\Windows NT\CurrentVersion\NetworkList\Profiles
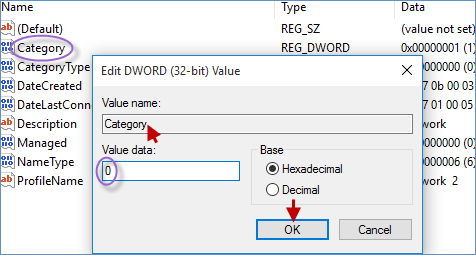
Step 3: Click the key under Profiles. Right-click Category to choose Modify option in right side.
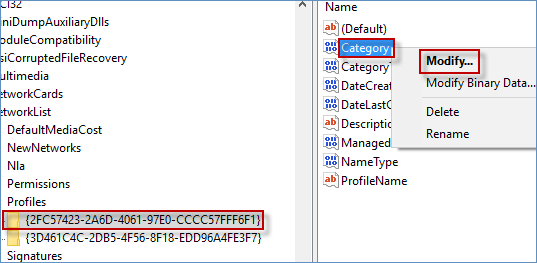
Step 4: Change Category Value data can be 0 for Public network, 1 for Private network and 2for Domain network. In Value data dialog box, type 0 and click OK button to change network type from private to public. Launch Network and Sharing Center to find the network type that has been set as Public network.
Step 1: Open Local Group Policy Editor in Windows 10.
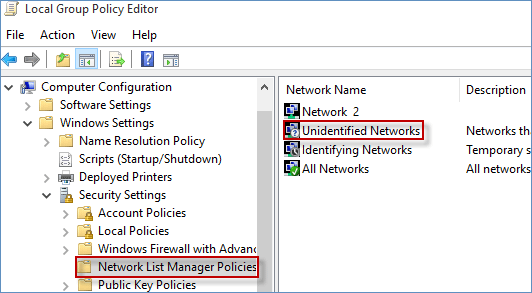
Step 2: In Local Group Policy Editor window, navigate to Computer Configuration\Windows Settings\Security Settings\Network List Manager Policies. When navigates to Network List Manager Policies, double-click Unidentified Networks.
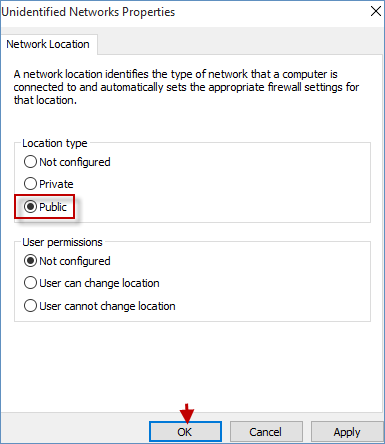
Step 3: In Unidentified Networks Properties, choose Public and click OK button.
Step 4: Go to Network and Sharing Center, you will see the network type is changed into Public network.
Step 1: Run PowerShell as administrator in Windows 10.
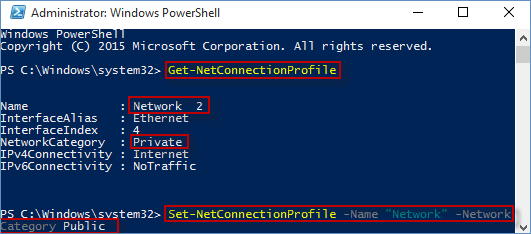
Step 2: In Windows PowerShell window, copy and paste Get-NetConnectionProfile, press enter.
Step 3: Input Set-NetConnectionProfile -Name "Network" -NetworkCategory Public, press enter.
Step 4: Open Network and Sharing Center, you will find the network type is displayed into Public network.
Note: If you want to change the network type from public to private, just need to type the command line below:
Set-NetConnectionProfile -Name "Network" -NetworkCategory private