Over time, you may be surprised at how many photos, music, apps, and other content that you use and enjoy on your Mac takes up space in your device's storage capacity. When you feel that your device's storage is filling up quickly, you may desperately need some more space on your Mac, there are several ways to do it. The following tips and tricks will help you get more free storage space in macOS and improve Mac performance.
Optimize Storage is Apple's built-in storage cleanup tool to manage Mac storage efficiently. Before you get started, you can make a Time Machine backup to ensure you can access anything on your Mac that you might need later.
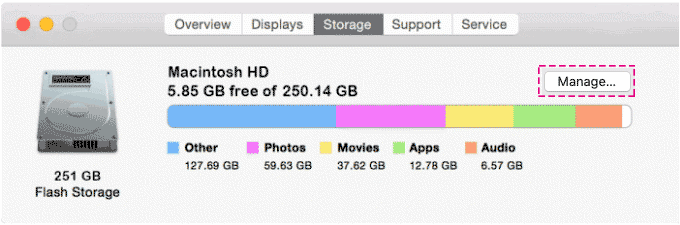
To access the storage management tools on your Mac, you can click the Apple menu in the upper-left corner, then choose About This Mac and then Storage tab. In this window, you'll see an overview of how your storage space is being used and how much space you have available.
Click the Manage button to see recommendations for optimizing your storage.
This helps you store files from your Desktop and Documents folders in iCloud Drive, store photos and videos in iCloud Photo Library, store messages and attachments in iCloud, and optimize storage by keeping only recently opened files on your Mac when space is needed.
To store files, photos, and messages in iCloud, click Store in iCloud, and then confirm.
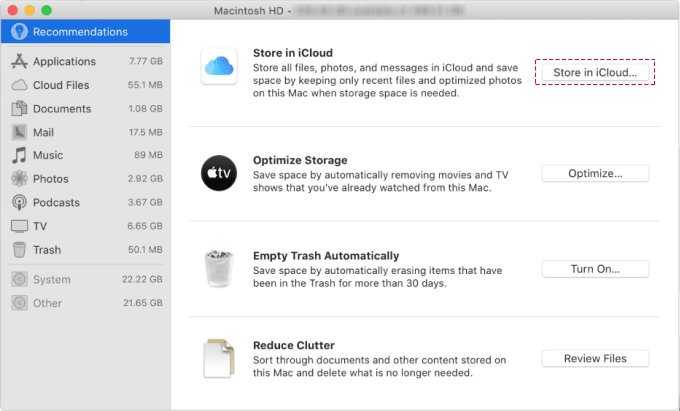
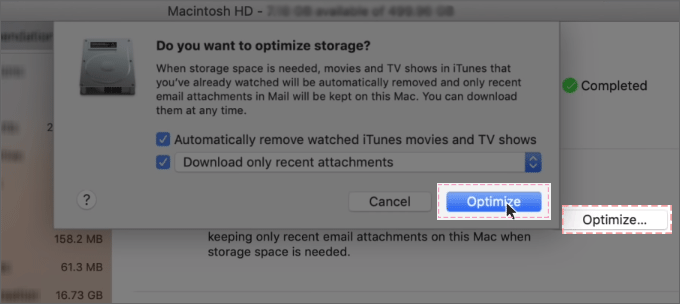
You can save space by automatically removing Apple TV movies and shows that you already watched and by keeping only recent email attachments on this Mac when storage space is needed.
To enable this recommendation, click Optimize... and confirm.
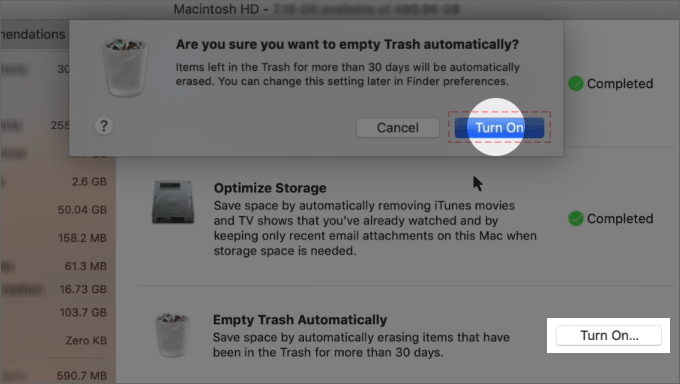
You can easily get rid of files you don't plan to use again by setting your Mac to empty the Trash automatically. This will erase items that have been in the Trash for 30 days or more.
To enable this option, click Turn On and then confirm.
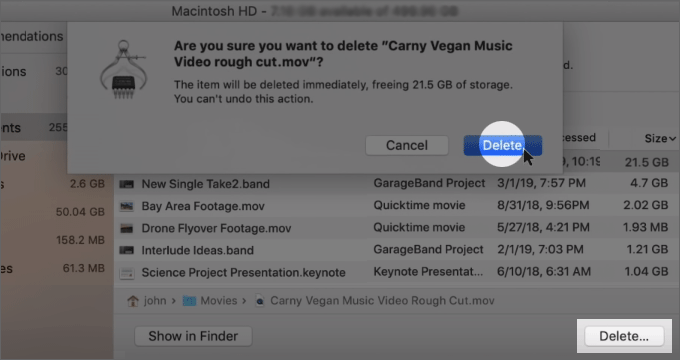
If you want to manually get rid of large, old files on your computer that you don't need anymore, just locate Reduce Clutter at the bottom and click Review Files to identify large files that you may no longer need.
Then select a file. Click Delete... and then confirm to remove it from your Mac.
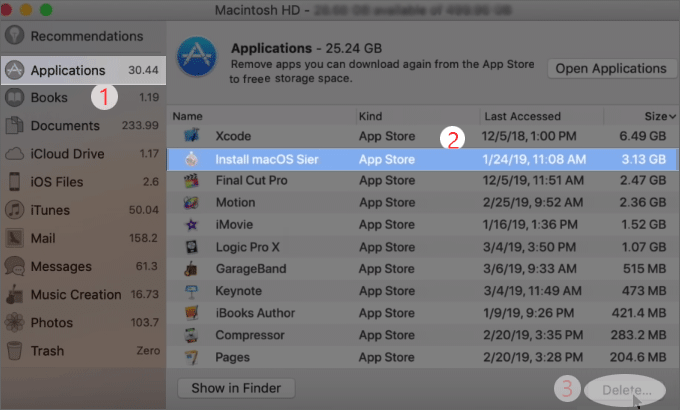
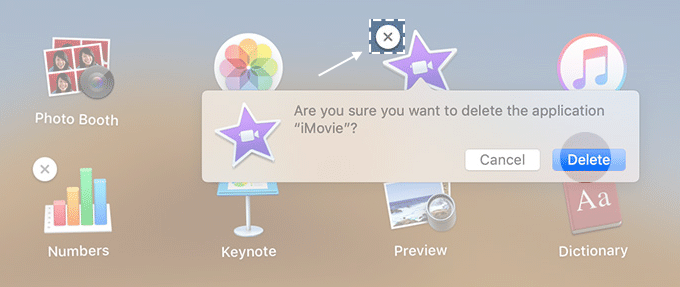
Once you've reviewed documents, explore other categories in the sidebar to remove more content you no longer need. For example, click Applications to see how much space each of your apps takes up. See one you haven't used in a while? Click the app... Then click Delete. Enter your password if prompted, click Delete one more time.
Step 1: Open Launchpad in the Dock.
Step 2: Locate the app you wish to remove.
If you don't see the app in Launchpad, type its name in the search field at the top of the screen.
Step 3: Press and hold the Option key, or click and hold any app until the apps jiggle.
Step 4: Click Delete icon next to the app that you want to delete, then click Delete to confirm.
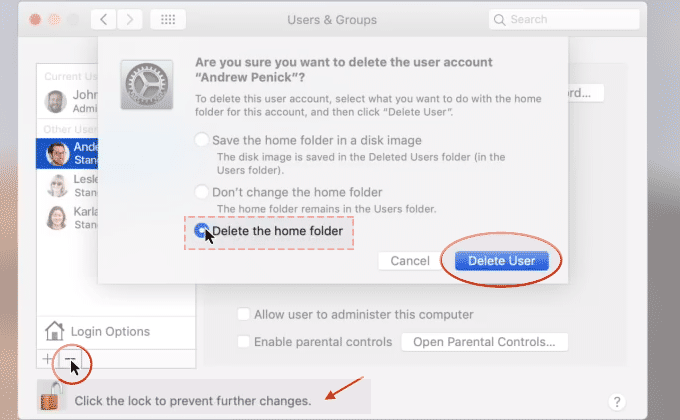
Another way to make room is to remove any users or groups who no longer need access to your Mac.
This option will permanently delete every file within that account, so make sure there's nothing you need to save before selecting this option. If you're sure, click Delete User.
If you've run out of things to delete, consider copying some of your files, photos, and other personal documents to an external drive and deleting them from your Mac. You can use the same drive for your Time Machine backups and for extra storage on demand.
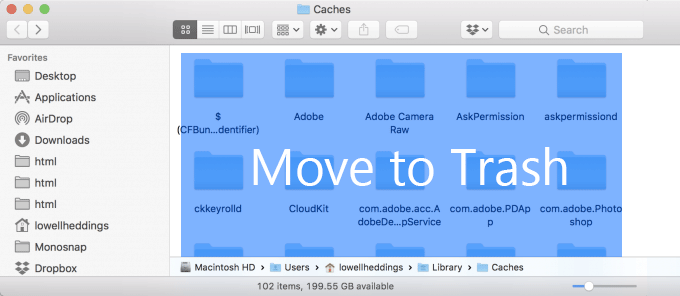
You have to clear caches, logs, and other unnecessary data when storage space is needed. Follow the below steps to clean these annoying the temporary log files and caches on the Mac.
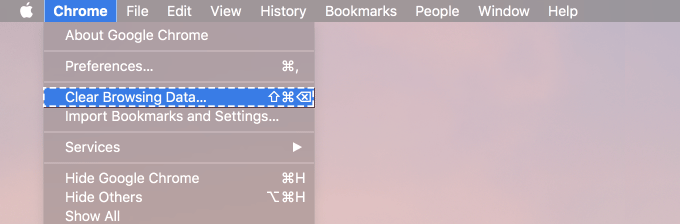
Your web browser has a built-in option to clear out browsing data that you can use to quickly clear up a bit of space.
There are a lot of other temporary files on your system, which you can see by opening up the Finder.
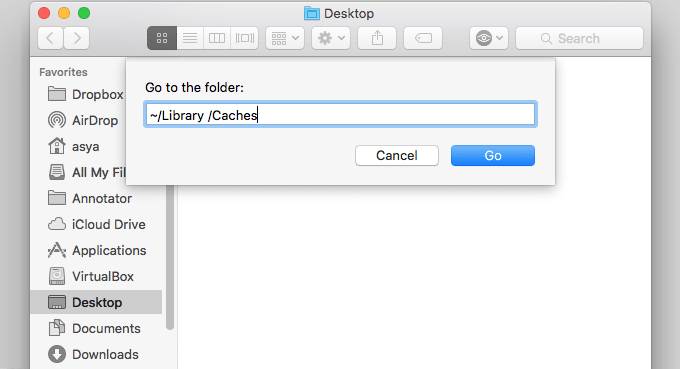
This will pull up a folder that has a ton of folders in it, which you can select and right-click to delete manually.
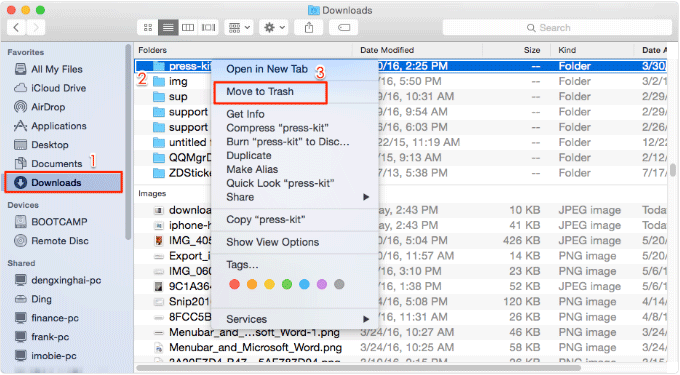
Step 1: Open the Finder app from your dock.
Step 2: Click on Downloads in the left hand-side menu.
Step 3: Select the files you want to delete by clicking on them. If you want to delete all downloads, simply press Shift on your keyboard while clicking the first and then last download in the list. You can also hold Command + A to select all. Then right-click the mouse and click on Move to Trash.
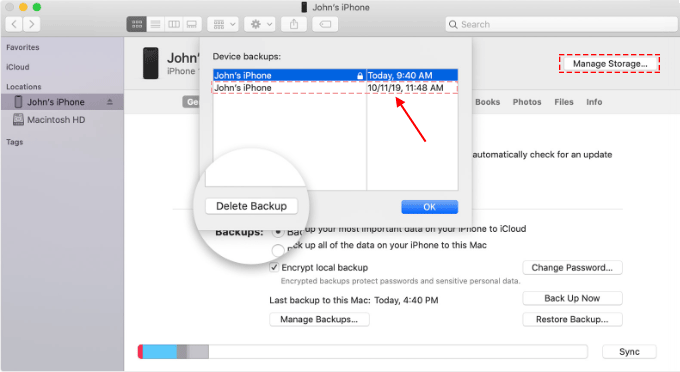
If you've backed up your iPhone or iPad to your Mac using iTunes or Finder app, you've probably got a bunch of massive backup files that are taking up a shocking amount of space. You are able to clear up lots of space by finding and deleting some of these backup files.
On a Mac with macOS Catalina 10.15 or later, open the Finder.
In Finder, under the General tab, click Manage Backups to see a list of your backups. From here, you can right-click on the backup that you want, then select Delete.
Click Delete Backup, then confirm.
It is essential to completely remove all the files that your trash cans contain and free up the space they require. To empty your user account's main trash can, right-click the Trash icon at the bottom-right corner of the dock and select Empty Trash. This will delete all the files you sent to the trash from the Finder.