Live Photos are three-second-long moving pictures. In this tutorial, you'll learn how to shoot, view, edit and share Live Photos so that you can create unforgettable living memories with your iPhone.
A Live Photo captures 1.5 seconds of video and audio both before and after you press the shutter button to take a photo. It includes a 12 megapixel still JPEG image, and a 3-second Live Photo.
Live Photos are available in the camera app of iPhone 6s/6s Plus, iPhone se, iPhone 7/7Plus.
Use these steps to take a Live Photo:
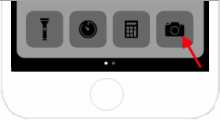
Step 1: Open the camera app.
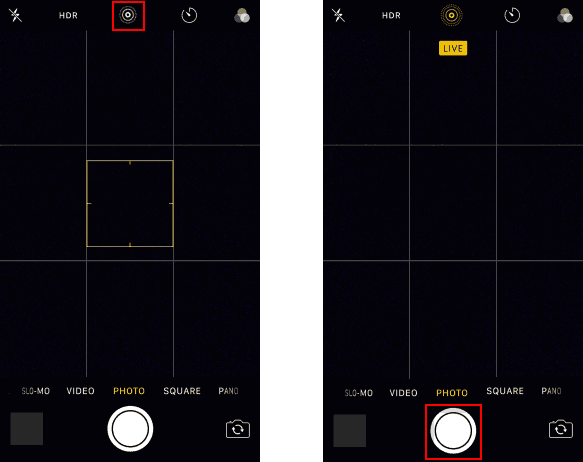
Step 2: Tap ![]() icon at the top center of the screen to turn on Live Photos.
icon at the top center of the screen to turn on Live Photos.
Step 3: Tap the white shutter button.
Once you've taken a Live Photo, it will be stored in the Photos app. You can edit Live Photos in the Photos app just like the ordinary still images.
To view a Live Photo:
Tap an image thumbnail to open Live Photo. Firmly press the screen and hold it to animate the photo.
To Edit Live Photos:
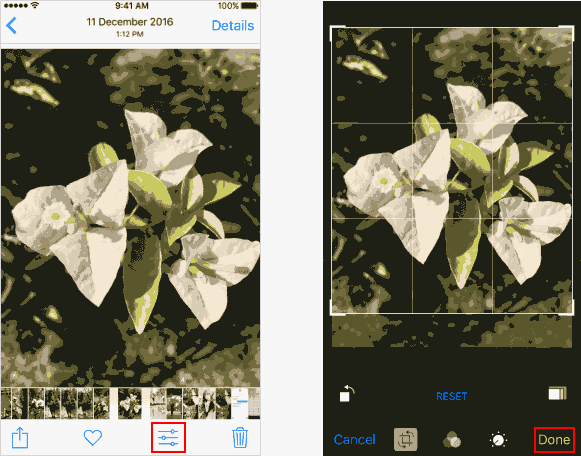
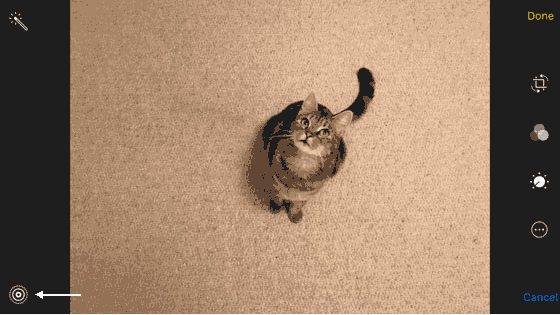
Step 1: Open a Live Photo, tap the Edit icon.
Step 2: The editing tools will appear, edit a Live Photo as the still image.
You can use these tools to crop and rotate, apply a filter, or make lighting and color adjustments.
Step 3: When you've finished editing your Live Photo, tap Done to save the changes.
Option 1: Revert Live Photo to original one
If you decide later that you want to remove the editing you applied, you can easily revert it back to the original Live Photo at any time.
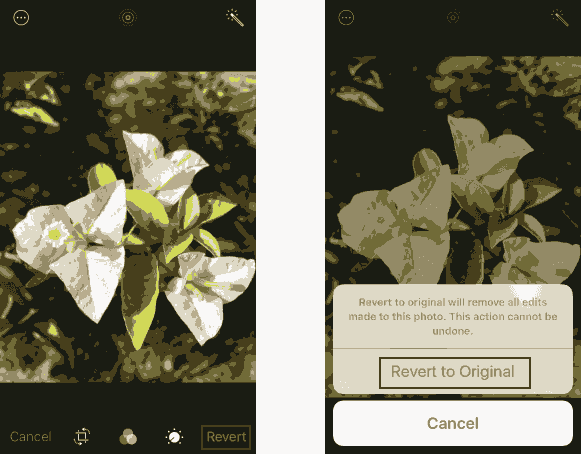
Option 2: Convert Live Photo to a still image
When you're viewing a Live Photo, tap the Edit icon, then tap the blue Live Photos icon to convert it to a still image. The icon will turn white to indicate that it's no longer a Live Photo. Tap Done to confirm.
You can revert back to the original Live Photo at any time in the same way.
After taking and editing Live Photo, you can send or share a meaningful time with your relatives and friends. You can share Live Photos to another iOS device using iMessage, AirDrop, or via iCloud Photo Library.
Step 1: Tap the Share icon at the bottom left of the screen.
If you want to share the still photo and not the Live Photo, tap Live in the upper-left corner.
Step 2: Select the sharing option that you want to use, e.g. iMessage, Airdrop.
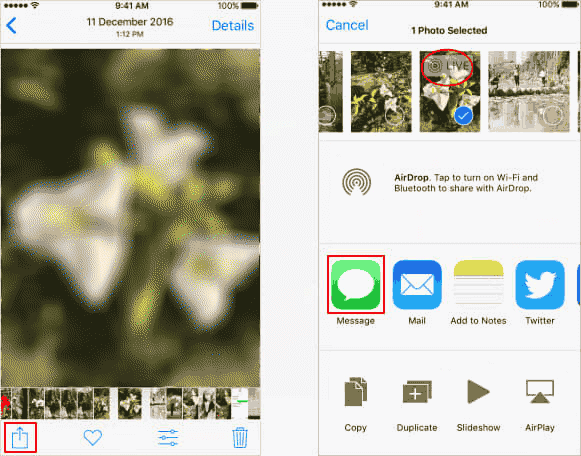
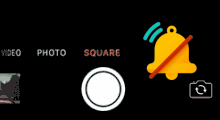
Live Photos are labeled LIVE so you can clearly identify them.
Facebook and Tumble already allow you to share Live Photos, and eventually, more social media platforms are likely to support Live Photos too.