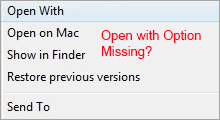
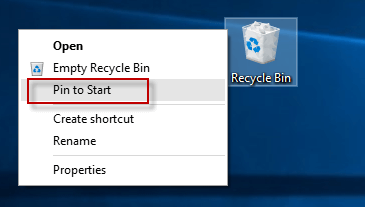
"I right clicked on an app shortcut icon wanting to pin it to Start menu but found the 'Pin to Start' option missing from the context menu. I tried to perform a right-click on an executable file or a folder, but the 'Pin to Start' option was still not appearing. Why is that and how can I resolve it?"
This is likely because the policy or registration value associated with the Start menu is changed. But don't worry. In this post, I will show you how to restore the missing "Pin to Start" option in Windows 10. Two methods are available.
Step 1: Open Local Group Policy Editor, by searching gpedit.msc in Start menu search box or in any way you would like.
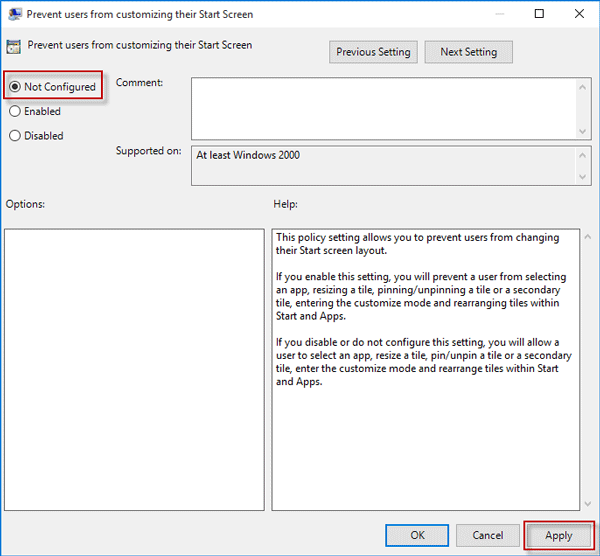
Step 2: In the Local Group Policy Editor, navigate to User Configuration -> Administrative Templates -> Start Menu and Taskbar. With Start Menu and Taskbar selected, look for the policy setting named "Prevent users from customizing their Start Screen" on the right-side pane, and then double-click this policy.
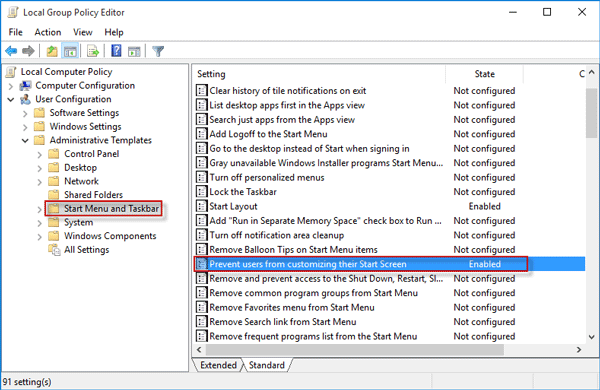
Step 3: Select Disabled or Not Configured, and click Apply followed by OK.
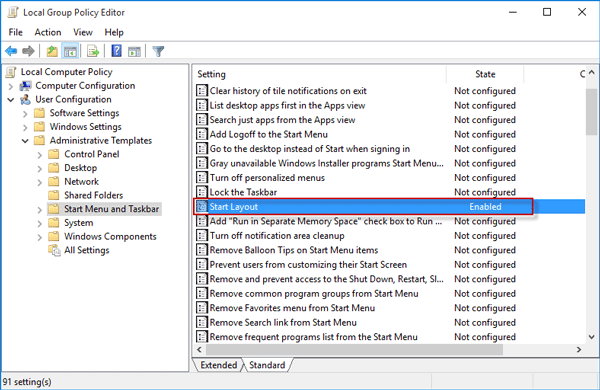
Step 4: Next, look for the policy setting named "Start Layout" on the right-side pane, and then double-click it.
Step 5: Select Disabled or Not Configured, and click Apply followed by OK.
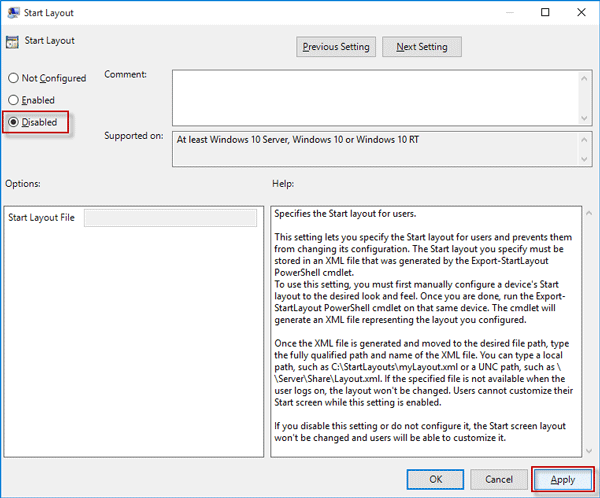
Step 6: That's it. Now close the Local Group Policy. Right-click on any app, shortcut icon, or folder to check if the missing "Pin to Start" option is restored back to the context menu.
If you use the Home edition of Windows 10, the Local Group Policy Editor may not be used. In this case, you will have to restore the missing "Pin to Start" option with Registry Editor. This might a bit more cumbersome. Follow the steps.
Step 1: Open Registry Editor in Windows 10, by searching regedit in Start menu search box, or any method you enjoy.
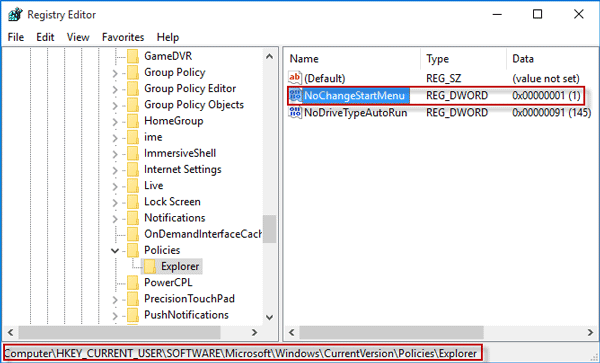
Step 2: In the Registry Editor, navigate to the key: HKEY_CURRENT_USER\SOFTWARE\Microsoft\Windows\CurrentVersion\Policies\Explorer. Under the Explorer key, look for the value named "NoChangeStartMenu" and delete it if found. If Windows 10 says you can't delete this value, restart Windows 10 and then try again.
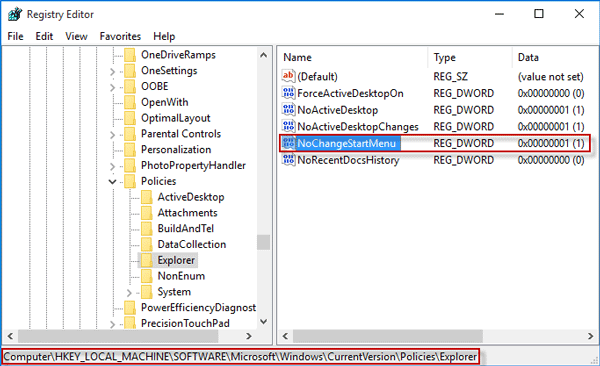
Step 3: Next, navigate to the key: HKEY_LOCAL_MACHINE\SOFTWARE\Microsoft\Windows\CurrentVersion\Policies\Explorer, and then delete the value named "NoChangeStartMenu", if it exists under the "Explorer" key.
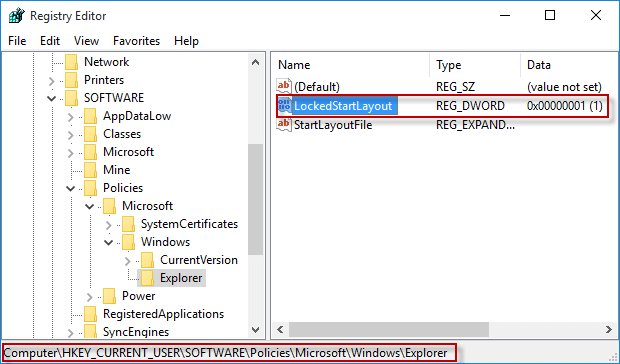
Step 4: Next, navigate to the key: HKEY_CURRENT_USER\SOFTWARE\Policies\Microsoft\Windows\Explorer, and then delete the value named "LockedStartLayout".
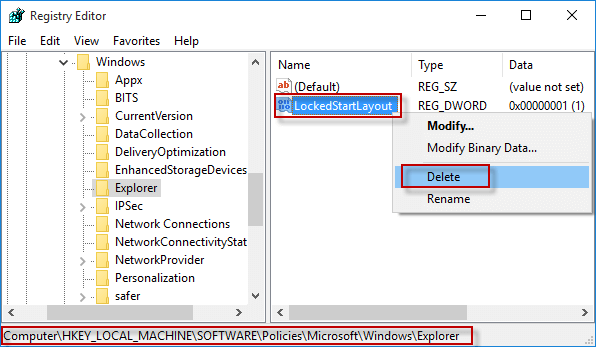
Step 5: Finally, navigate to the key: HKEY_LOCAL_MACHINE\SOFTWARE\Policies\Microsoft\Windows\Explorer, delete the value named "LockedStartLayout".
Step 6: Restart Windows 10 for the changes to take effect. When you are back to Windows 10, the missing "Pin to Start" option is restored back to the context menu.