
Windows 10 Creator Update introduces Storage sense, a new feature that automatically gets rid of the files you don't need to save you an extra step when low on disk space. This article will guide you on how to enable and configure Storage Sense on Windows 10 Creators Update to free up more storage space.
Storage sense is disabled by default, but once enabled, it'll proactively delete certain temporary files, such as those created by apps, and files that have been moved to the recycle bin for more than 30 days. Here's how:
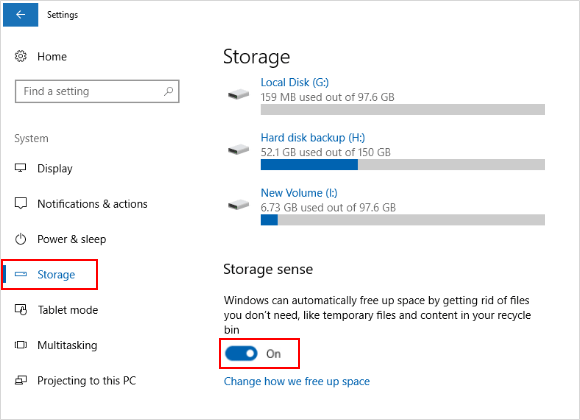
Step 1: Open Settings app.
Step 2: Click on System > Storage.
Step 3: On the right pane of Storage, turn on the Storage sense toggle switch.
To select which items Storage sense should remove automatically, here is how:
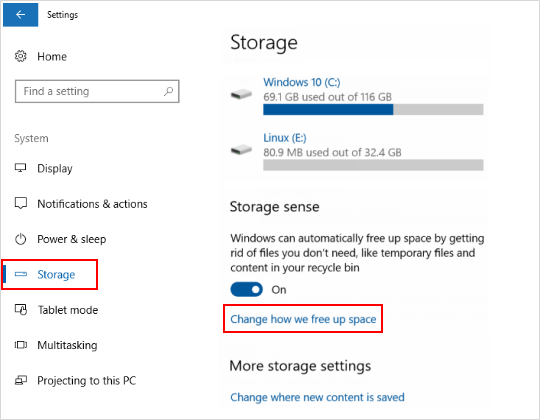
Step 1: Open Settings app. Click on System > Storage.
Step 2: On the right pane of Storage, click on Change how we free up space link.
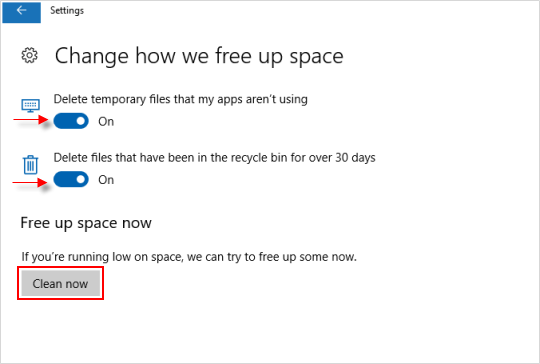
Step 3: Then you can select which items you want to delete from your computer:
Here you can also click the Clean now button to remove junk files if you're running low on space and wait for the process to complete.
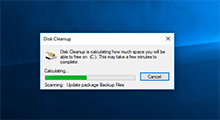
Currently, Storage sense is only supported for unused temporary files and items that have been in your recycle bin for 30 days. To remove other temporary items, such as a previous version of Windows 10 installation files and Windows Update logs, you need to use Disk Cleanup tool to delete manually.
 Remove Previous Windows Installation to Free up Storage Space
 5 Ways to Fix Not Enough Space to Update Windows 10
 6 Tips to Free Up Space on SSD in Windows 10
 2 Ways to Delete System Restore Point in Windows 10
 C Drive Is Full for No Reason in Windows 10 – 6 Ways to Fix It
 Fix: Disk Cleanup Not Working Properly in Windows 10