
If you want a user account on Windows 10 to be unavailable, you don't have to delete it, but just disable it. This way, whenever you need the user account back, you can re-enable it. You won't lose any data. Now, this article will show you how to enable or disable a user account in Windows 10.
Related: Enable or Disable Built-in Administrator Account in Windows 10
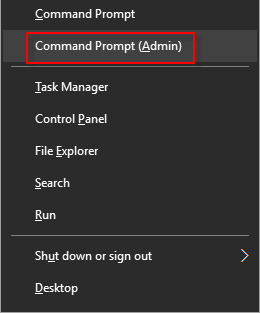
Step 1: Start Command Prompt as an administrator.
Press "Windows key + X" shortcut keys, then enter A key.
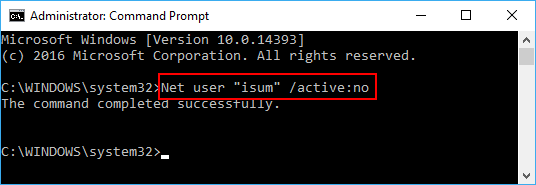
Step 2: Type the command below in the command prompt, press Enter.
To disable a user account: Net user "User Name" /active:no
Tips: "User name" is the actual user name (ex: isum) of the account you want to disable or enable.
Step 3: When finished, you can close the Command Prompt window.
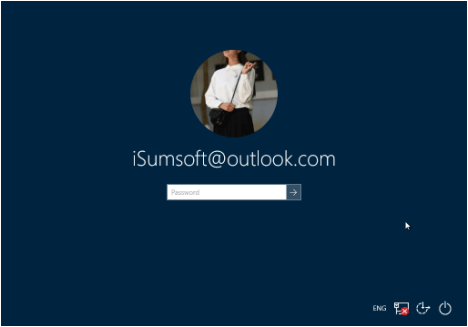
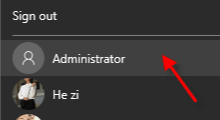
When a user account is disabled, its name will be removed from the sign-in screen and Start menu switch user areas so that it can no longer be signed in to.
To re-enable a user account: Net user "User Name" /active:yes

You can easily enable or disable a user account in Local Users and Groups.
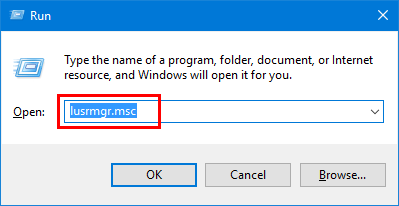
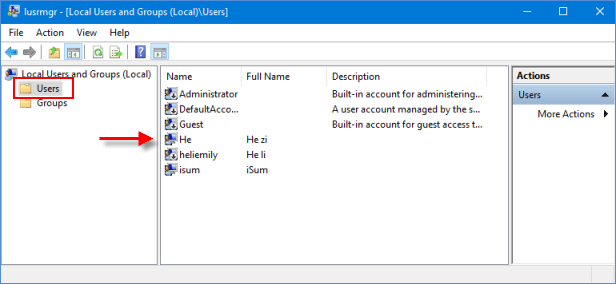
Step 1: Open the Local Users and Groups.
Press the Windows key + R keys to open the Run dialog, type lusrmgr.msc.
Step 2: Click on Users in the left pane, and double-click on the Name of the user account you want.
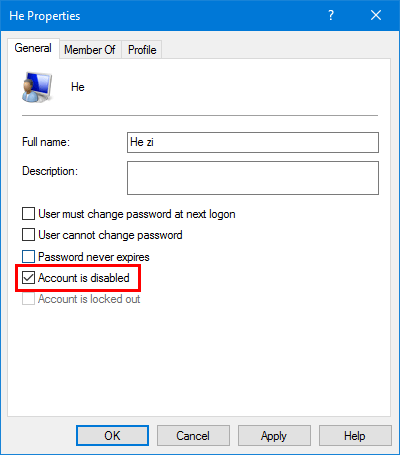
Step 3: In the opening Properties window, you can see the Account is disabled box is unchecked by default. To disable user account, check on that box.
When finished, you can close the Local Users and Groups.
With this option, the account's details will be easily shown or hidden from the sign-in screen.
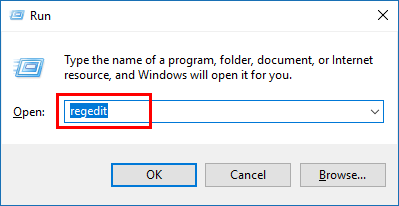
Step 1: Open the Registry Editor.
Press Win + R keys to bring out the Run dialog box. Then type regedit, then press Enter.
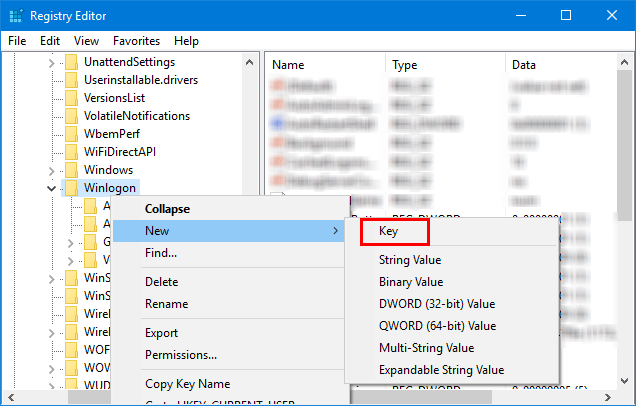
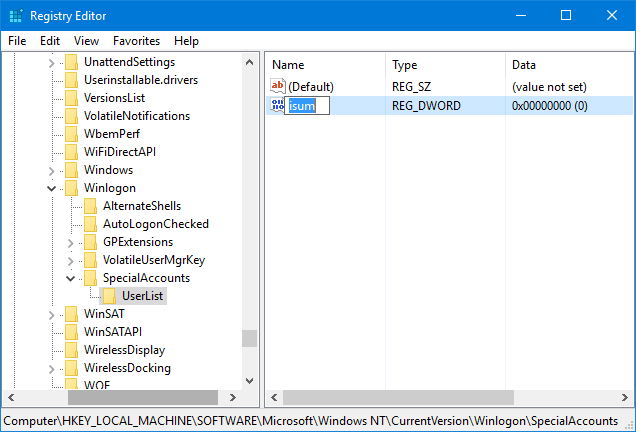
Step 2: When the Registry Editor opens, head to the following path: HKEY_LOCAL_MACHINE\SOFTWARE\Microsoft\Windows NT\CurrentVersion\Winlogon
Right-click the Winlogon folder, then click New > Key. Name this new key as SpecialAccounts.
Step 3: Right-click the SpecialAccounts folder, then click New > Key. Name this new key as UserList. On the right pane of UserList, select New > DWORD (32-bit) Value. Name it with the user account that you want to hide on Windows 10 sign-in screen.
Tips: If you ever want to reverse this change and Unhide user account on the sign-in screen, navigate back to the UserList key, right-click on the name of the user account you want to unhide and click on Delete.
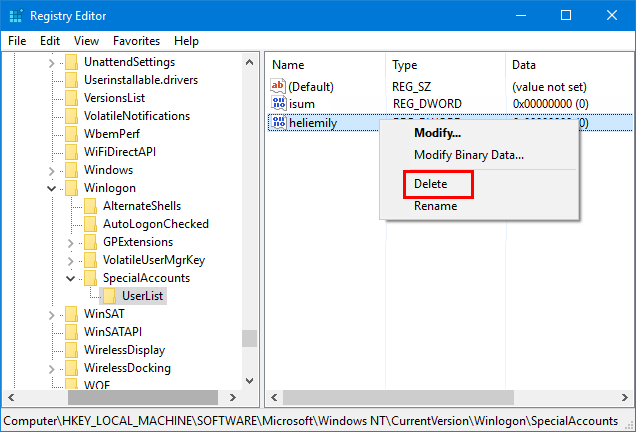
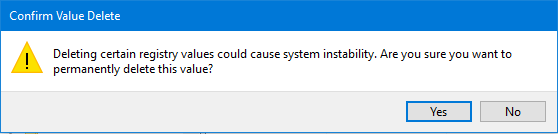
Click on Yes to confirm. Restart your computer to make the changes take effect.
 How to Enable or Disable Built-in Administrator Account in Windows 10
 2 Ways to Disable User Account Control in Windows 10
 4 Ways to Enable/Disable Guest Account in Windows 10
 How to Add, Delete, and Modify User Accounts on Windows 10
 Accidentally Deleted Windows 10 Admin Account, How to Recover It
 How to Change User Account Name of Windows 10 in Sign-in Screen