
Windows Hello, as a part of Windows 10, is a new way to sign in to your devices, apps, online services, and networks. It allows you to sign in to Surface Book/ Surface Pro 4 without having to touch the screen or typing with keyboard. It sounds amazing, right? Just read on. This tutorial will show you how to set up Windows Hello on Surface Book/Surface Pro 4.
Windows Hello is also built into the Surface Pro 4 and the Surface Book, and most PCs with fingerprint readers already work with Windows Hello. If your Windows 10 device has compatible hardware, you can set it up with ease.
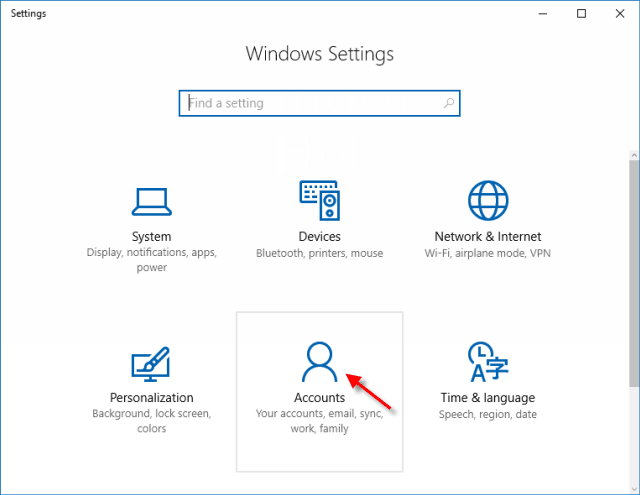
Step 1: Go to Start menu, select Settings > Account.
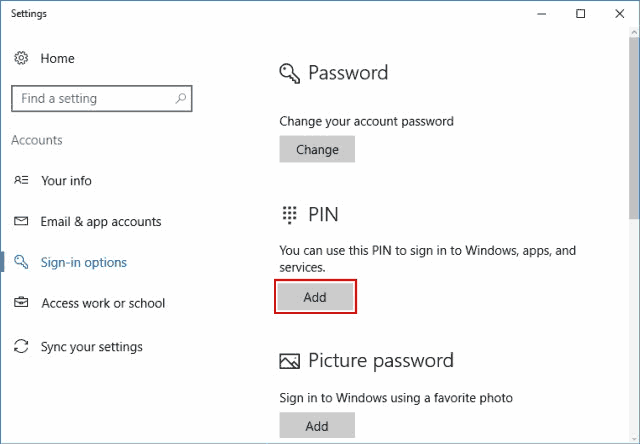
Step 2: Click Sign-in option. If you haven't set up a PIN, you'll have to create a PIN by clicking Add under PIN. Then follow the instructions to add a PIN.
Step 3: Under Windows Hello, you can select either Fingerprint or Face. Click the Add button to add a fingerprint or the Set Up button to set up facial recognition.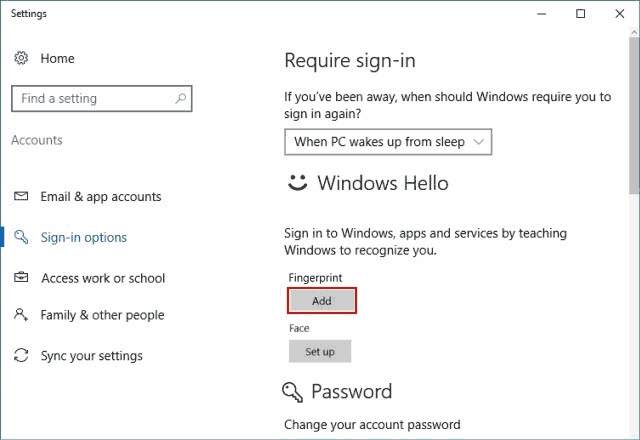
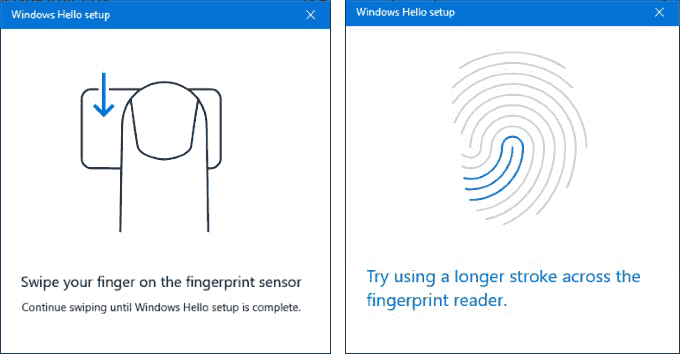
Step 4: Windows will guide you to set up fingerprint or face recognition. Follow the on-screen instructions.
Now, sign in to your Surface using Windows Hello. From the lock screen, place your face on the camera, or scan your finger on the fingerprint reader. After it recognizes your face or fingerprint, it will sign in automatically.