To take screenshots on the computer, we usually use Windows built-in Snipping Tool or a third-party screen-capture tool like SnagIt. However, if you want to put an image that is captured from the computer's screen into an Office document like Word, Excel, or PowerPoint, it should be much easier to use Office built-in screenshot function. The picture that captured in Office can be automatically inserted to the Office document, which will save you from copying and pasting one screenshot from other locations into the document. Now, this post will show you how to take a screenshot in Word, Excel, and PowerPoint 2016.
Step 1: Open an Office 2016 document, such as a Word document.
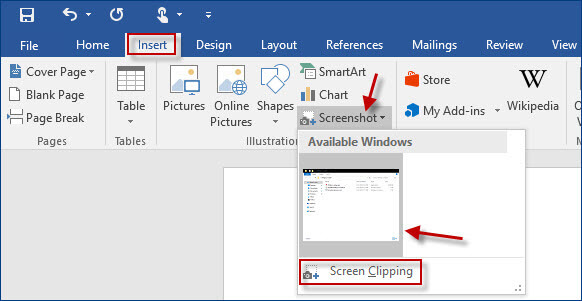
Step 2: Select the Insert tab on the ribbon, then click the Screenshot button. Then you will see two options, Available Windows and Screen Clipping.

Under the Available Windows section, it shows thumbnail previews of opened windows on your desktop. If you want to get a screenshot of the available window, just select its thumbnail. Then its screenshot will be displayed in the Word Document.
If you want to manually take a screenshot from the screen, click the Screen Clipping button and then continue with the next steps.
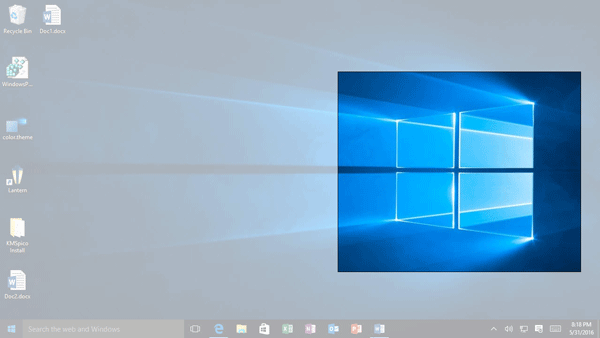
Step 3: After the Screen Clipping button is clicked, the Word screen temporarily exists, and a transparent haze covers the whole screen. Navigate to the area where you want to take a screenshot, then press and hold the left mouse button to select and highlight the area. In my example, I select the Windows logo on Windows 10 desktop.

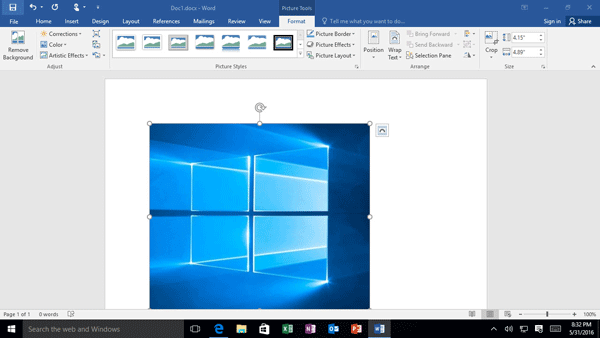
Step 4: Release the left mouse button. The selected area on the screen can be captured and displayed in the Word document. Also, the Picture Tools is opened. You can edit the screenshot as your desire.

If you want to save the screenshot, right-click on it and select Save as Picture from the menu. Then give it a name, select one image format (*.png, *.jpg, etc.), and select one location to save the screenshot as a picture.
Similarly, you can take screenshots in Excel and PowerPoint 2016 app using the screenshot feature under the Insert tab.