
While reading/editing document in Microsoft Word/Excel, occasionally you may encounter sudden power failure, application crash, or computer crash so that the Word/Excel document is forced to close before you can save the data. In such a case, you can turn on the Autosave feature in Microsoft Word/Excel to automatically save documents being edited at a certain time interval to minimize/prevent data loss if the application is unexpectedly closed. Now, this post will describe how to turn on and set Autosave in Word/Excel 2016.
How to turn on and set Autosave in Microsoft Word/Excel 2016
Both in Word and in Excel, the steps are the same. Below I will use Microsoft Word 2016 as an example.
Step 1: Open your Word document with Microsoft Word 2016.
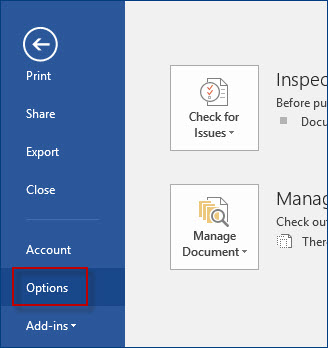
Step 2: Click the File tab on the menu bar, and then in the Backstage click Options.
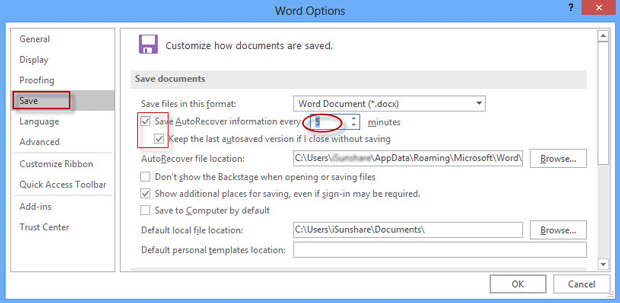
Step 3: After the Word Options window opens, select the Save tab on the left-side pane, and then locate the ”Save documents” section on the right-side pane. Tick the ”Save AutoRecover information every” box and set how often it automatically saves the Word document, 3 minutes, 5 minutes, or other value depending on your own desire. Moreover, tick the ”Keep the last autosaved version if I close without saving” box.
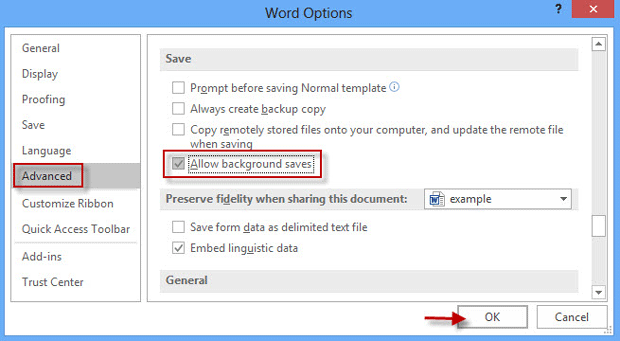
Step 4: Click the Advanced tab on the left-side pane, and then locate the Save section on the right-side pane. Make sure the ‘Allow background saves’ box ticked, and finally click OK to save the changes.
So you turn on and set Autosave in Word 2016, and the feature takes effect in all Word documents. If you need to turn on and set Autosave in Excel/PowerPoint 2016, similarly open the Excel/PowerPoint Options window to perform similar actions.

