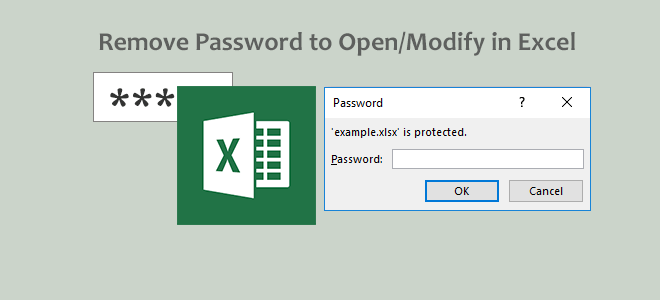
If an Excel file is protected by a “Password to Open” or/and “Password to Modify” but you don’t know (or remember) the password(s), you won’t be able to open or/and modify the Excel workbook. In this case, you would want to remove the Password to Open/Modify in the Excel file. Now, this post will show you how to achieve that.
- Part 1: How to remove “Password to Open” in Excel file
- Part 2: How to remove “Password to Modify” in Excel file
Part 1: How to remove “Password to Open” in Excel file
Generally, an Excel 2010-2016 workbook is saved as XLSX format by default, but sometimes it would be saved as XLS format, out of necessity. Therefore, how to remove a “Password to Open” in an Excel file depends on the Excel file format.
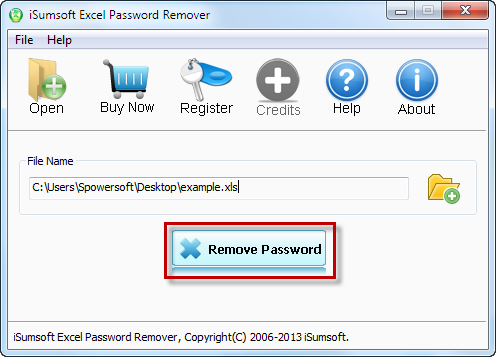
1) If the Excel file is in XLS format, try to use the “iSumsoft Excel Password Remover” tool to instantly remove the “Password to Open” online.
2) If the Excel file is in XLSX format, you have to first find the “Password to Open”, and then remove it. Steps are as follows.
Step 1: Use Excel Password Refixer to find the “Password to Open” in the Excel file.
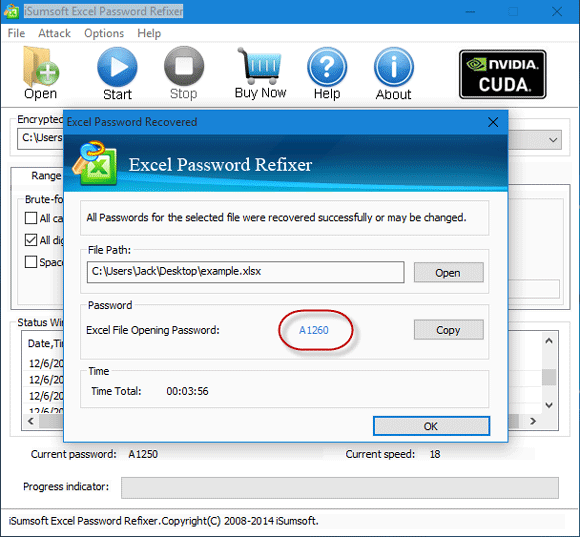
Step 2: Open the Excel file with the password that is just found.
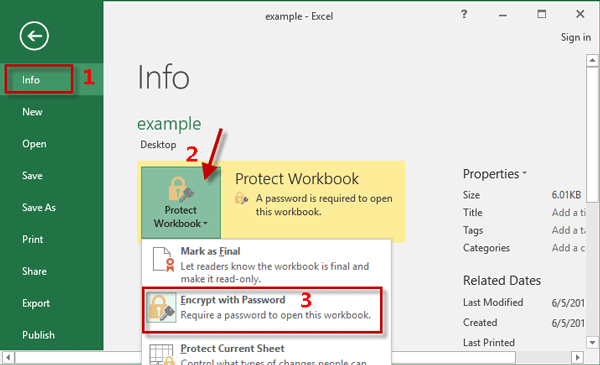
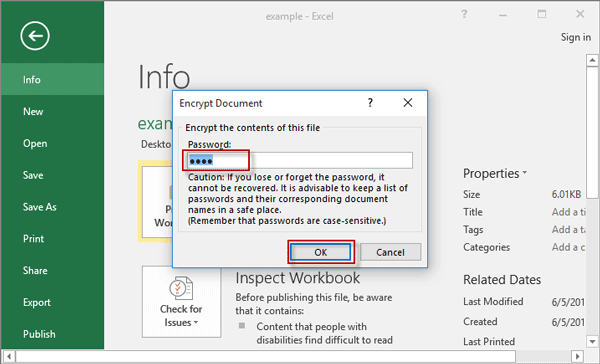
Step 3: Click the File tab to bring up the backstage view. Select Info, click “Protect Workbook”, and click “Encrypt with Password”.
Step 4: After the “Encrypt Document” dialog opens, delete the password in the field under “Password”, and click OK to confirm that.
Step 5: Click Ctrl + S to save the changes to the Excel file, so that the “Password to Open” is removed. Next time you can open the Excel file without a password.
Part 2: How to remove “Password to Modify” in Excel file
You can easily remove the “Password to Modify” in an Excel file without using any third-party software. Steps are as follows.
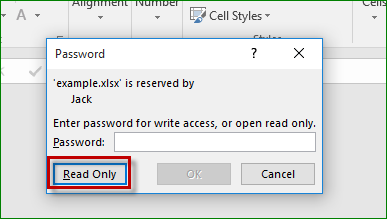
Step 1: Double click on the Excel file to open it. When a “Password” dialog pops up, leave the Password field blank, and click the “Read Only” button.
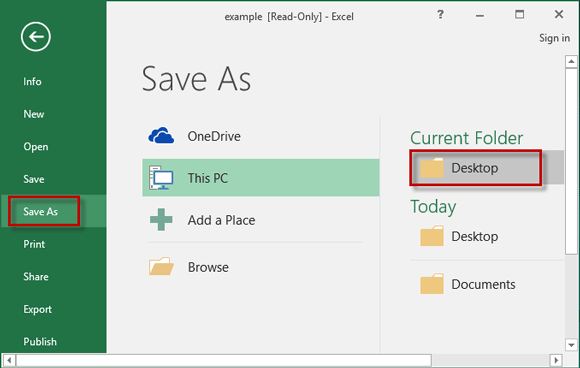
Step 2: After the Excel file is open as read-only, click the File tab, click Save As, and then choose one location such as Desktop to save the Excel file.
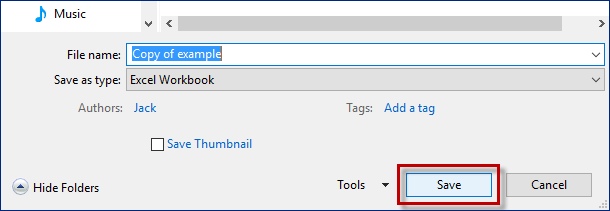
Step 3: After the “Save As” dialog opens, type a new name for the copy of the Excel file, or use its default name “Copy of ***”, and then click Save.
Step 4: The original Excel file is now saved as a new Excel file with no “Password to Modify”, so you can modify it without limitations. You can delete the original Excel file if you want to.

